
Automating PostgreSQL backups to Amazon S3 provides a reliable, scalable solution for data protection. S3’s durability and versioning capabilities make it ideal for storing critical database backups offsite.
In this article, you will learn how to setup a secure and automated backup process of your PostgreSQL database to an Amazon S3 bucket. To automate the backup process, we will use the built CloudRay’s schedule which simplifies running recurring backup script task without manual interventions.
This guide assumes you already have a PostgreSQL server up and running. If not, you can follow the setup guide on Setting Up a PostgreSQL Database
Contents
- Creating Amazon S3 Bucket
- Creating an IAM User
- Manual Backup of PostgreSQL Database to S3
- Automate and Schdule PostgreSQL Backups to Amazon S3 Using CloudRay
- Wrapping Up
- Related Guides
Creating Amazon S3 Bucket
First, you create the S3 bucket that will store the PostgreSQL backup files.
-
In the AWS Console, Navigate to the Amazon s3 service
-
Click on Create Bucket. You will see a general configurations
-
Provide a Provide a globally unique bucket name, such as “cloudray-postgres-backups”
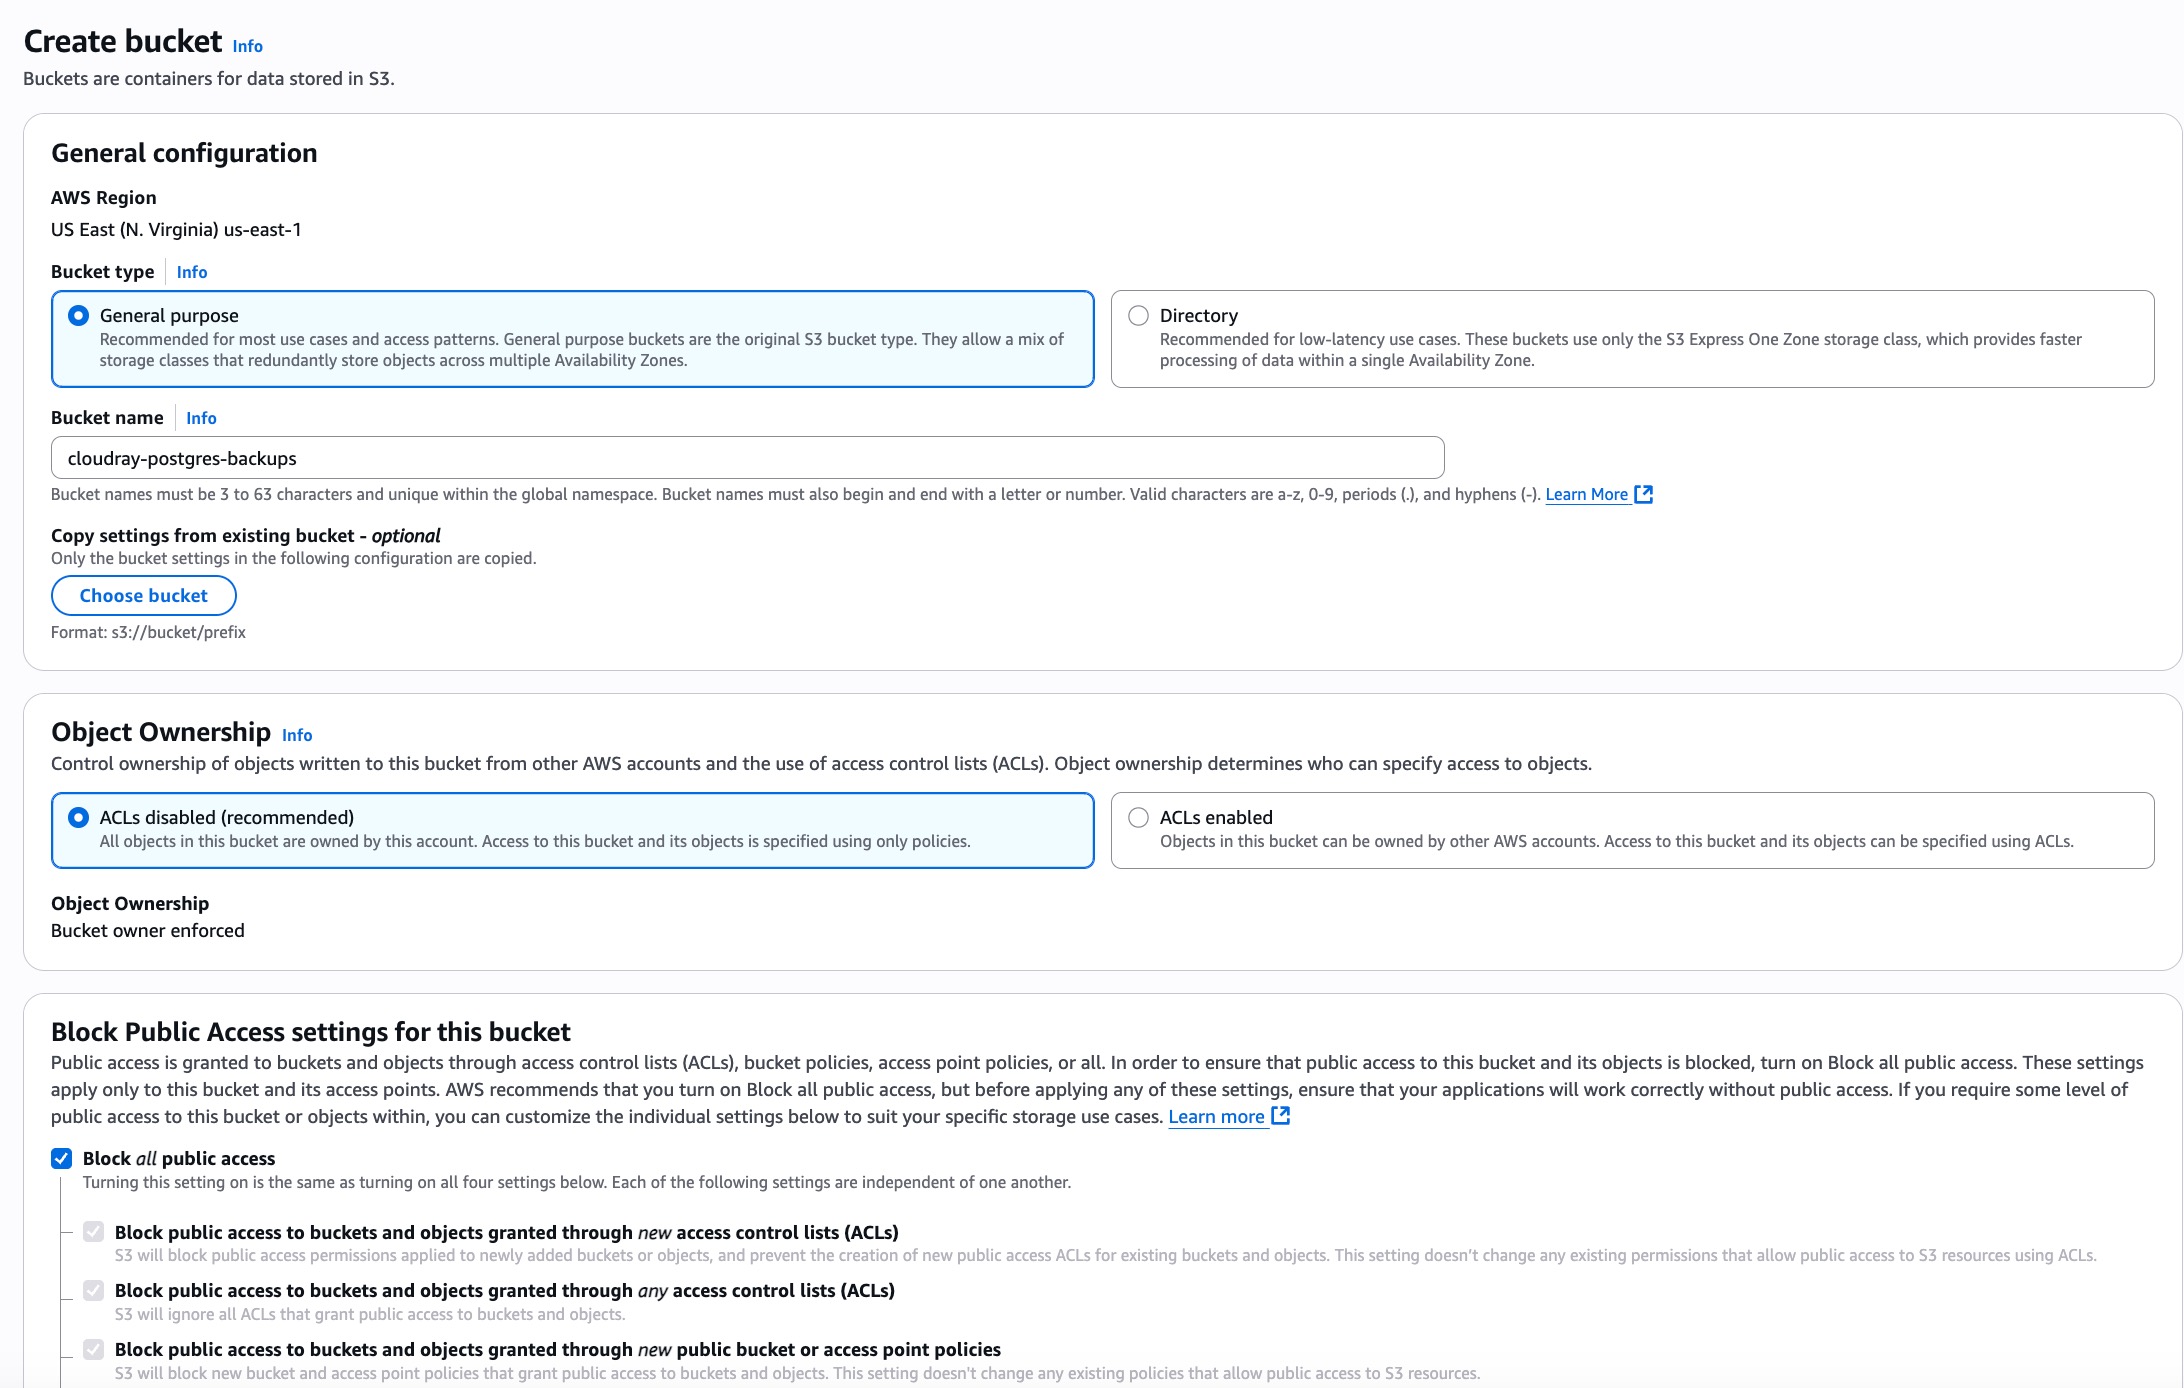
- Leave other options at their default values or customise as needed (e.g., enabling versioning or setting up encryption)
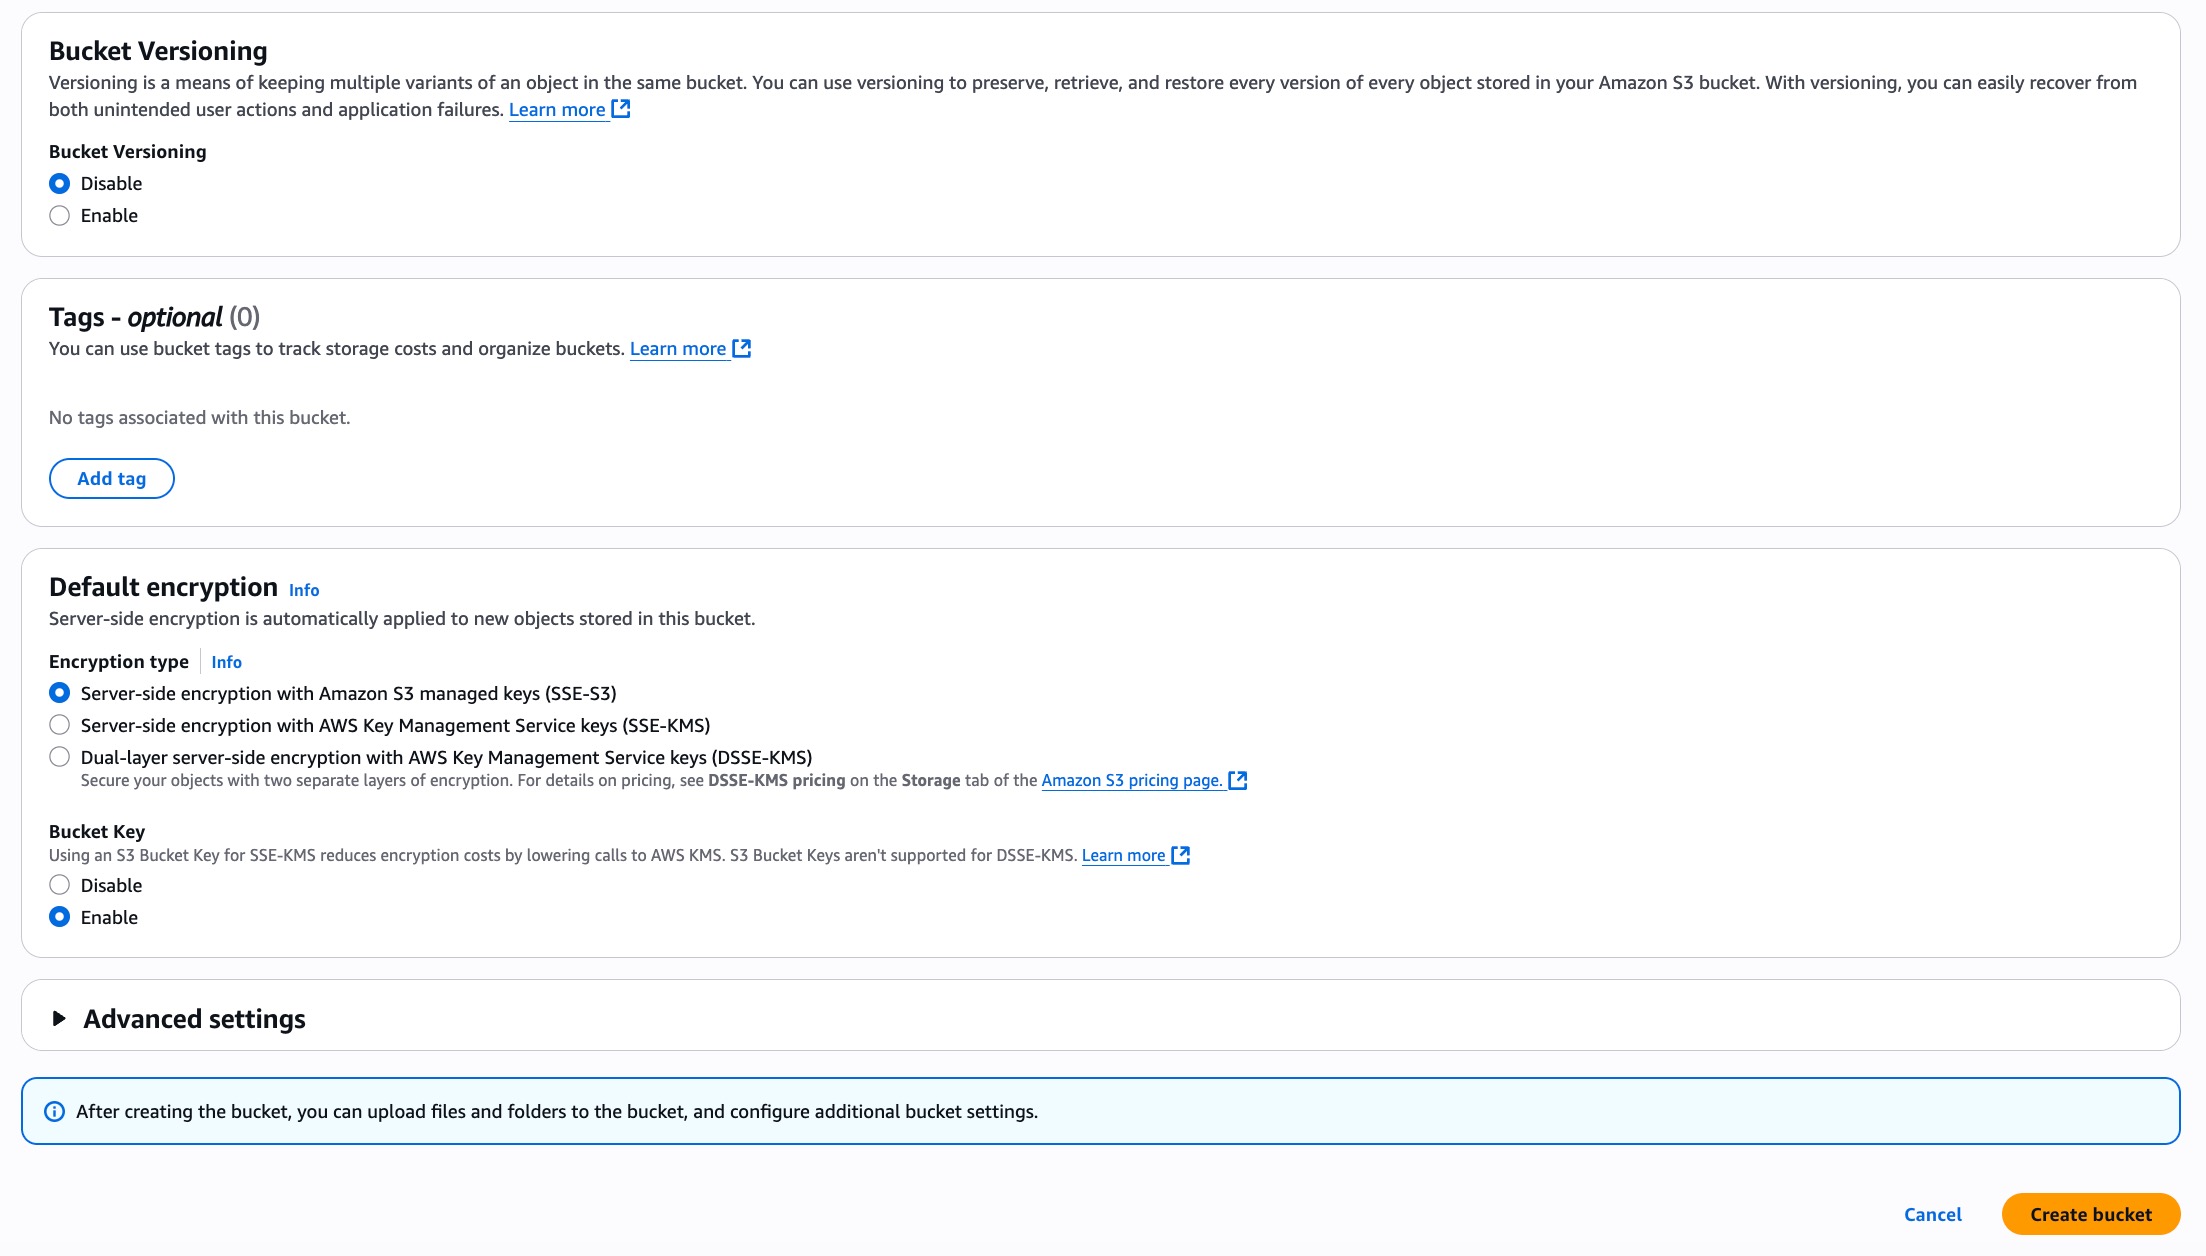
- Click Create bucket
This bucket will serve as the storage location for your PostgreSQL backups. You will reference the created bucket name when assigning permissions to the IAM user.
Creating an IAM User
To securely upload backups to S3, it’s best practice to create a dedicated user with minimal, scoped-down permissions. First, you begin by creating an IAM group and attach an inline policy that grants access to a specific S3 bucket. Then, you create a user and assign it to that group.
Here are the steps to getting it done:
-
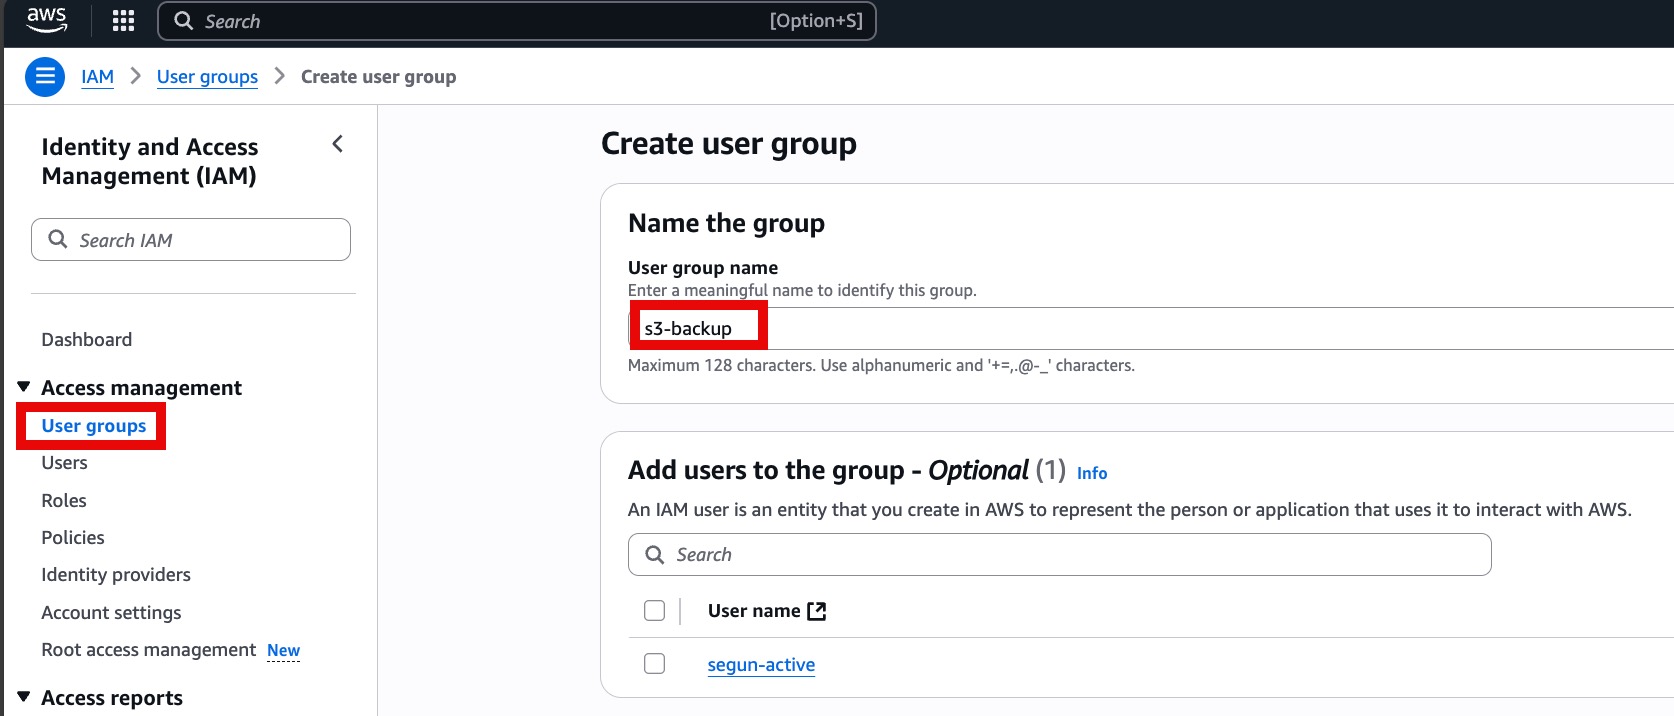
Navigate to the IAM section of the AWS Management Console
-
Click on User groups → Create group. Name the group (for example, “s3-backup”). Skip attaching policies for now, and proceed to the next step
- Once the group is created, open it and go to the Permissions tab.
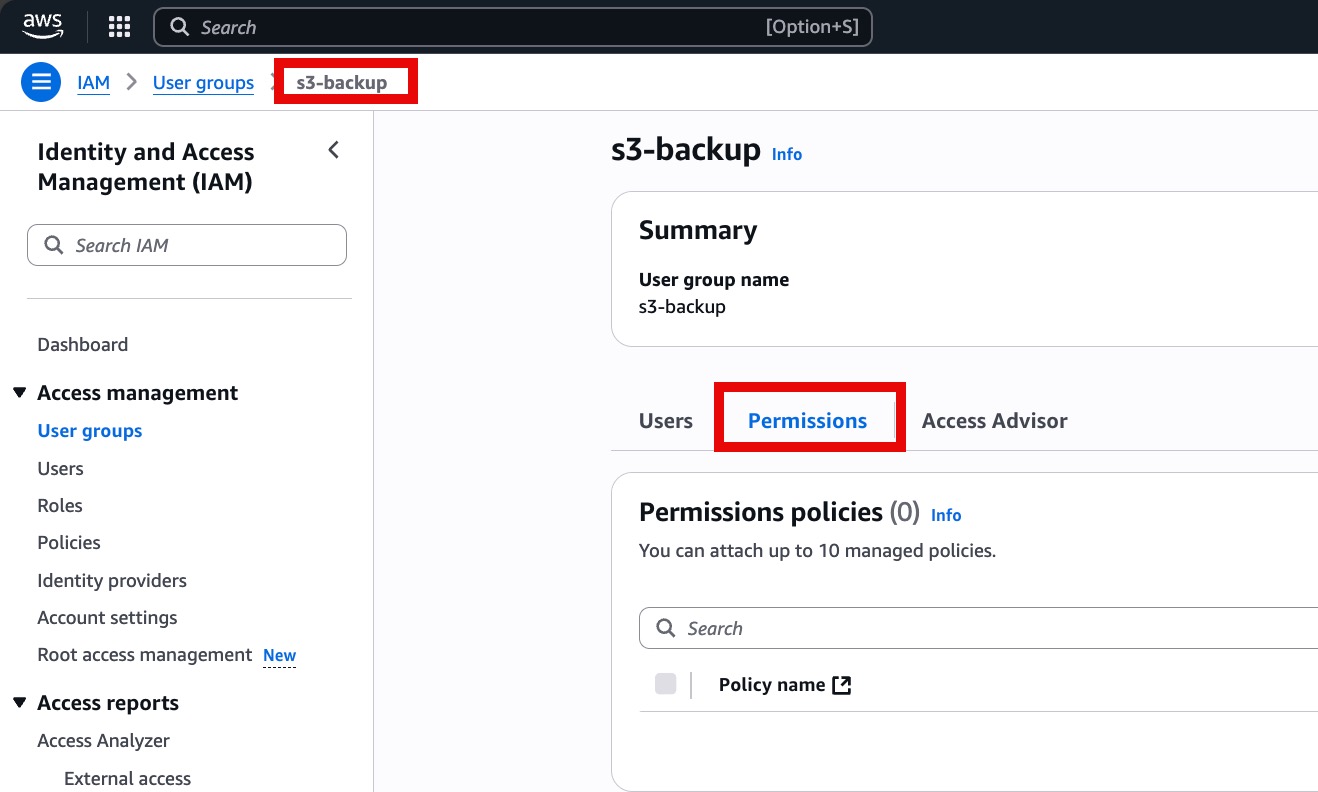
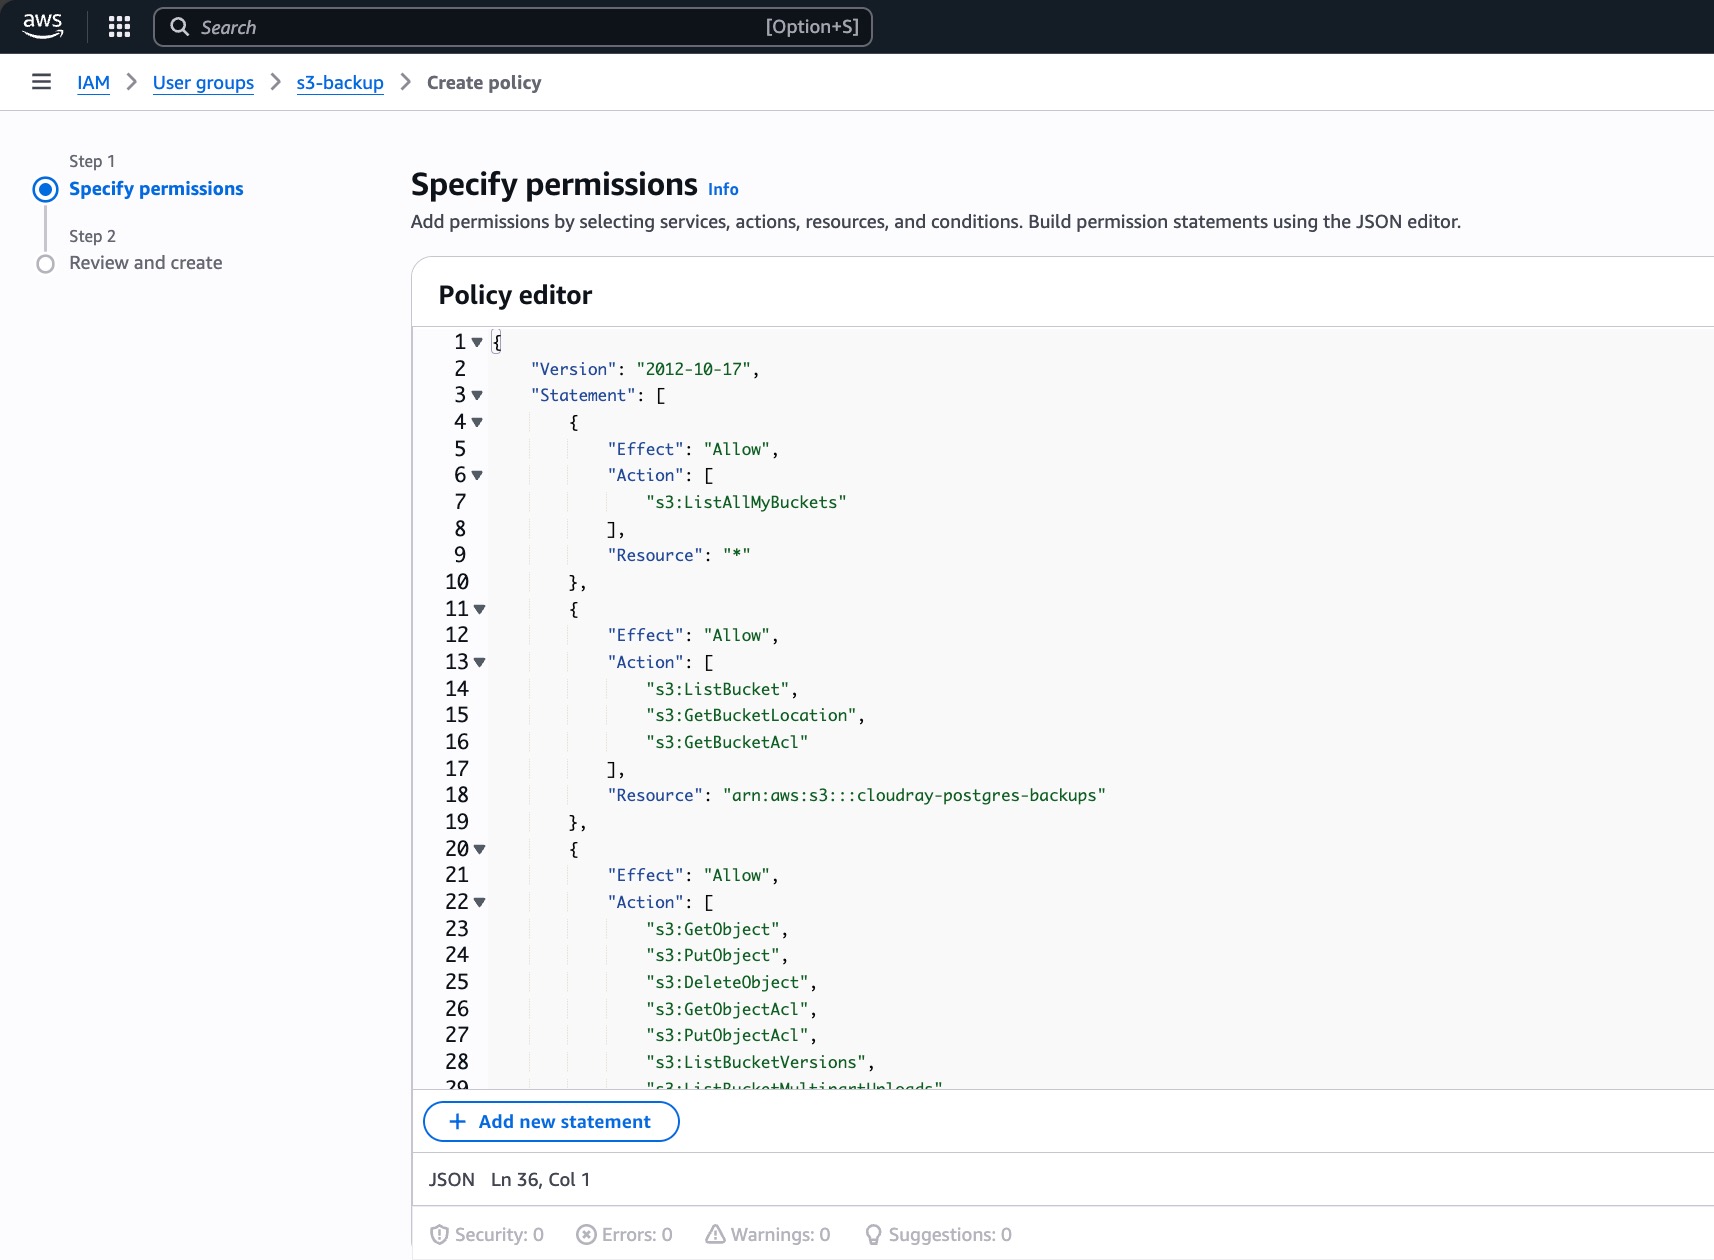
- Click Add permissions → Create inline policy

- Choose the JSON tab and paste the following policy, replacing
your-bucket-namewith the actual bucket name created earlier:
{
    "Version": "2012-10-17",
    "Statement": [
        {
            "Effect": "Allow",
            "Action": [
                "s3:ListAllMyBuckets"
            ],
            "Resource": "*"
        },
        {
            "Effect": "Allow",
            "Action": [
                "s3:ListBucket",
                "s3:GetBucketLocation",
                "s3:GetBucketAcl"
            ],
            "Resource": "arn:aws:s3:::your-bucket-name"
        },
        {
            "Effect": "Allow",
            "Action": [
                "s3:GetObject",
                "s3:PutObject",
                "s3:DeleteObject",
                "s3:GetObjectAcl",
                "s3:PutObjectAcl",
                "s3:ListBucketVersions",
                "s3:ListBucketMultipartUploads",
                "s3:AbortMultipartUpload",
                "s3:ListMultipartUploadParts"
            ],
            "Resource": "arn:aws:s3:::your-bucket-name/*"
        }
    ]
}
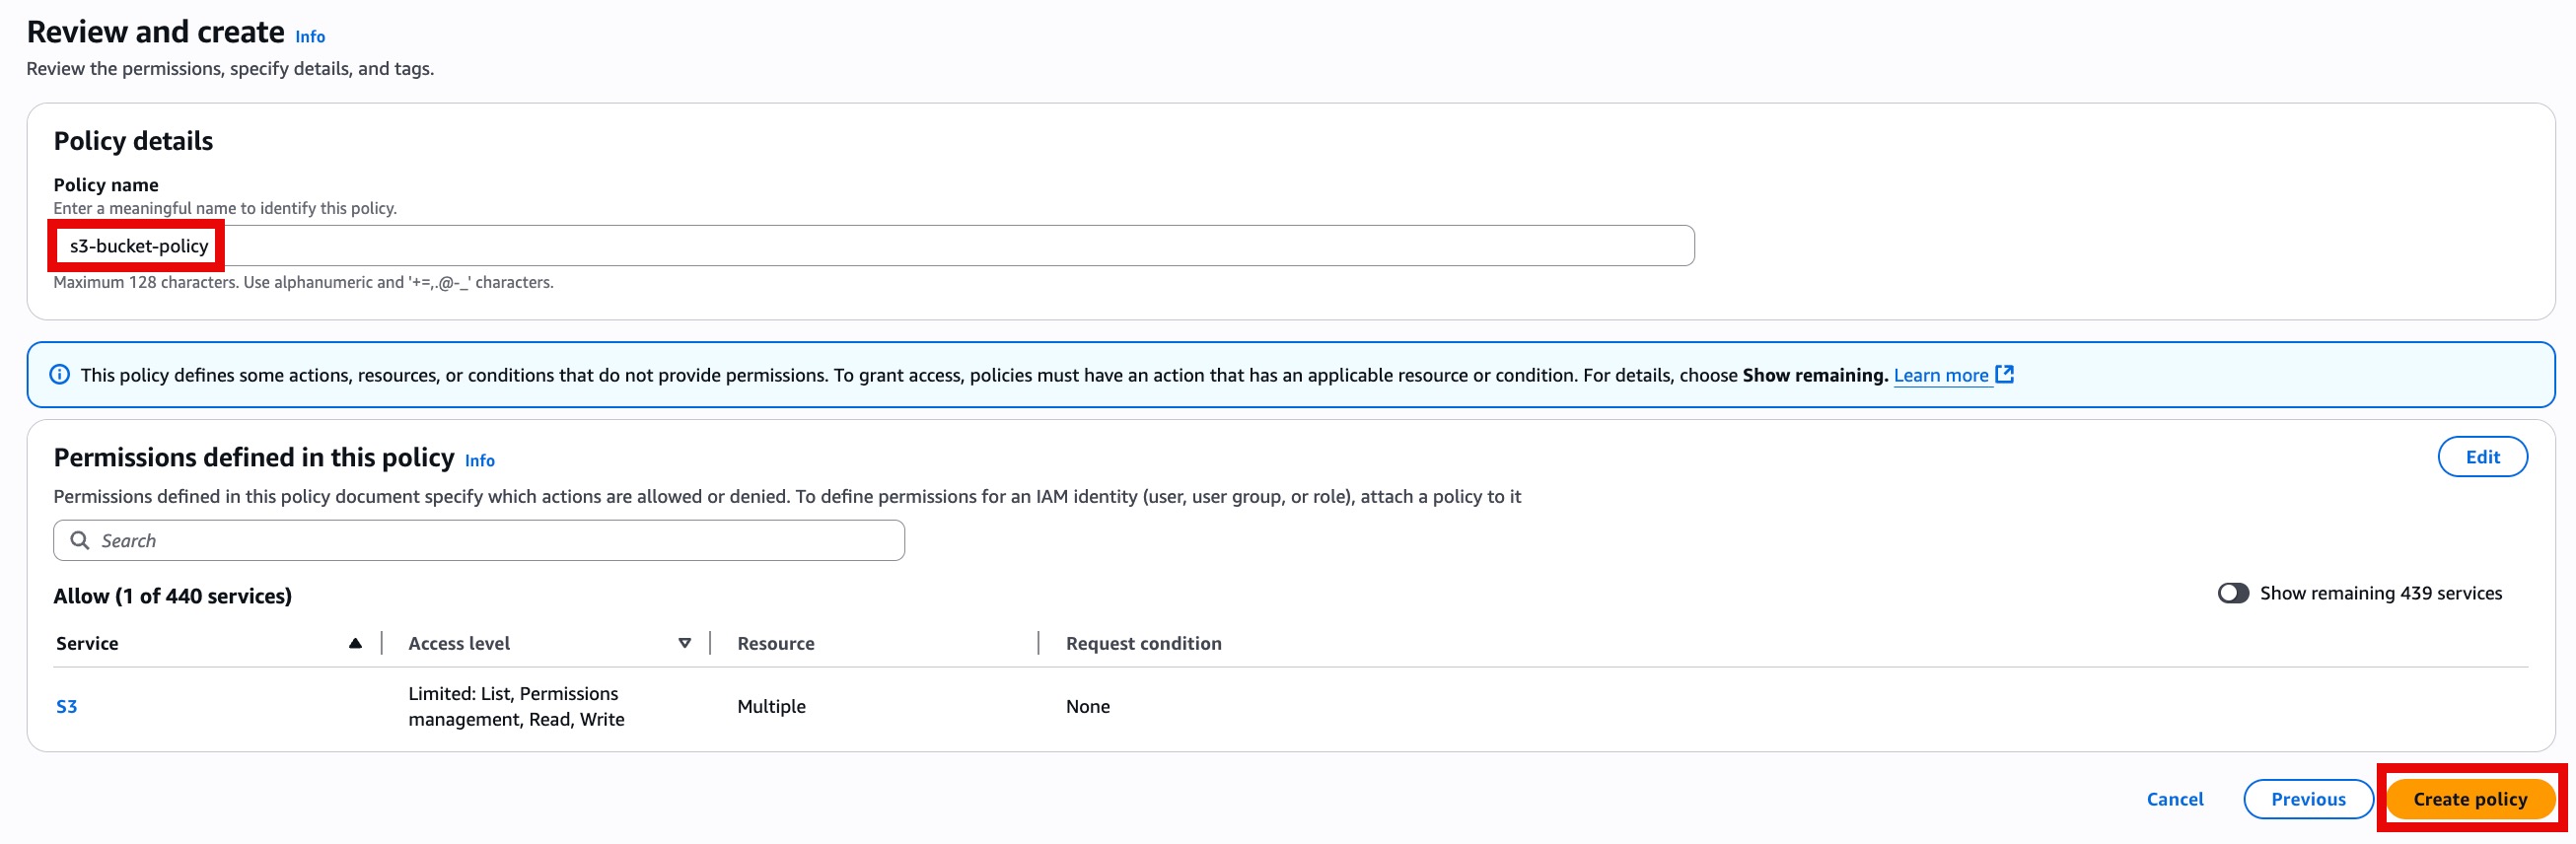
- Give your policy a name (for example s3-backup-policy) and save the policy
-
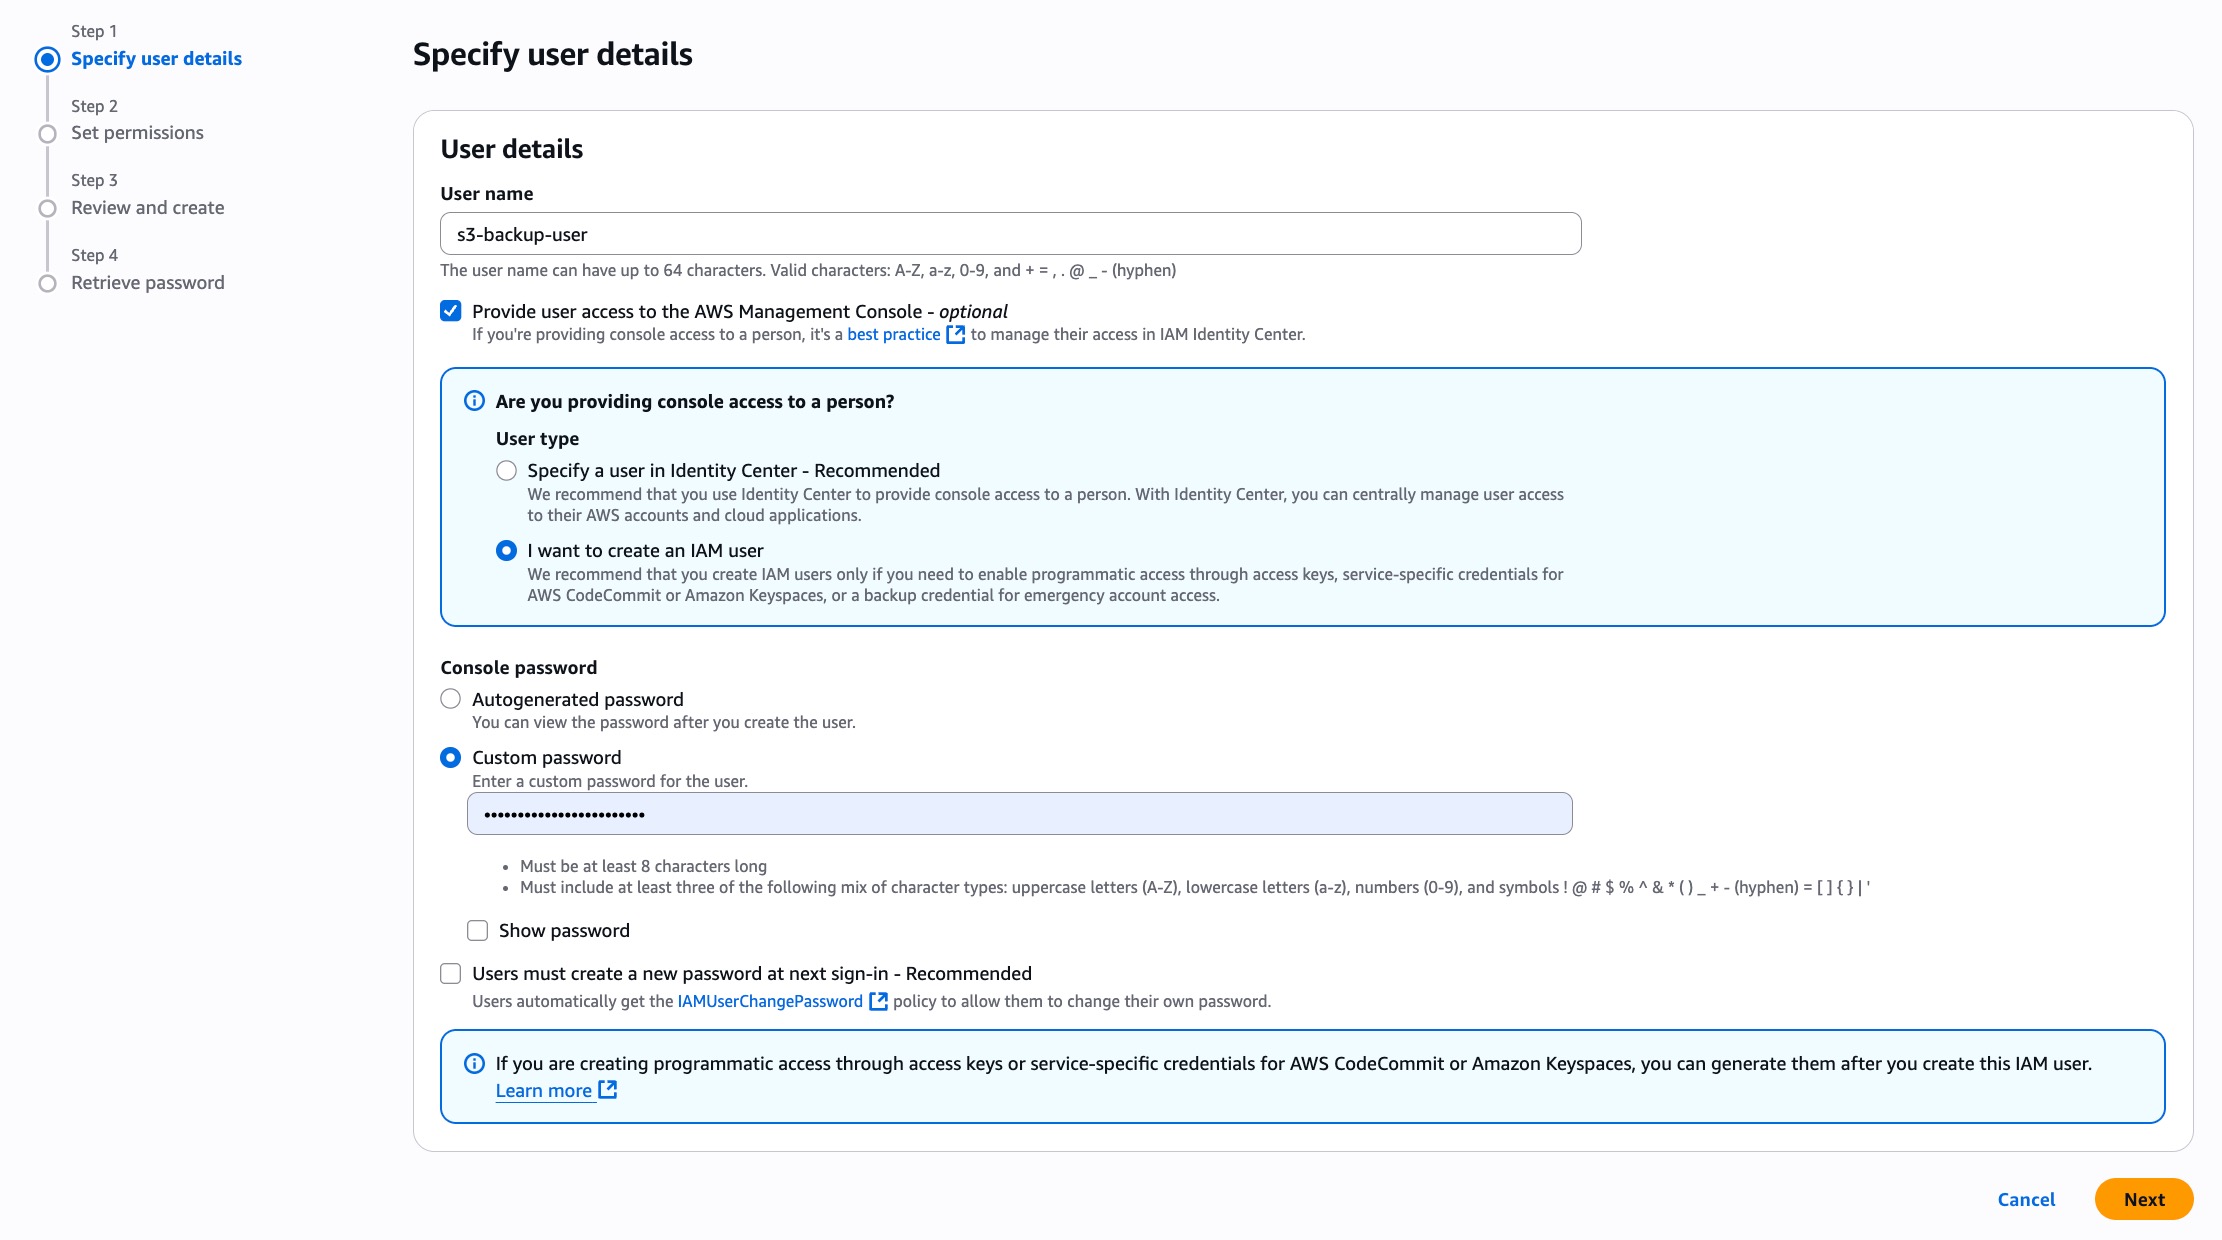
Navigate to Users → Create users
-
Set the username to backup-s3-user. Toogle on the Provide user access to the AWS Management Console - optional. Then, create a new password for the created user. Click on Next
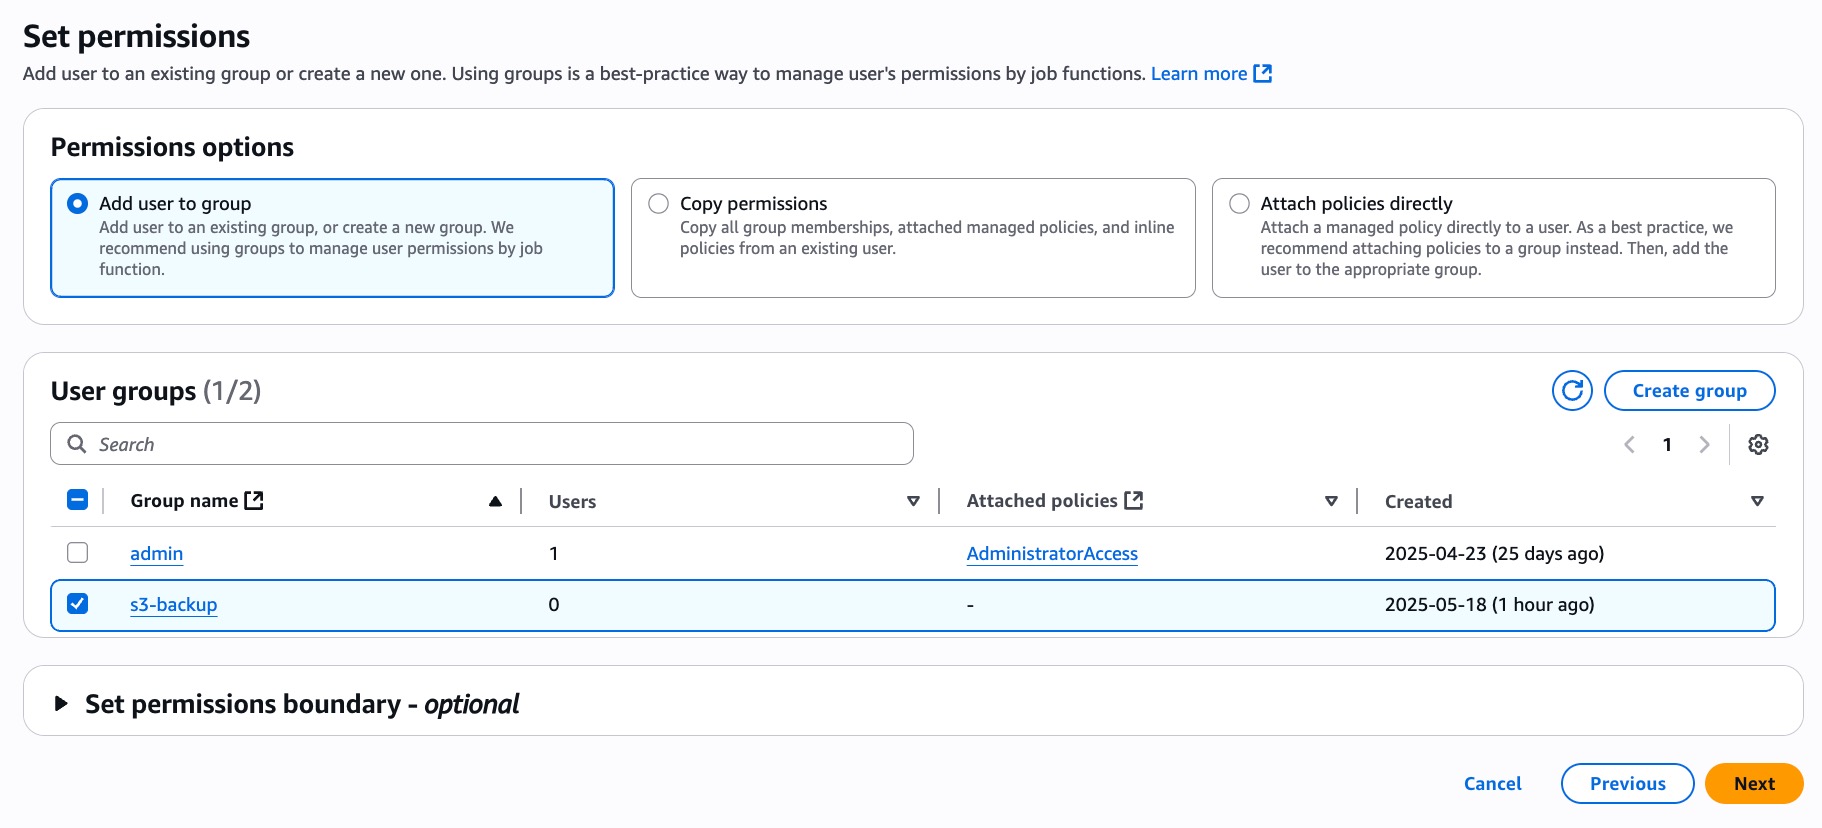
- On the permissions screen, give the user permission by selecting the group (s3-backup) in which the user would be added to
-
Review and create the user
-
Once these are done, you need the Access key and Secret key for programmatic access to AWS resources. To get this keys, go back to users, then click on the user created earlier. Click on Create access Key.
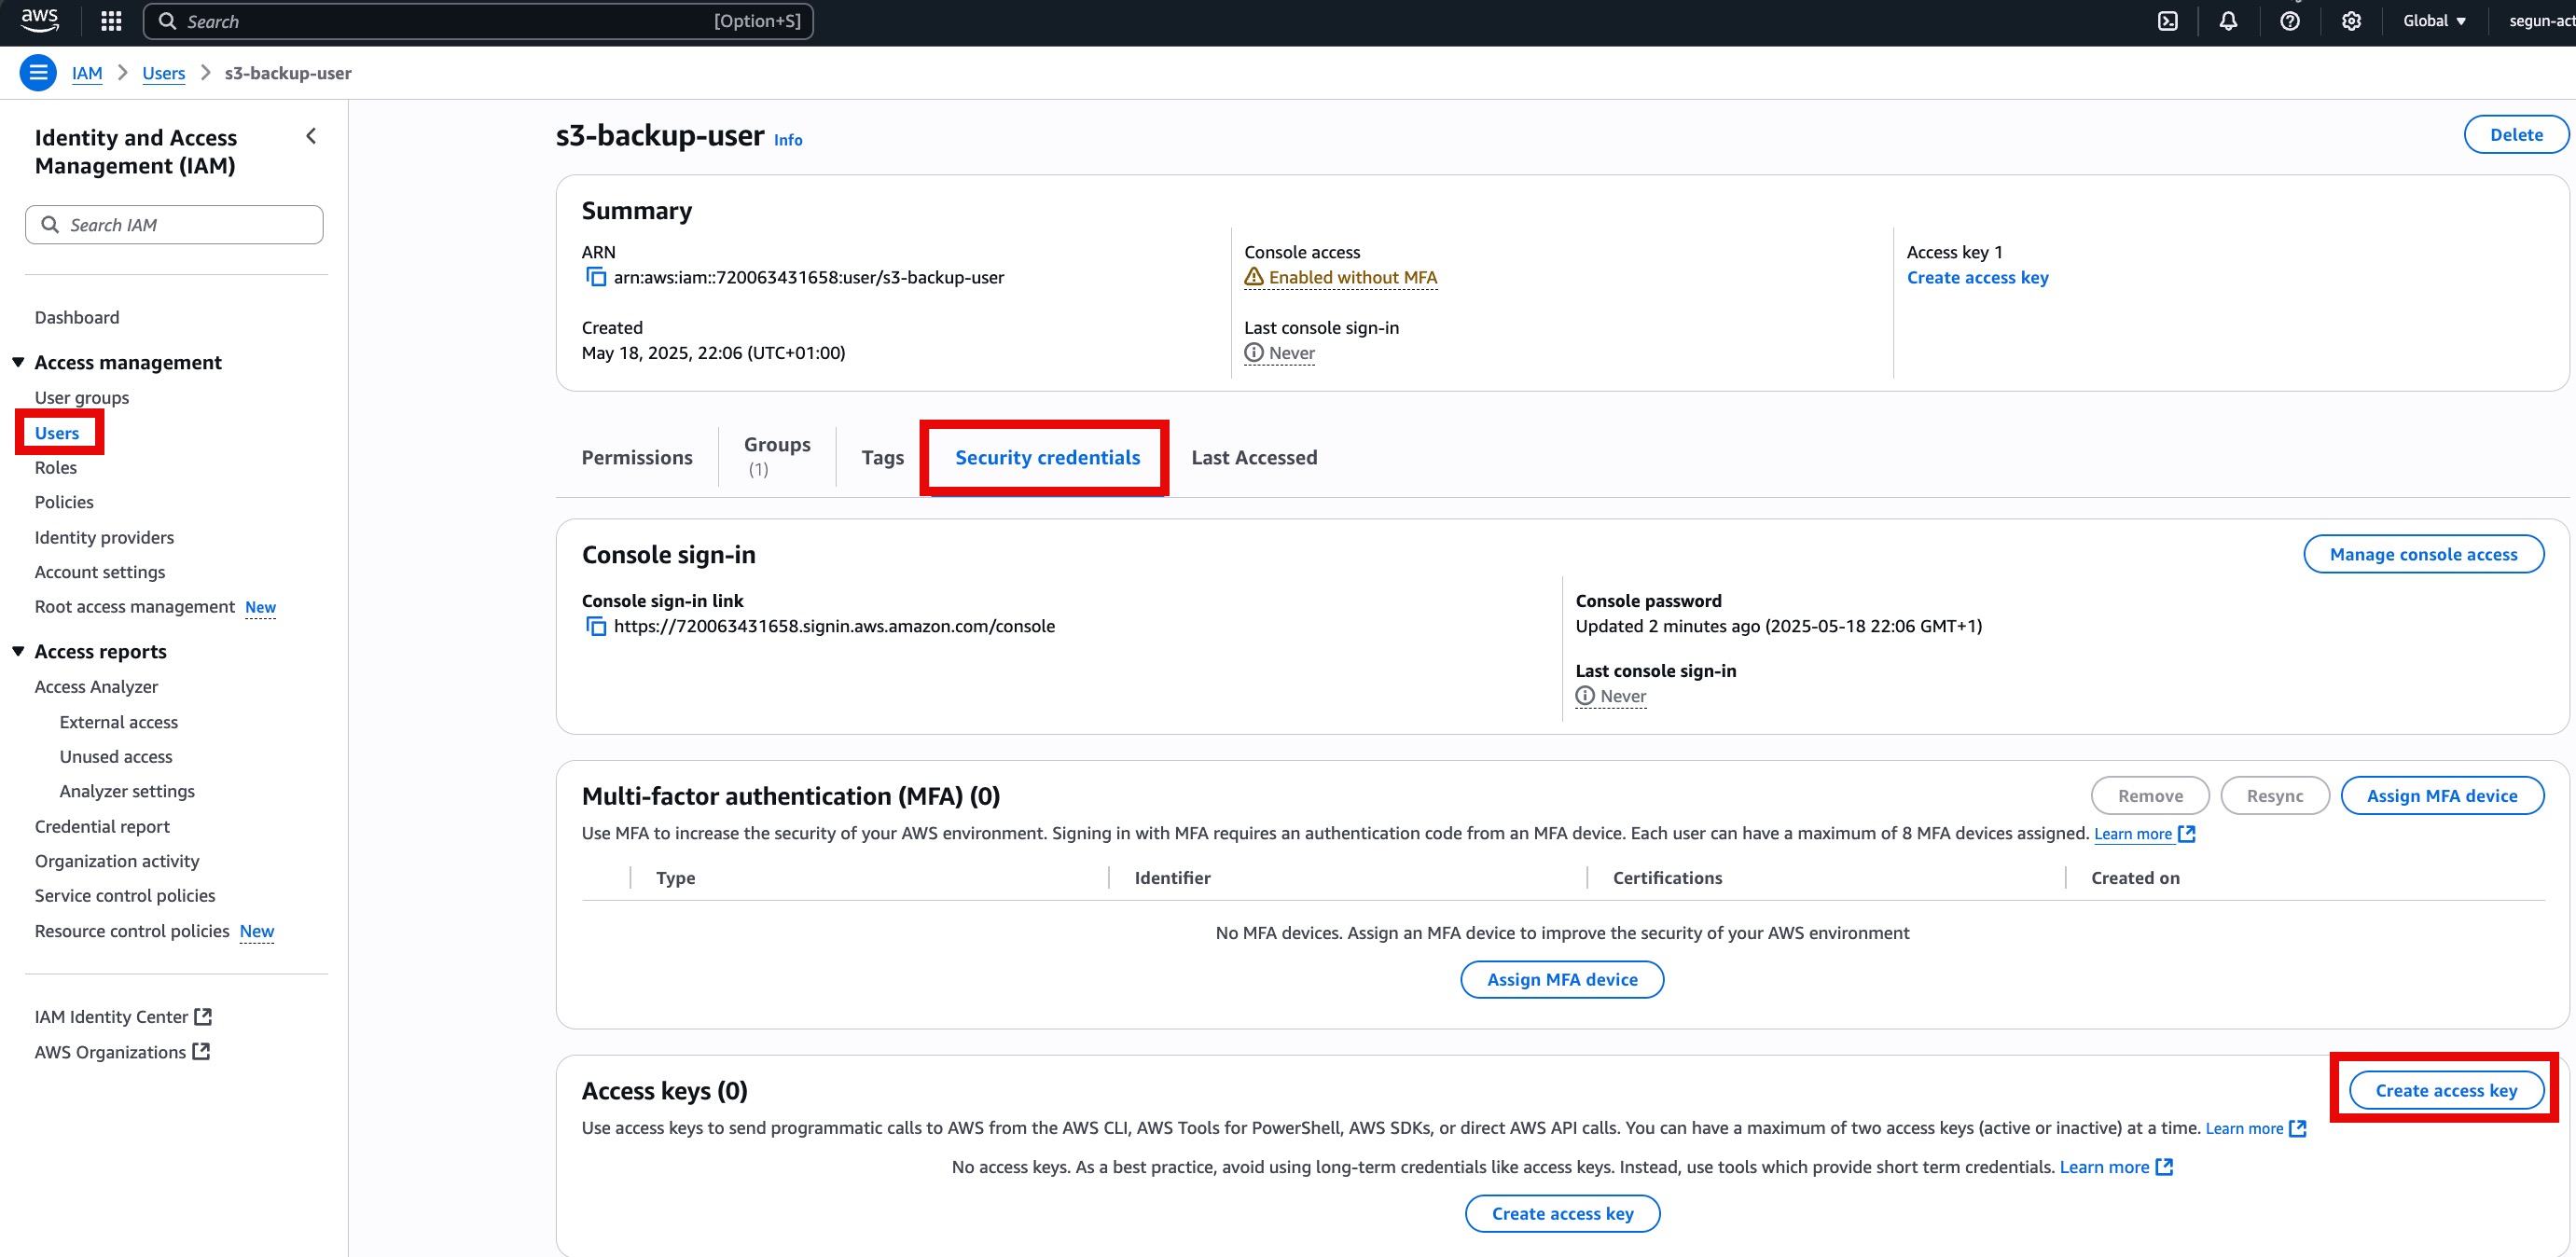
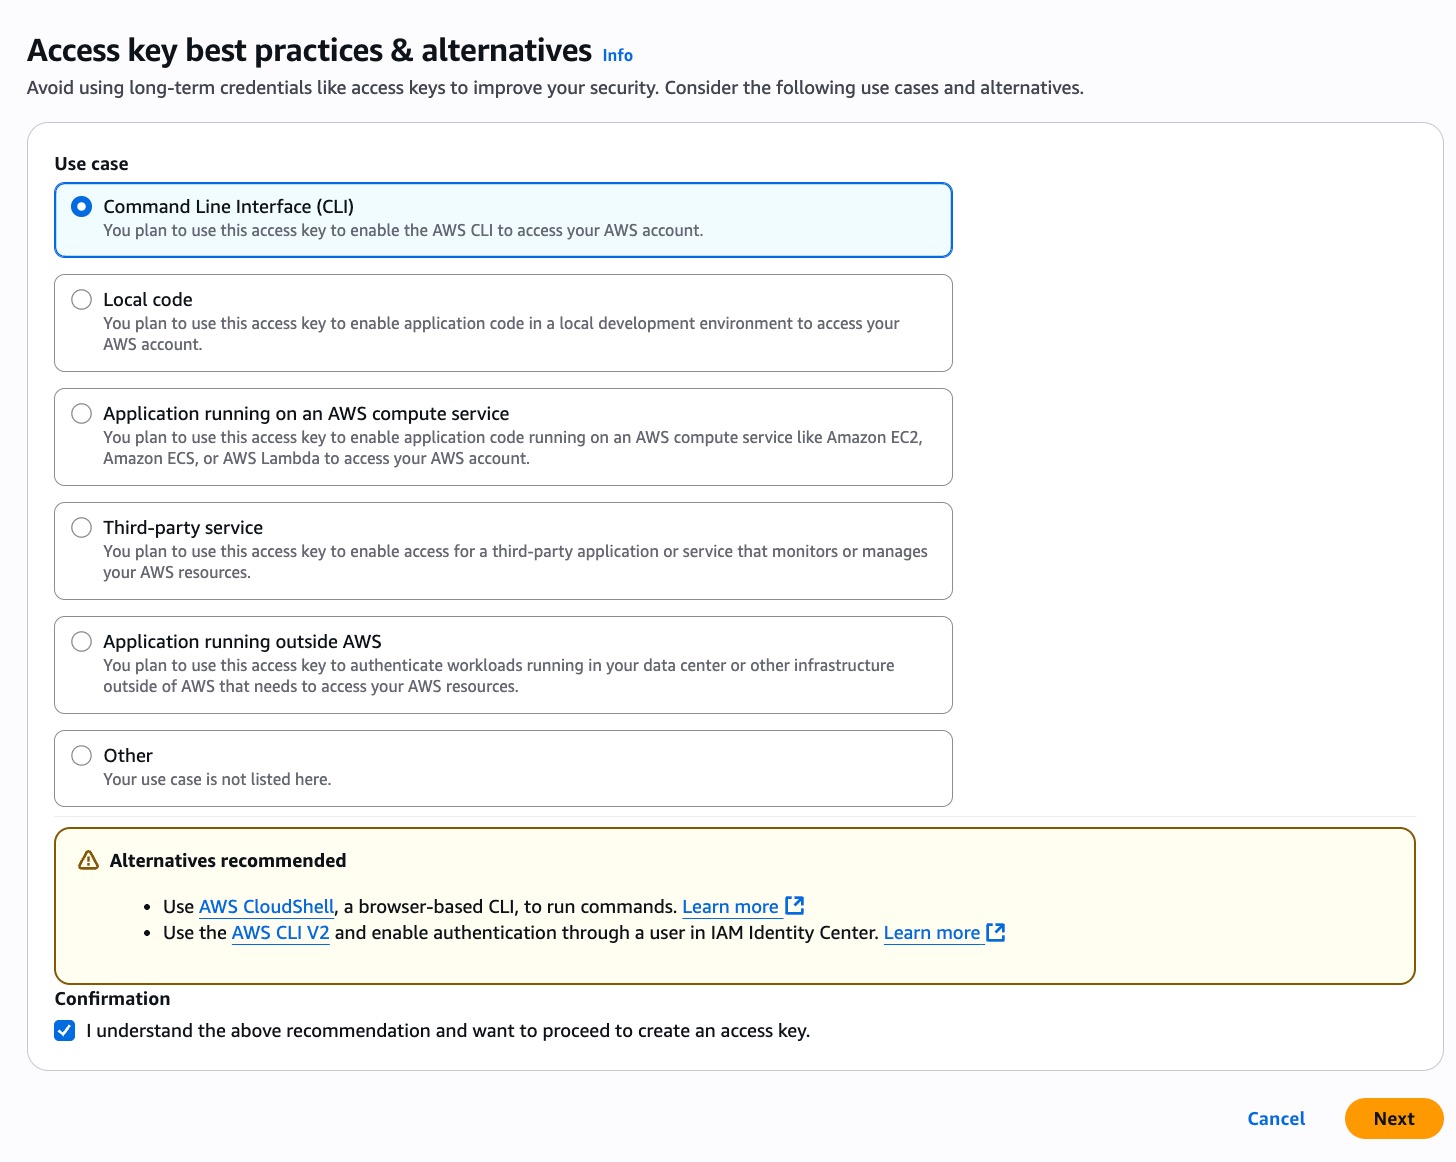
- For the use case, select the Command Line Interface (CLI). Then click on Next
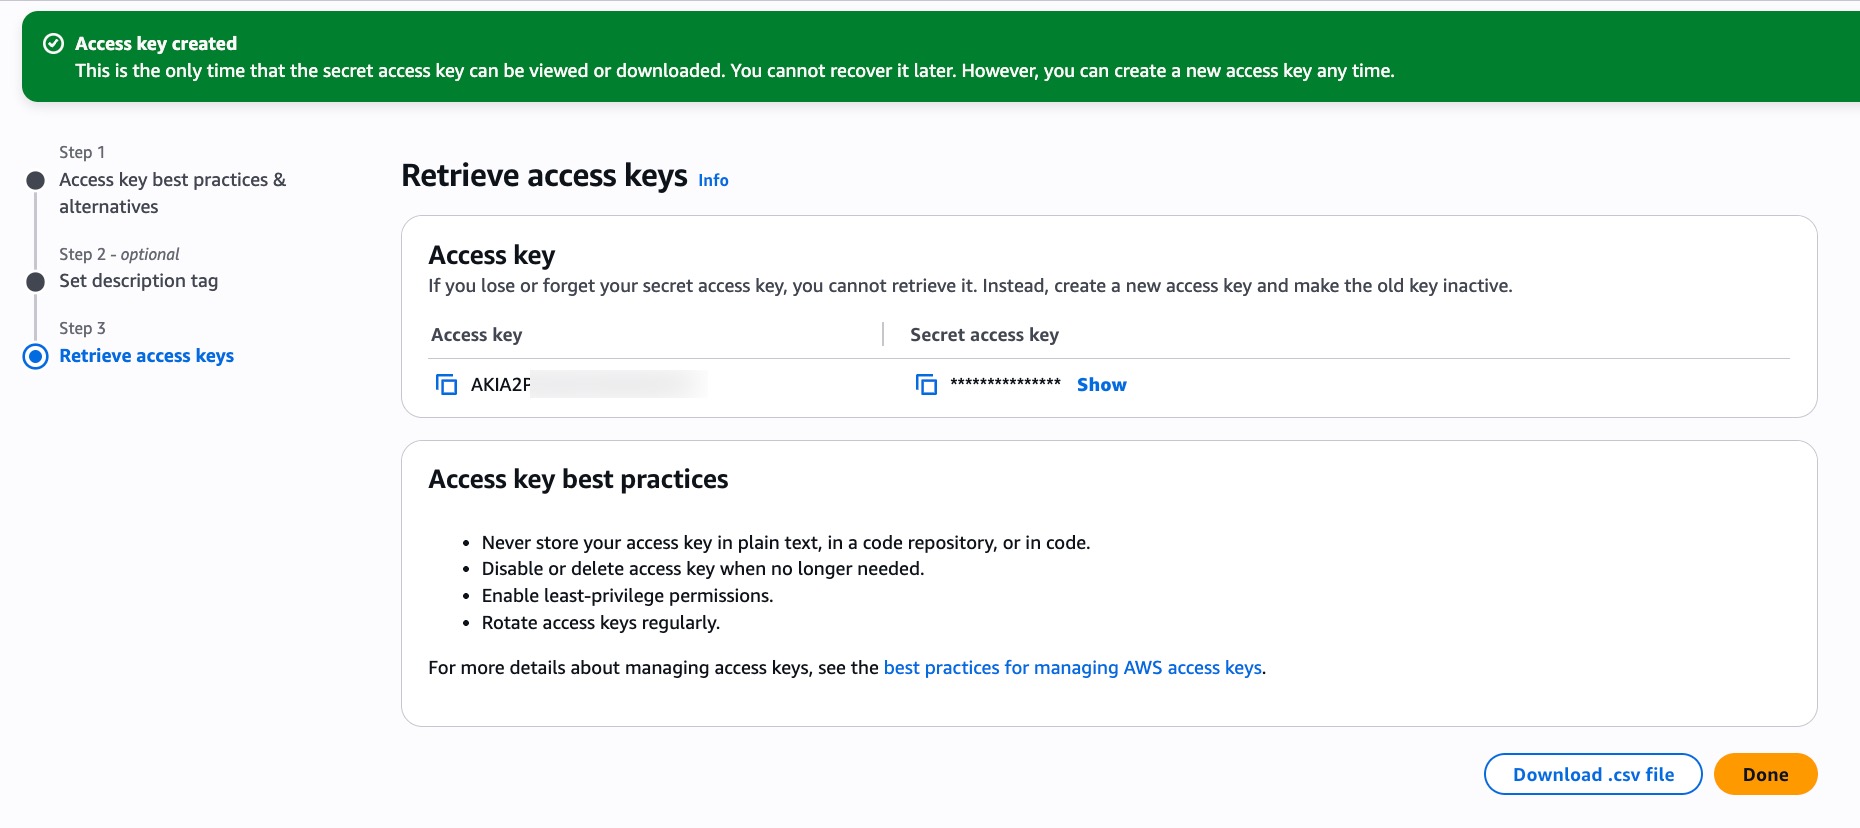
- Finally create the access key and download the
.csvfiles
NOTE
For detailed guidance on setting up AWS CLI credentials, refer to this AWS CLI setup guide. This should be done on the server where your PostgreSQL database is present.
Manual Backup of PostgreSQL Database to S3
Before automating the Backup process, it’s important to understand how to create and upload a PostgreSQL backup to your S3 bucket.
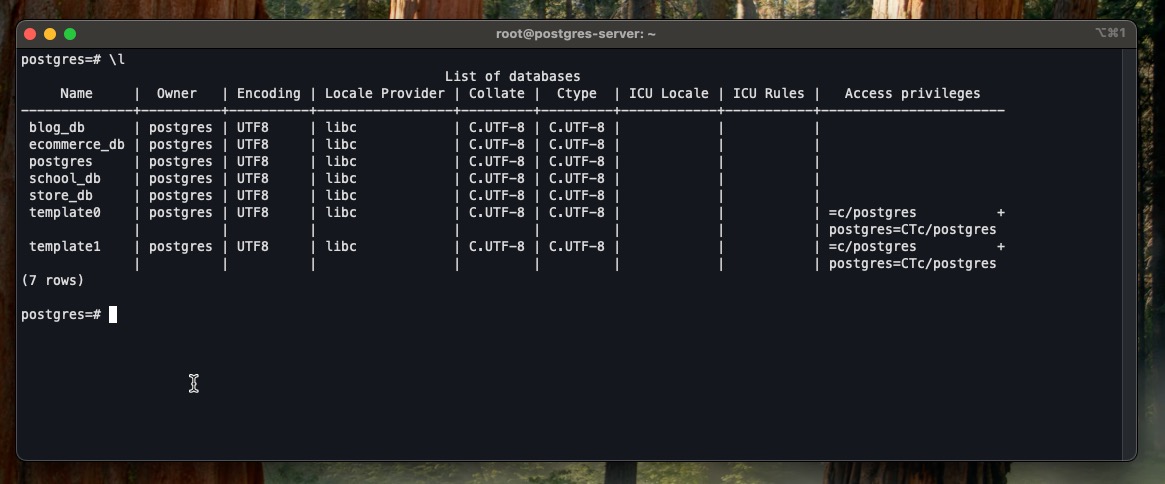
First, login to the PostgreSQL database:
sudo -u postgres psqlLet’s confirm the databases present:
\lYou result would be similar to the below
Next, exit from the database:
Exit;use the pg_dump to first of all export the database into a .sql file:
pg_dump -U postgres -h localhost -d ecommerce_db > ecommerce_db_backup.sqlYou will be prompted to enter your database password. This will create the ecommerce_db_backup.sql in the server.
Additionally, if you want to backup all your database present, then use the following command:
pg_dumpall -U postgres -h localhost --clean > all-databases-backup.sqlThis command will backup all backup all your databases to the server.
Moving forward, before transfering the backups to S3, ensure you have AWS CLI configured. If you haven’t done that yet, run the following command:
aws configure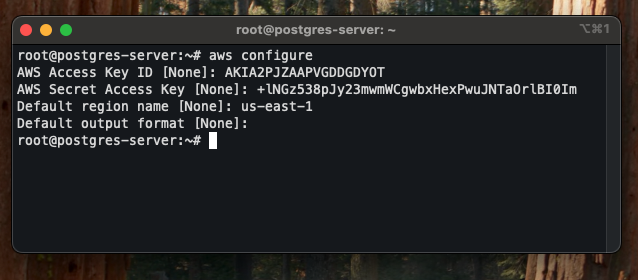
Here you provide:
- Access Key ID
- Secret Access Key
- Default region (same as your S3 bucket)
- Output format (e.g., json)
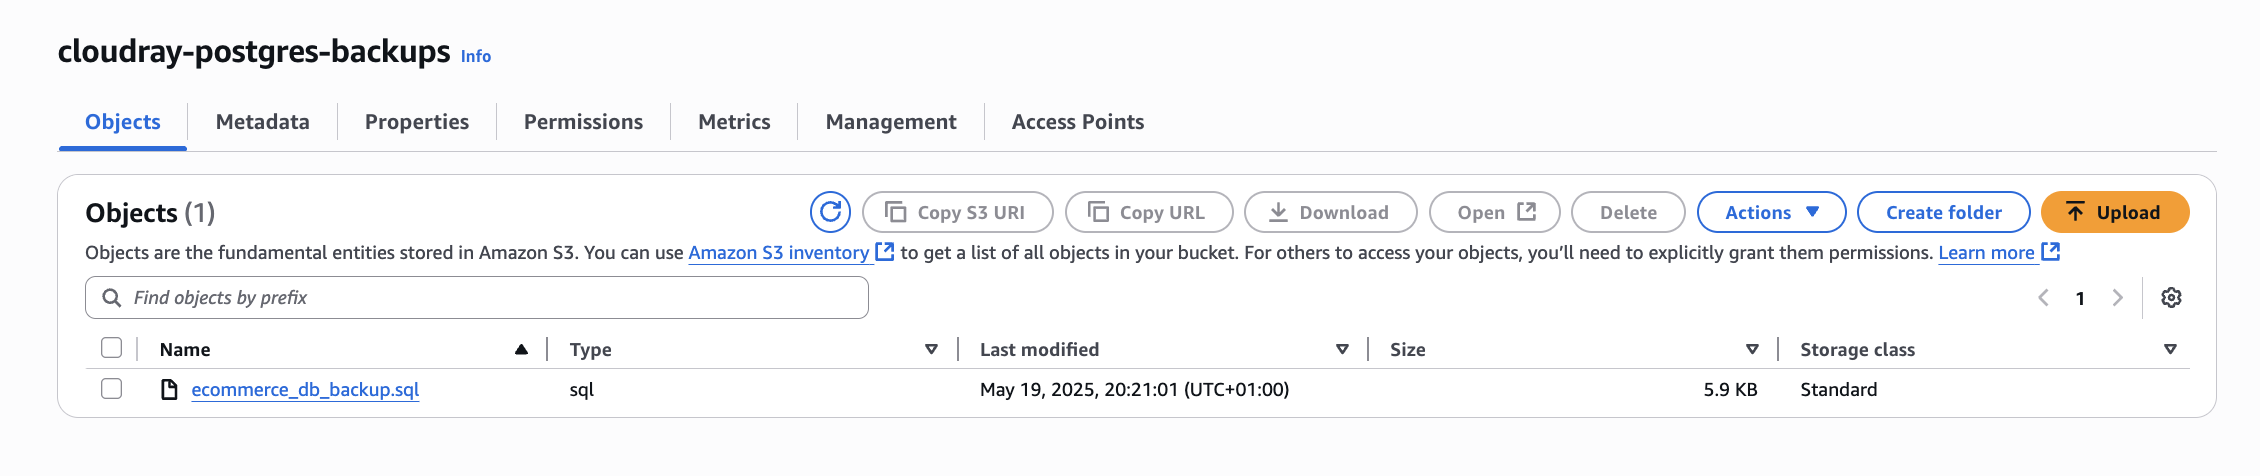
Next, use the AWS CLI s3 cp command to upload the backup file. For instance, let’s upload the blog_db_backup file to S3
aws s3 cp blog_db_backup.sql s3://cloudray-postgres-backupsYou can verify your upload by visiting your s3 buckets and clicking on the bucket you created earlier
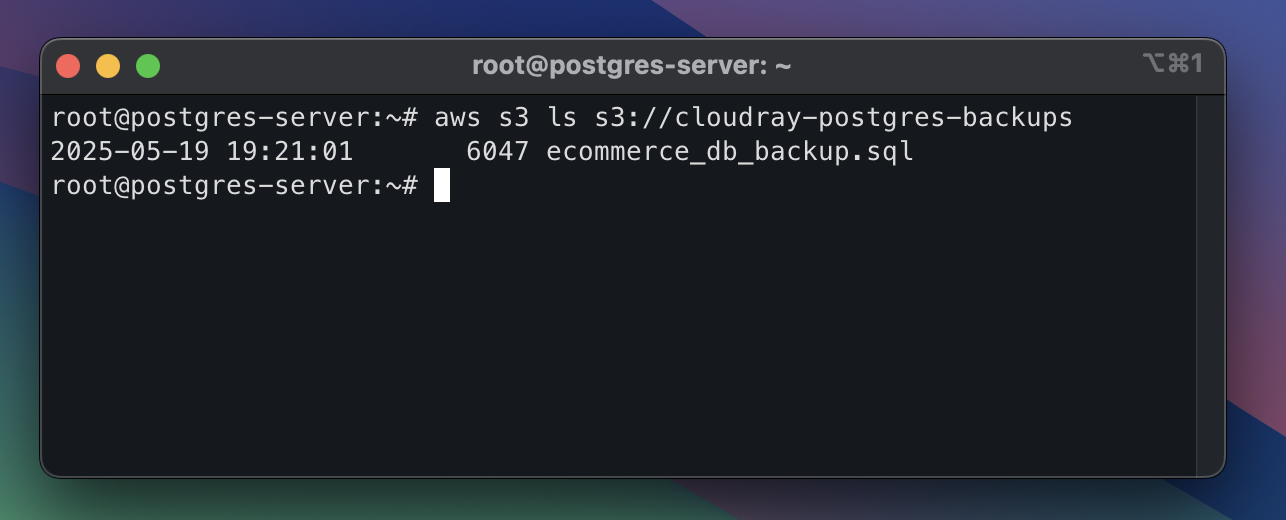
You can also verify the successful backup in CLI by listing the content of the bucket:
aws s3 ls s3://cloudray-postgres-backupsyour output should be similar to the below:
Automate and Schdule PostgreSQL Backups to Amazon S3 Using CloudRay
Once you have manually verified your backup process, the next step is automation. This removes the need for constant manual effort and reduces the chances of human error.
CloudRay offers a flexible scheduling feature that allows you to run scripts at specified intervals. This is particularly useful for automating recurring tasks like backing up PostgreSQL databases.
If you haven’t already, go to https://app.cloudray.io and sign up for an account. Once signed in, you will have access to CloudRay’s dashboards for managing scripts and schedules. Additionally, make sure your target servers are connected to CloudRay. If you haven’t done this yet, follow our servers docs to add and manage your server.
To automate backups, first create a reusable script in CloudRay. This script will perform the backup and can be used across different schedules
Here are the steps to take:
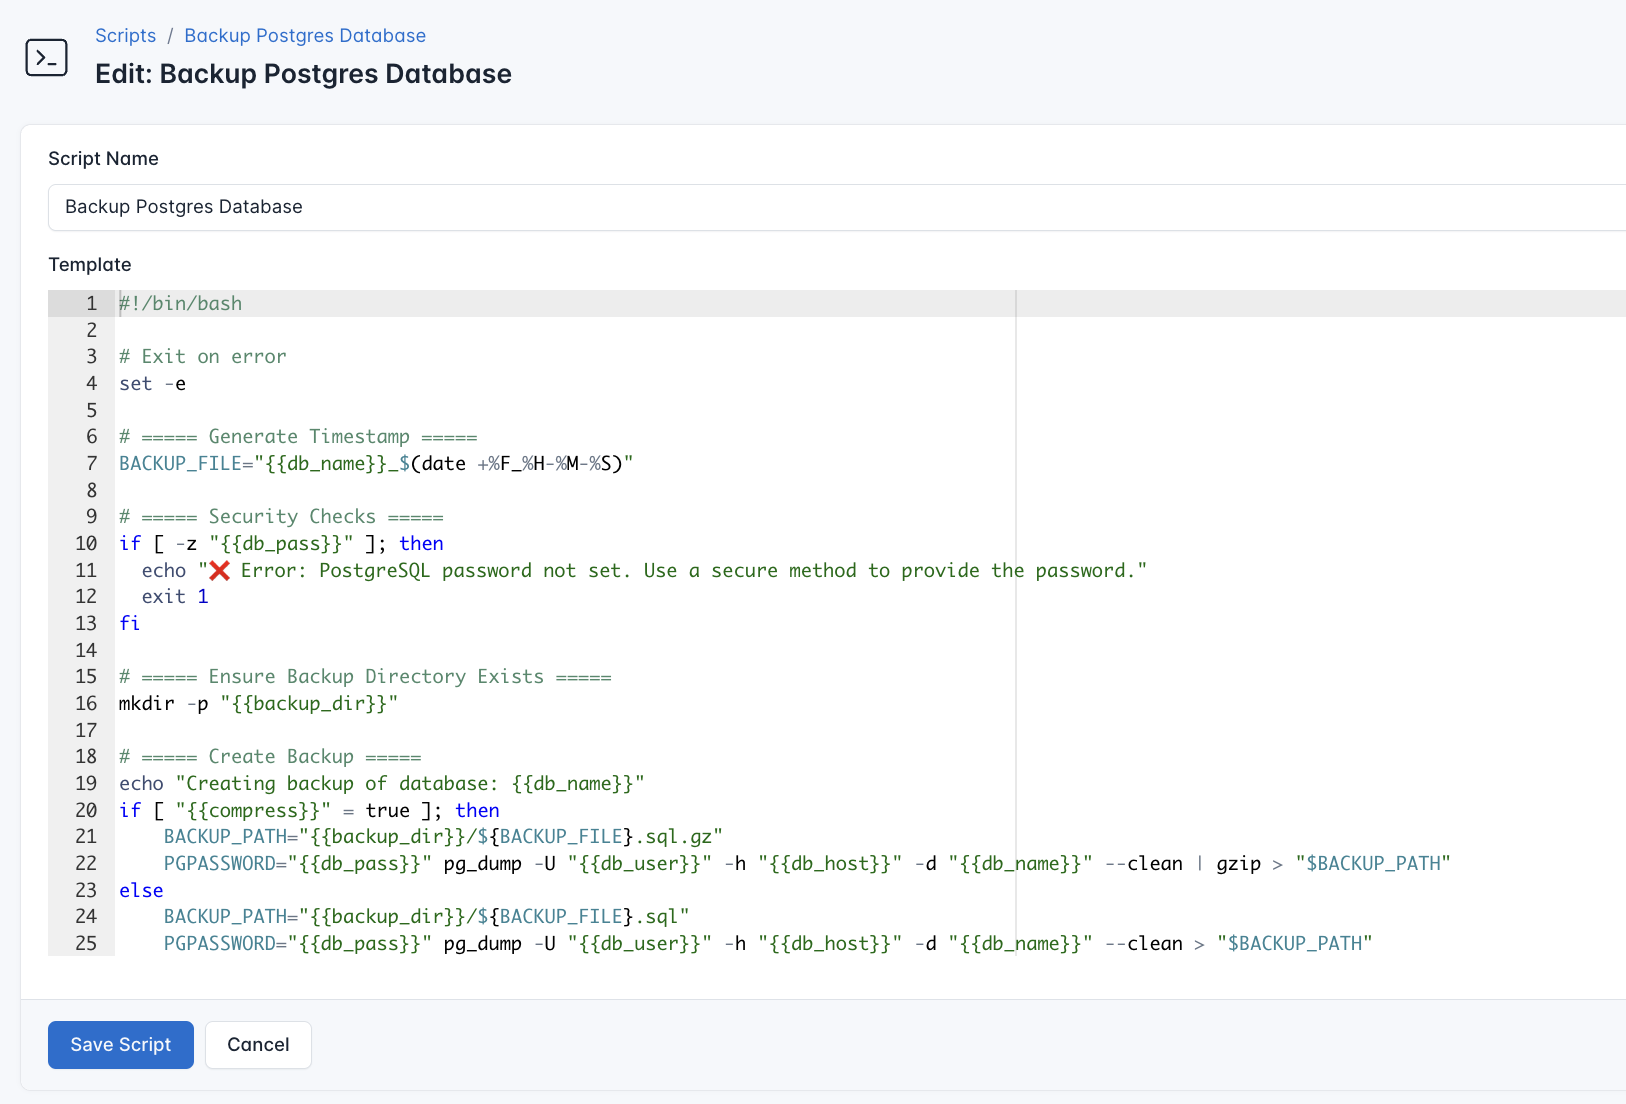
- Navigate to Scripts > New Script
- Name the script: Backup Postgres Database
- Paste in the following code:
#!/bin/bash

# Exit on error
set -e

# ===== Generate Timestamp =====
BACKUP_FILE="{{db_name}}_$(date +%F_%H-%M-%S)"

# ===== Security Checks =====
if [ -z "{{db_pass}}" ]; then
  echo "❌ Error: PostgreSQL password not set. Use a secure method to provide the password."
  exit 1
fi

# ===== Ensure Backup Directory Exists =====
mkdir -p "{{backup_dir}}"

# ===== Create Backup =====
echo "Creating backup of database: {{db_name}}"
if [ "{{compress}}" = true ]; then
    BACKUP_PATH="{{backup_dir}}/${BACKUP_FILE}.sql.gz"
    PGPASSWORD="{{db_pass}}" pg_dump -U "{{db_user}}" -h "{{db_host}}" -d "{{db_name}}" --clean | gzip > "$BACKUP_PATH"
else
    BACKUP_PATH="{{backup_dir}}/${BACKUP_FILE}.sql"
    PGPASSWORD="{{db_pass}}" pg_dump -U "{{db_user}}" -h "{{db_host}}" -d "{{db_name}}" --clean > "$BACKUP_PATH"
fi

# Check backup success
if [ $? -ne 0 ]; then
    echo "❌ Backup failed!"
    exit 1
fi
echo "✅ Backup created: $BACKUP_PATH"

# ===== Upload to S3 =====
echo "Uploading to S3 bucket: {{s3_bucket}}"
if [ "{{compress}}" = true ]; then
    aws s3 cp "$BACKUP_PATH" "s3://{{s3_bucket}}/${BACKUP_FILE}.sql.gz"
    aws s3 cp "$BACKUP_PATH" "s3://{{s3_bucket}}/{{s3_latest_backup}}"
else
    aws s3 cp "$BACKUP_PATH" "s3://{{s3_bucket}}/${BACKUP_FILE}.sql"
    aws s3 cp "$BACKUP_PATH" "s3://{{s3_bucket}}/latest_backup.sql"
fi

if [ $? -eq 0 ]; then
    echo "✅ Backup successfully uploaded to S3"
else
    echo "❌ Failed to upload backup to S3"
    exit 1
fi

# ===== Apply Retention Policy =====
echo "Cleaning up backups older than {{retention_days}} days..."
if [ "{{compress}}" = true ]; then
    find "{{backup_dir}}" -type f -name "*.sql.gz" -mtime +"{{retention_days}}" -delete
else
    find "{{backup_dir}}" -type f -name "*.sql" -mtime +"{{retention_days}}" -delete
fi

echo "✨ Backup process completed successfully"
Here is what this script does:
- Creates a timestamp for PostgreSQL backup
- Secures the Database access
- Automate S3 upload of the backups
- Manages local storage by the implementation of retention policy
- Provides a clear status updates on the backup process
Next, before running the scripts, you need to define values for the placeholders {{db_user}}, {{db_pass}}, {{db_name}}, {{backup_dir}}, {{s3_bucket}}, {{retention_days}}, and {{s3_latest_backup}} used in the scrips. CloudRay processes all scripts as Liquid templates. This allows you to use variables dynamically across different servers.
To ensure that these values are automatically substituted when the script runs, follow these steps to create a variable Group:
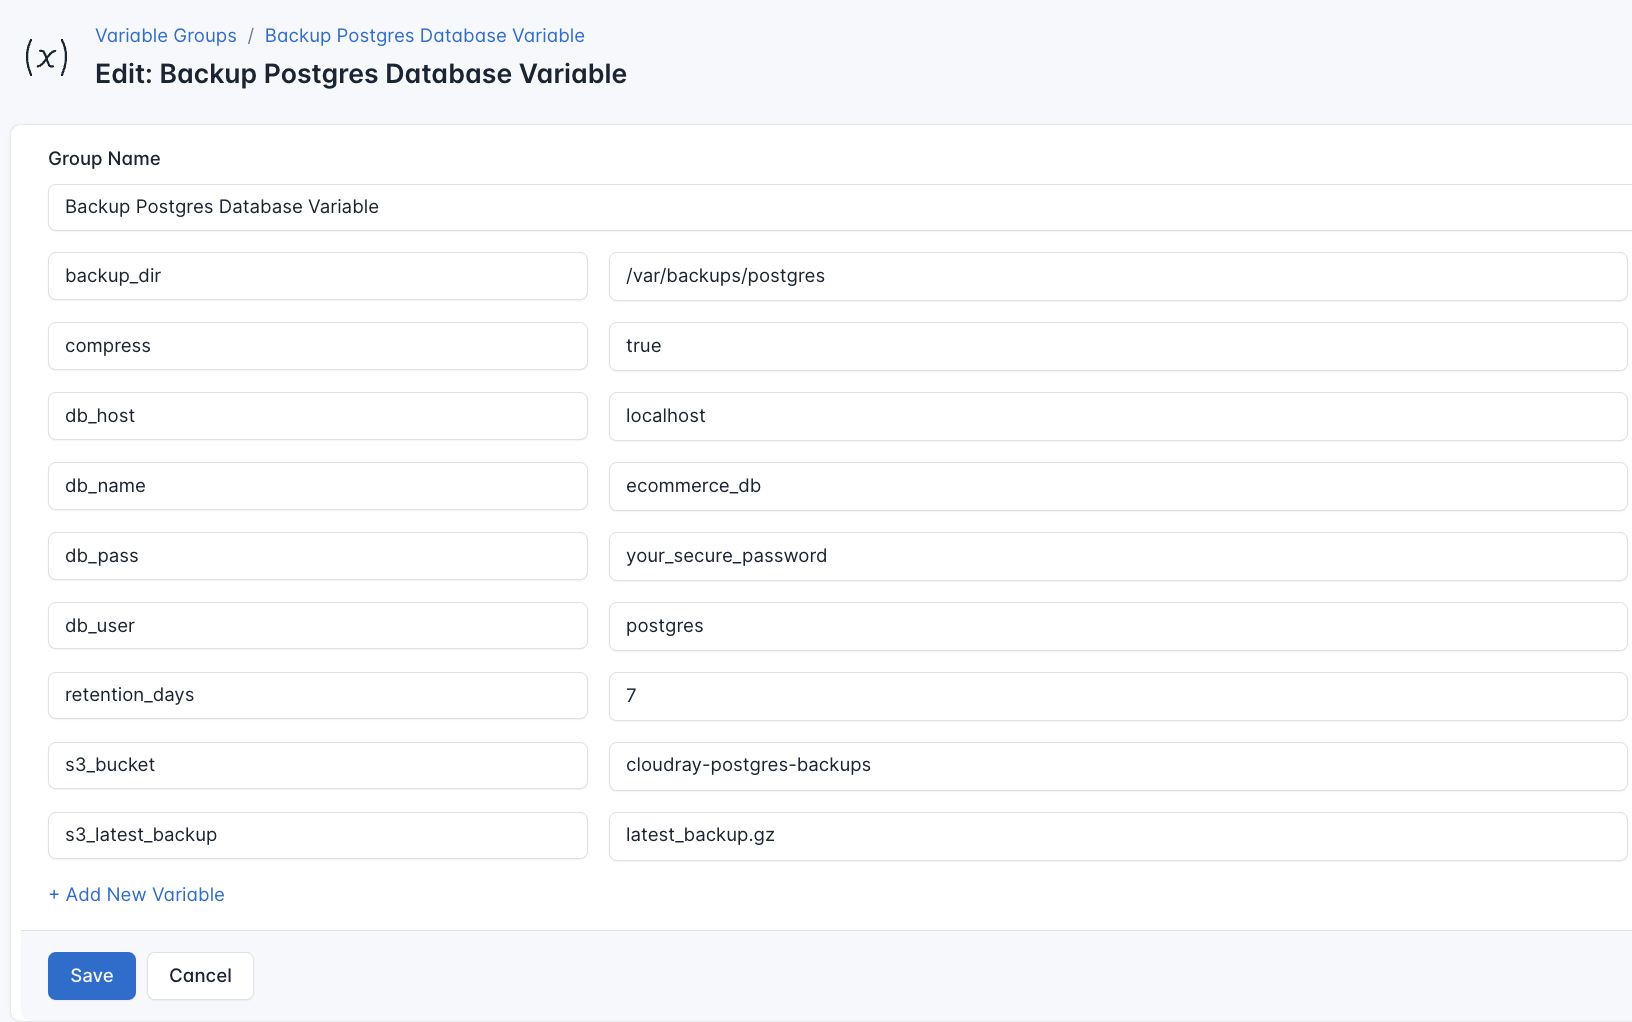
- Navigate to Variable Groups: In your CloudRay project, go to “Scripts” in the top menu and click on “Variable Groups”
- Create a new Variable Group: Click on “Variable Group”
- Add the following variables:
db_name: This is the name of the databasedb_user: The name of the userdb_pass: The password of the for the database userbackup_dir: The directory where PostgreSQL database backups will be storeds3_bucket: This is the name of the s3 bucket where the backups will be savedretention_days: The timeframe for the backup to be deleted on the servers3_latest_backup: The latest backup in s3 bucket
CloudRay uses Runlogs to execute scripts on your servers while providing real-time logs of the execution process.
To run the Backup Postgres Database, follow these steps:
- Navigate to Runlogs: In your CloudRay project, go to the Runlogs section in the top menu
- Create a New Runlog: Click on New Runlog
- Configure the Runlog: Fill in the required details:
- Server: Select the server you added earlier
- Script: Choose the “Backup Postgres Database”
- Variable Group (optional): Select the variable group you created earlier
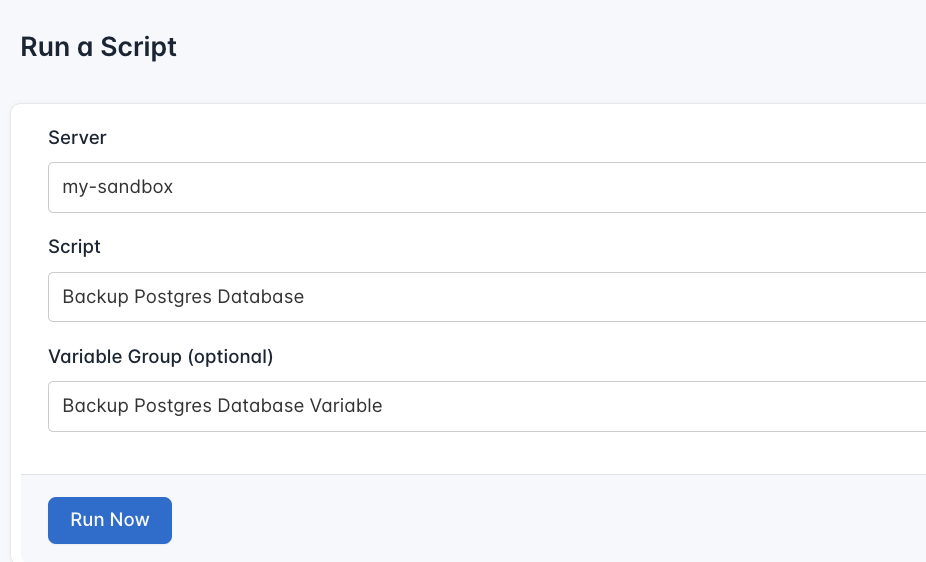
- Execute the Script: Click on Run Now to start the execution.
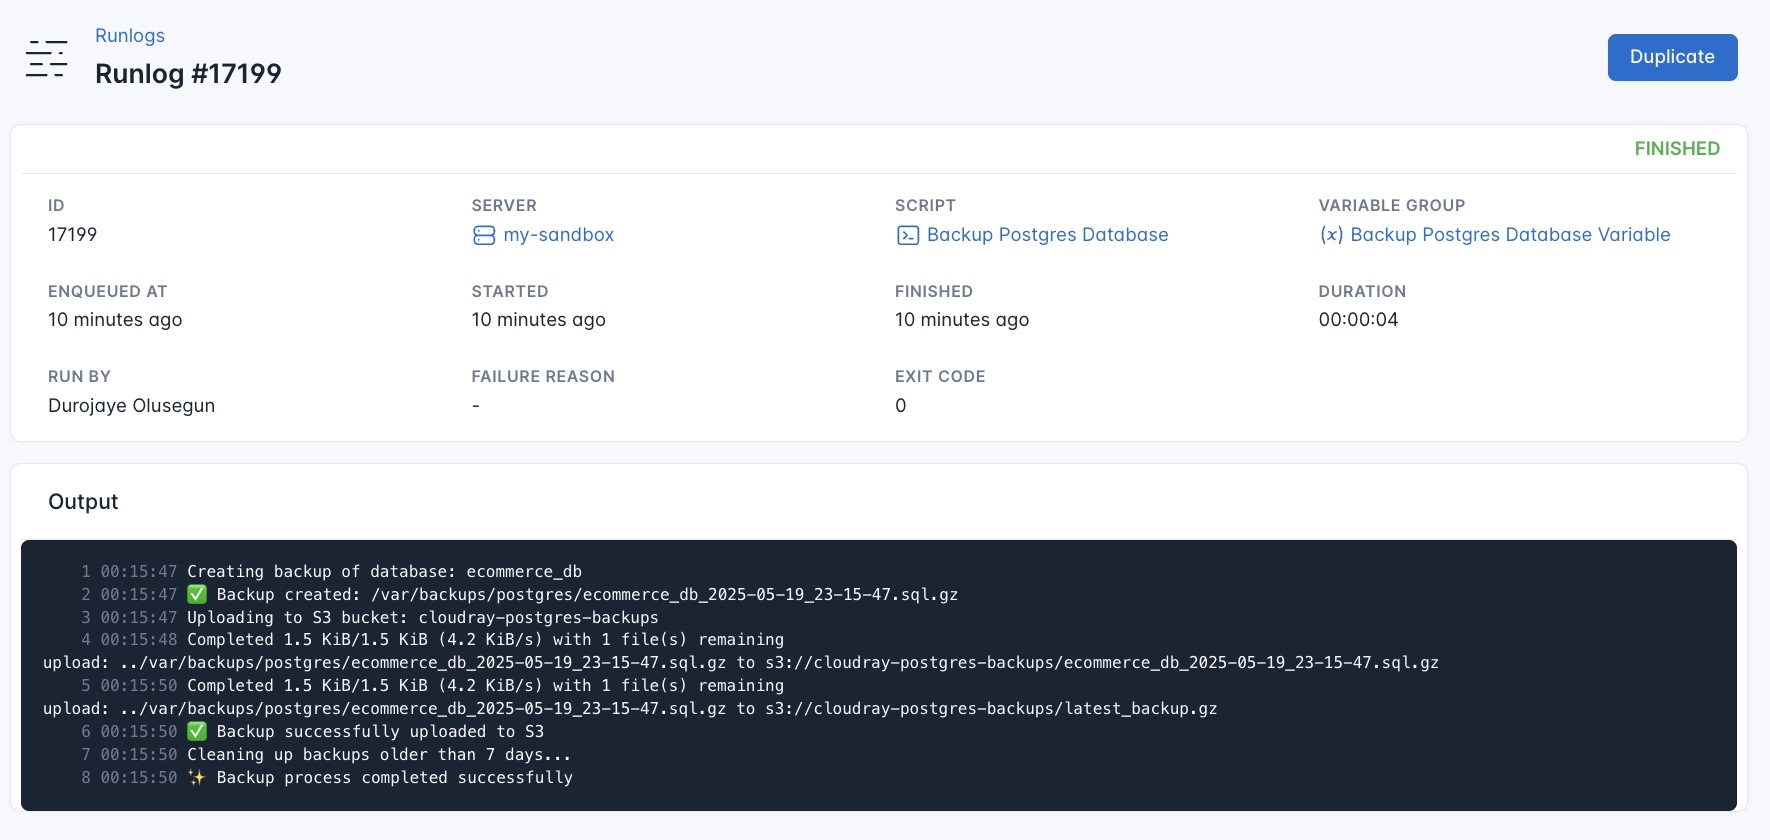
CloudRay will automatically connect to your server, run the Backup Postgres Database, and provide live logs to track the process. If any errors occur, you can review the logs to troubleshoot the issue.
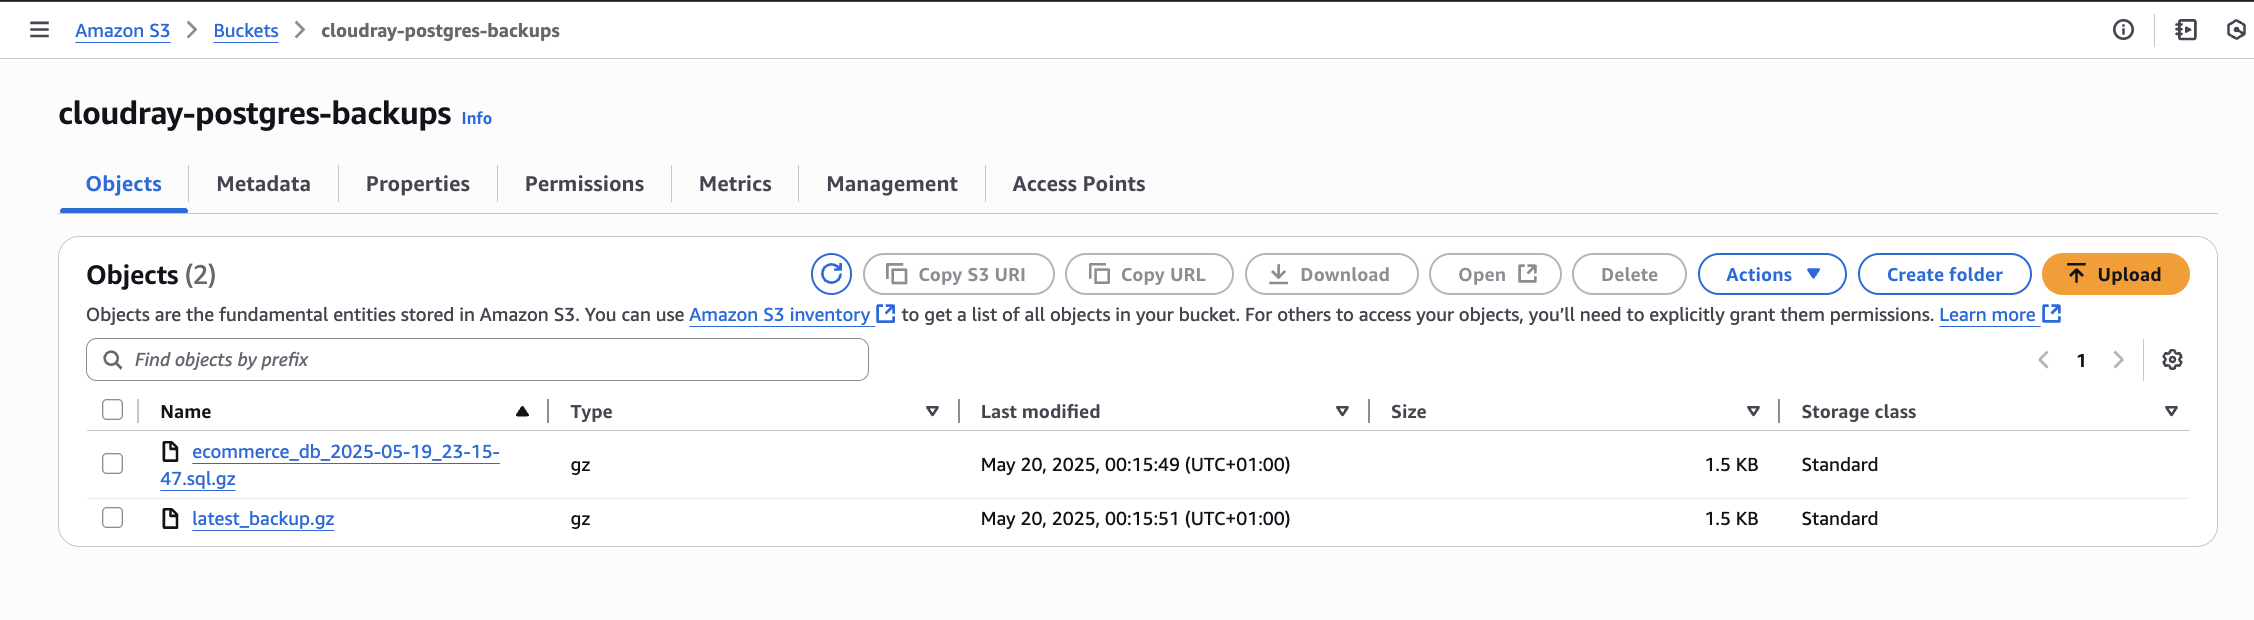
To comfirm successful backup to Amazon S3, check your S3 bucket.
Scheduling PostgreSQL Database Backup to Amazon S3 Using CloudRay
CloudRay also offers Schedules, allowing you to execute scripts automatically at specific intervals or times. This feature is useful for tasks such as automating database backups.
For example, if you want to back up your PostgreSQL database to S3 on monday of every week at 1:00 AM, you can configure a CloudRay schedule to handle this automatically.
Here are the steps to achieve this:
- Navigate to Schedules: In your CloudRay dashboard, go to the “Schedules” tab.

- Click “Add Schedule”: Start creating a new schedule.
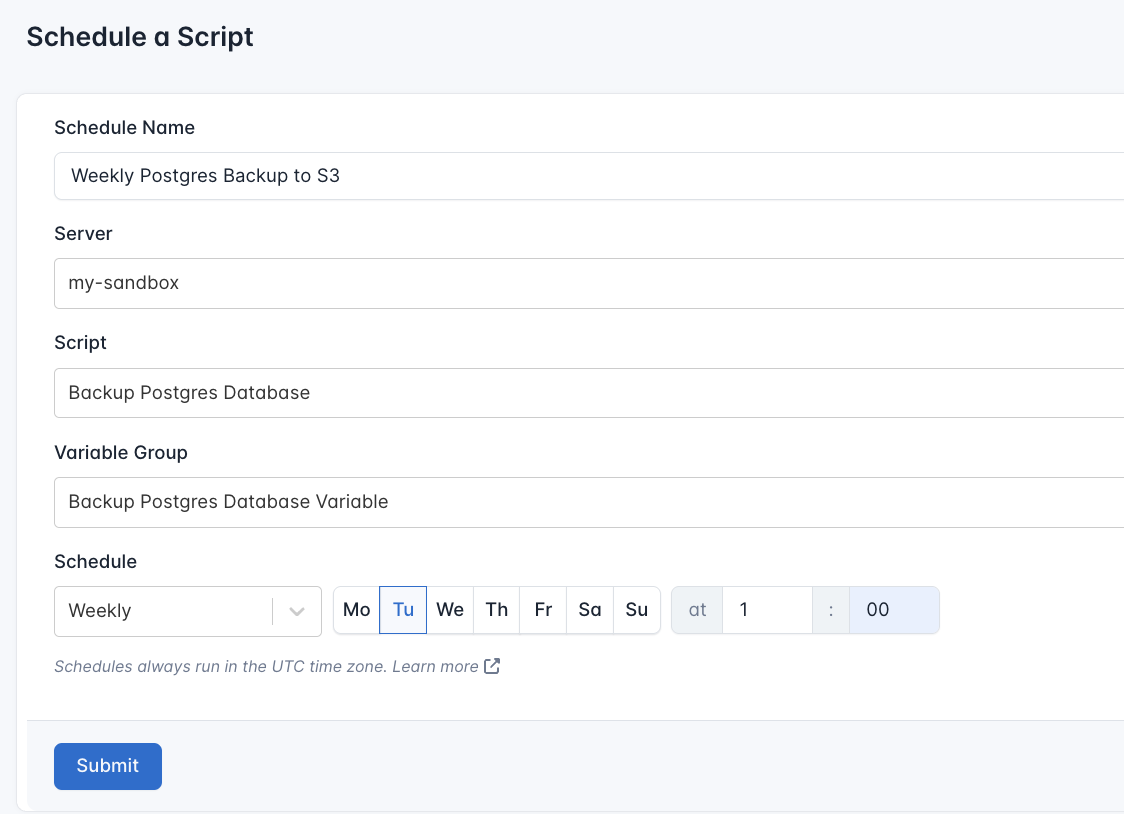
- Submit Schedule: Click “Submit” to activate your new schedule.
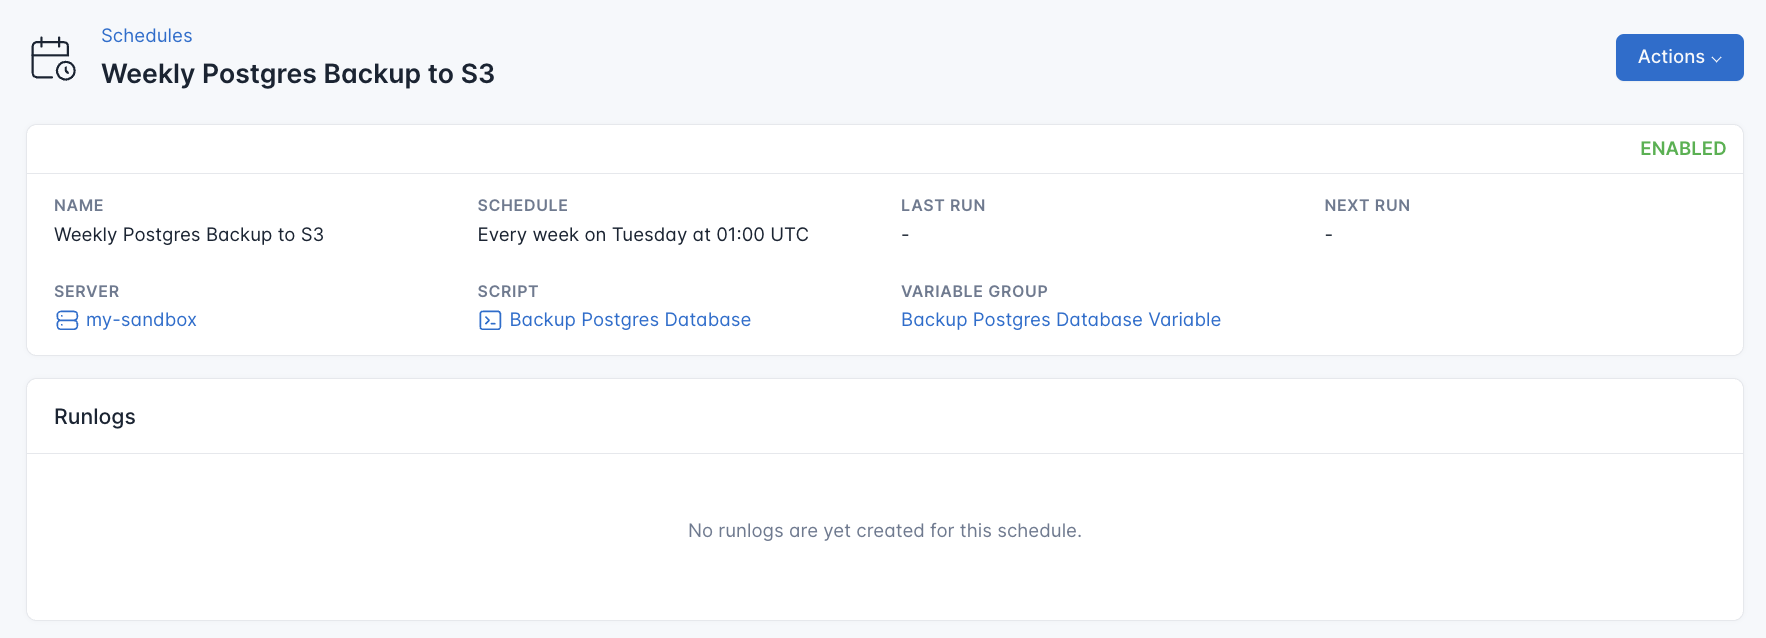
CloudRay will automatically execute the backup script at the scheduled time, ensuring that your database is regularly backed up to your S3 bucket without manual intervention.
Wrapping Up
Automating PostgreSQL backups to Amazon S3 ensures your data is consistently protected, versioned, and stored offsite with minimal manual effort. By combining AWS services with CloudRay’s powerful scripting and scheduling tools, you can create a reliable and reusable backup workflow. Whether you’re managing a single database or multiple servers, this setup offers flexibility, scalability, and peace of mind.
Start today by signing up at https://app.cloudray.io and manage your bash scripts in a centralised platform.
Related Guides

Olusegun Durojaye
CloudRay Engineering Team