
Statamic is a flat‑file CMS built on Laravel that lets you publish dynamic content without a traditional database. On Ubuntu you typically install PHP, Composer, the Statamic CLI, and then configure Nginx by hand.
This guide shows how to turn that repeatable setup into a single Bash script you can run from CloudRay so every new server starts with an identical, working Statamic site.
Contents
- Adding Servers to CloudRay
- Create a Deployment Script
- Define the Variable Group
- Run the Installation Script
- Next Step
- Summary
Adding Servers to CloudRay
Before getting started, make sure your machine is added to a CloudRay project and connected using the CloudRay Agent.
Create a Deployment Script
Now that your machine is connected to CloudRay, let’s create a reusable Bash script to automate the installation process. You need to follow these steps to create the script in CloudRay.
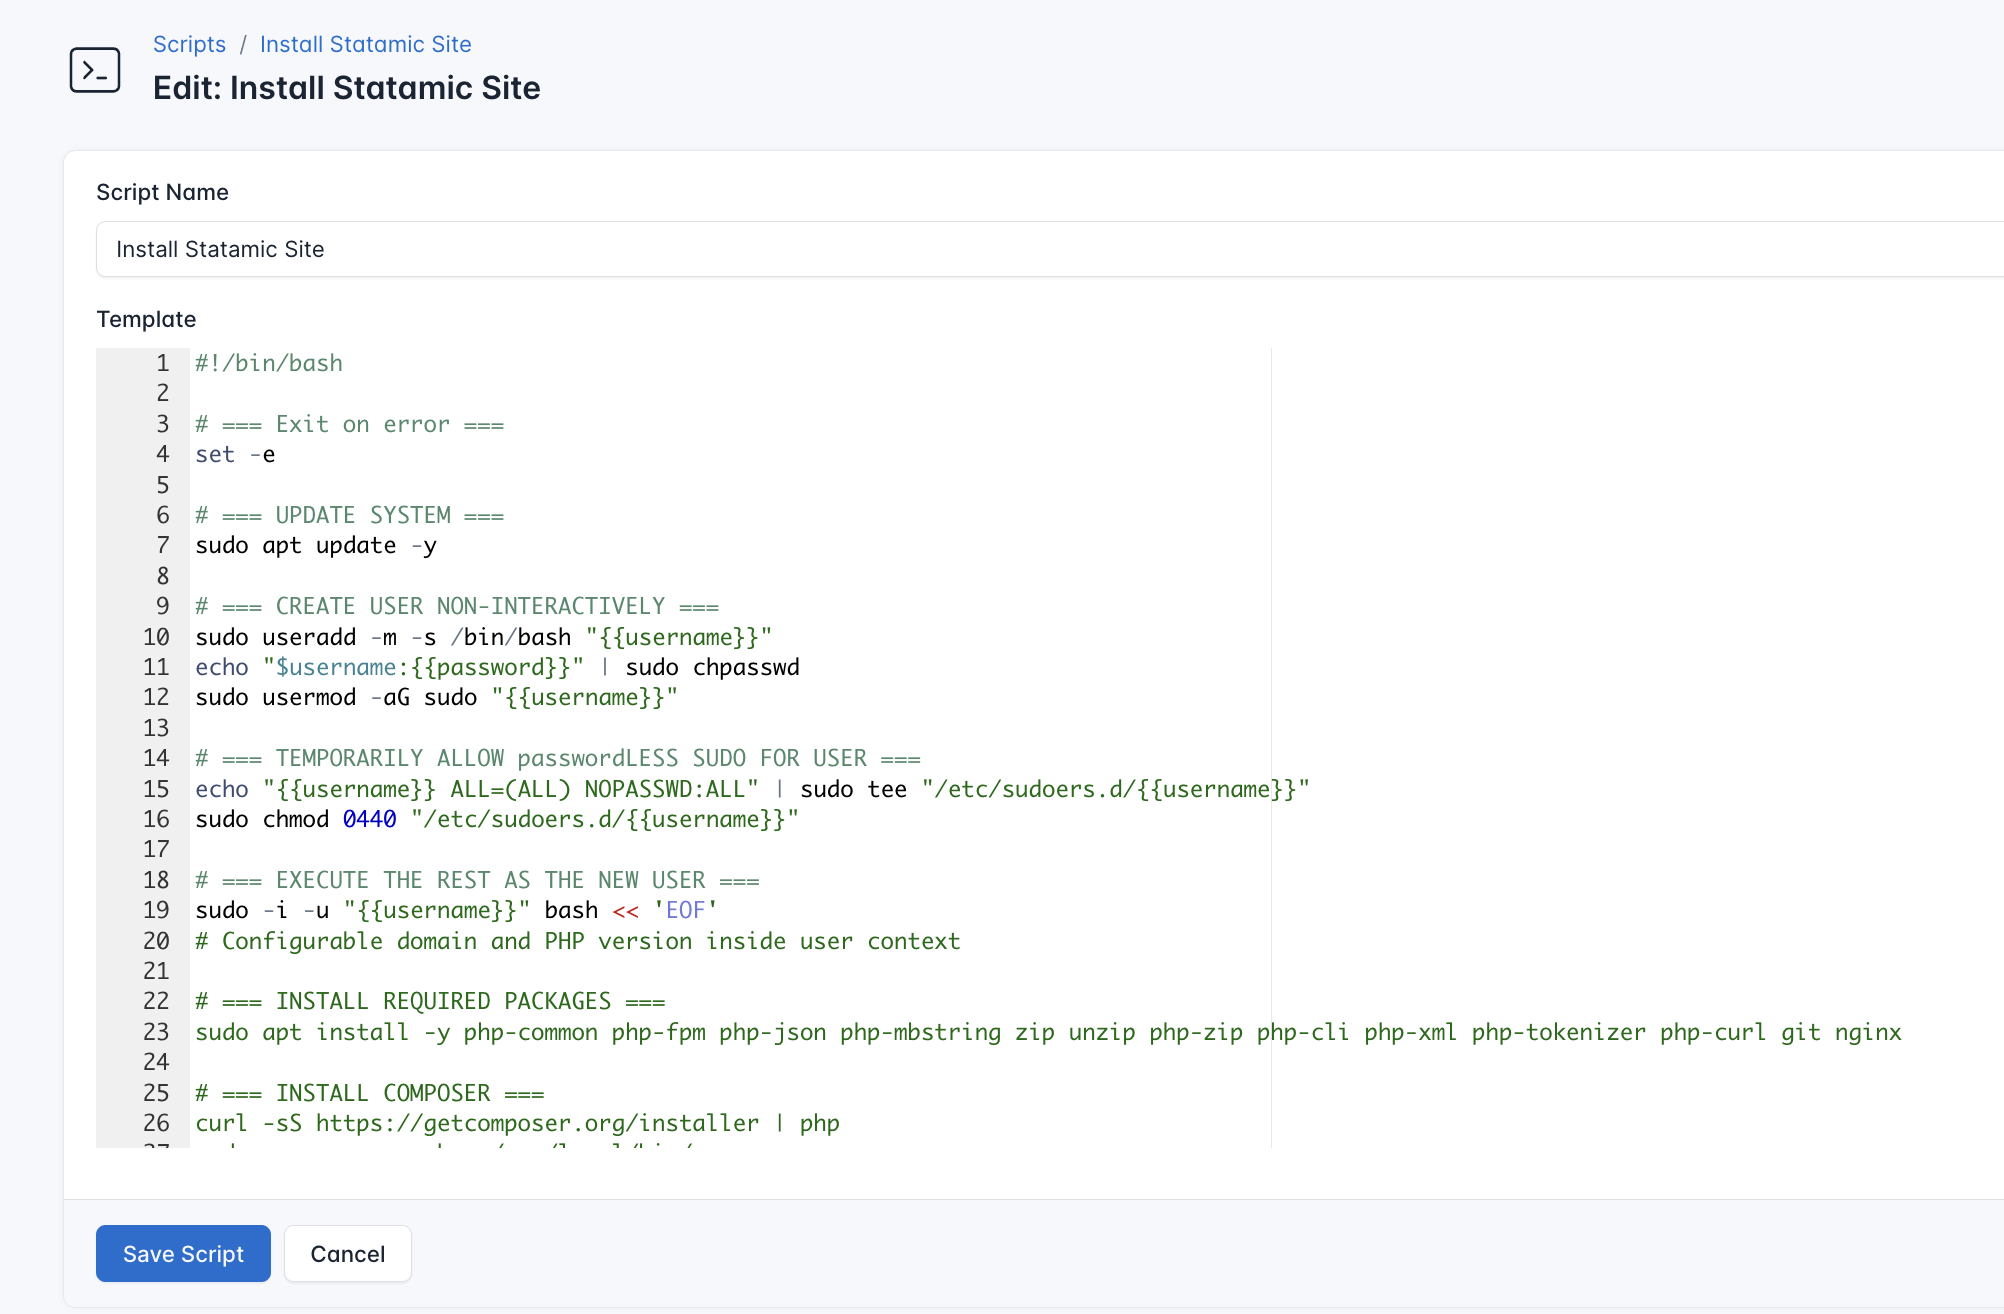
- Go to Scripts in your CloudRay project
- Click New Script
- Name:
Install Statamic Site. You can give it any name of your choice - Copy this code:
#!/bin/bash

# === Exit on error ===
set -e

# === UPDATE SYSTEM ===
sudo apt update -y

# === CREATE USER NON-INTERACTIVELY ===
sudo useradd -m -s /bin/bash "{{username}}"
echo "{{username}}:{{password}}" | sudo chpasswd
sudo usermod -aG sudo "{{username}}"

# === TEMPORARILY ALLOW passwordLESS SUDO FOR USER ===
echo "{{username}} ALL=(ALL) NOPASSWD:ALL" | sudo tee "/etc/sudoers.d/{{username}}"
sudo chmod 0440 "/etc/sudoers.d/{{username}}"

# === EXECUTE THE REST AS THE NEW USER ===
sudo -i -u "{{username}}" bash << 'EOF'
# Configurable domain and PHP version inside user context

# === INSTALL REQUIRED PACKAGES ===
sudo apt install -y php-common php-fpm php-json php-mbstring zip unzip php-zip php-cli php-xml php-tokenizer php-curl git nginx

# === INSTALL COMPOSER ===
curl -sS https://getcomposer.org/installer | php
sudo mv composer.phar /usr/local/bin/composer

# === CHECK COMPOSER VERSION ===
composer --version

# === INSTALL STATAMIC CLI ===
composer global require statamic/cli

# === SET PATH MANUALLY FOR CURRENT SESSION ===
export PATH="$HOME/.config/composer/vendor/bin:$HOME/.composer/vendor/bin:$PATH"

# === VERIFY STATAMIC INSTALLATION ===
which statamic
statamic -V

# === CREATE PROJECT DIRECTORY ===
cd /var/www
sudo chown $USER:www-data /var/www

# === CREATE NEW STATAMIC SITE ===
script -q -c "statamic new --no-interaction {{domain}}"

# === PERSIST PATH FOR FUTURE SESSIONS ===
echo 'export PATH="$HOME/.config/composer/vendor/bin:$PATH"' >> ~/.bashrc
echo 'export PATH="$HOME/.composer/vendor/bin:$PATH"'       >> ~/.bashrc
EOF

# === SET CORRECT PERMISSIONS ===
sudo chmod -R 755 /var/www/{{domain}}
sudo chown -R www-data:www-data /var/www/{{domain}}
sudo chown -R www-data:www-data /var/www/{{domain}}/{storage,content,bootstrap/cache}
sudo chown -R www-data:www-data /var/www/{{domain}}/storage /var/www/{{domain}}/bootstrap/cache
sudo chmod -R ug+rw /var/www/{{domain}}/storage /var/www/{{domain}}/bootstrap/cache
sudo chown -R www-data:www-data /var/www/{{domain}}/storage /var/www/{{domain}}/bootstrap/cache

# === SETUP NGINX CONFIGURATION ===
sudo tee /etc/nginx/sites-available/{{domain}} > /dev/null << NGINX_CONF
server {
    listen 80;
    server_name {{domain}} www.{{domain}};
    root /var/www/{{domain}}/public;

    index index.html index.htm index.php;
    charset utf-8;

    add_header X-Frame-Options "SAMEORIGIN";
    add_header X-XSS-Protection "1; mode=block";
    add_header X-Content-Type-Options "nosniff";

    set \$try_location @static;

    if (\$request_method != GET) {
        set \$try_location @not_static;
    }

    if (\$args ~* "live-preview=(.*)") {
        set \$try_location @not_static;
    }

    location / {
        try_files \$uri \$try_location;
    }

    location @static {
        try_files /static\${uri}_\$args.html \$uri \$uri/ /index.php?\$args;
    }

    location @not_static {
        try_files \$uri /index.php?\$args;
    }

    location = /favicon.ico { access_log off; log_not_found off; }
    location = /robots.txt  { access_log off; log_not_found off; }

    error_page 404 /index.php;

    location ~ \.php\$ {
        fastcgi_pass unix:/var/run/php/php{{php_version}}-fpm.sock;
        fastcgi_index index.php;
        fastcgi_param SCRIPT_FILENAME \$realpath_root\$fastcgi_script_name;
        include fastcgi_params;
    }

    location ~ /\.(?!well-known).* {
        deny all;
    }
}
NGINX_CONF

# === ENABLE SITE AND RELOAD NGINX ===
sudo ln -s /etc/nginx/sites-available/{{domain}} /etc/nginx/sites-enabled/
sudo nginx -t && sudo systemctl reload nginx


# === CLEANUP: Remove passwordless sudo access for security ===
sudo rm -f "/etc/sudoers.d/{{username}}"

echo "✅ Statamic site successfully installed at http://{{domain}}"
Here is what the Install Statamic Site does:
- Creates a non-root user and installs PHP, Composer and the Statamic CLI
- Generates a fresh Statamic site
- Sets correct file ownership and writes an Nginx virtual-host file
- Reloads Nginx and prints the site URL when finished
Define the Variable Group
Now, before running the deployment script, you need to define values for the placeholders {{username}}, {{password}}, {{domain}}, and {{php_version}} used in the scrips. CloudRay processes all scripts as Liquid templates. This allows you to use variables dynamically across different servers.
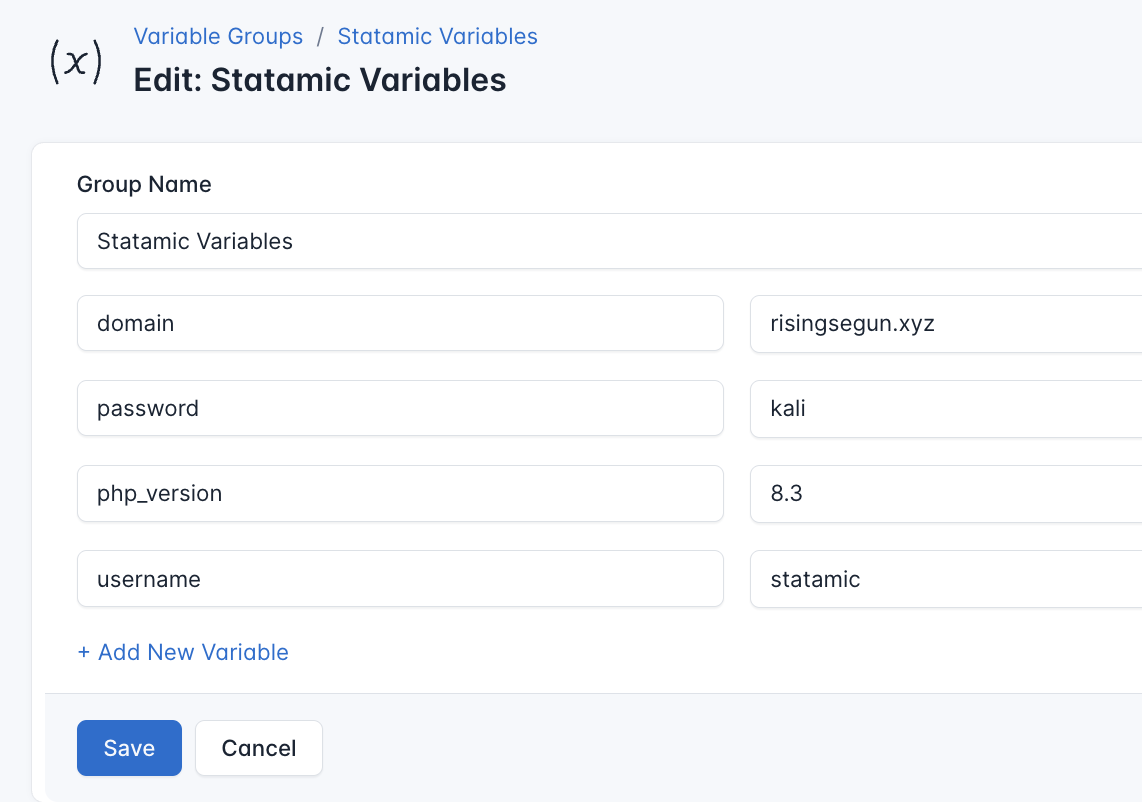
To ensure that these values are automatically substituted when the script runs, follow these steps to create a variable group:
- Navigate to Variable Groups: In your CloudRay project, go to “Scripts” in the top menu and click on “Variable Groups”.
- Create a new Variable Group: Click on “Variable Group”.
- Add the following variables:
username: Linux user that owns the web rootpassword: Password for that user (used once then revoked)domain: Public domain or IP of the site
Since the variables is setup, proceed with running the scripts with CloudRay
Run the Installation Script
CloudRay uses Runlogs to execute scripts on your servers while providing real-time logs of the execution process.
Once the script is saved, you can install statamic by creating a Runlog:
- Navigate to Runlogs: In your CloudRay project, go to the Runlogs section in the top menu.
- Create a New Runlog: Click on New Runlog.
- Configure the Runlog: Fill in the required details:
- Server: Select the server you added earlier.
- Script: Choose the “Install Statamic Site”
- Variable Group (optional): Select the variable group you created earlier.
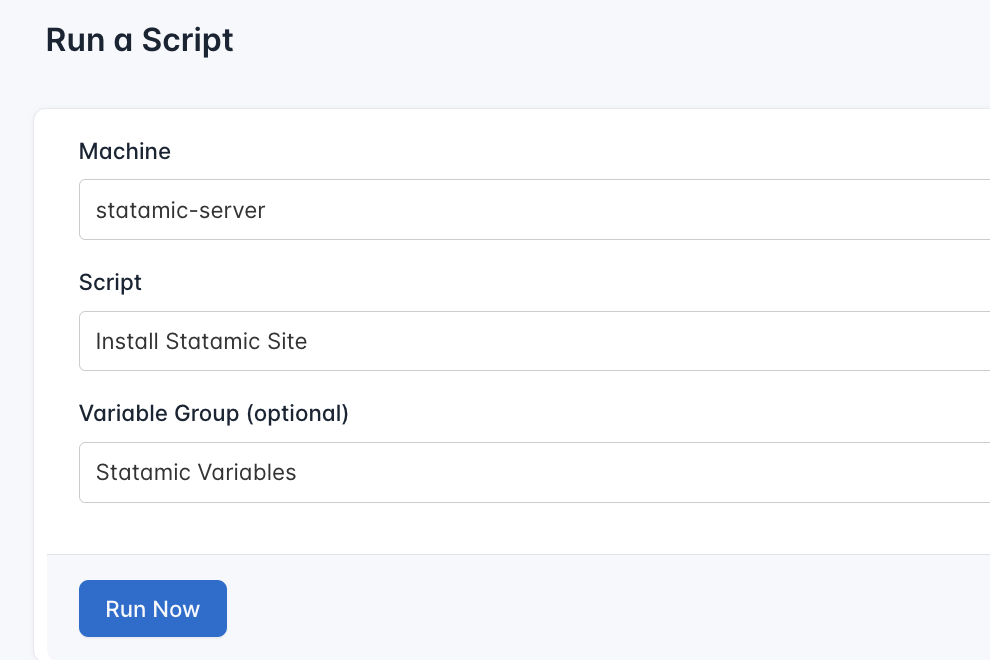
- Execute the Script: Click on Run Now to start the execution.
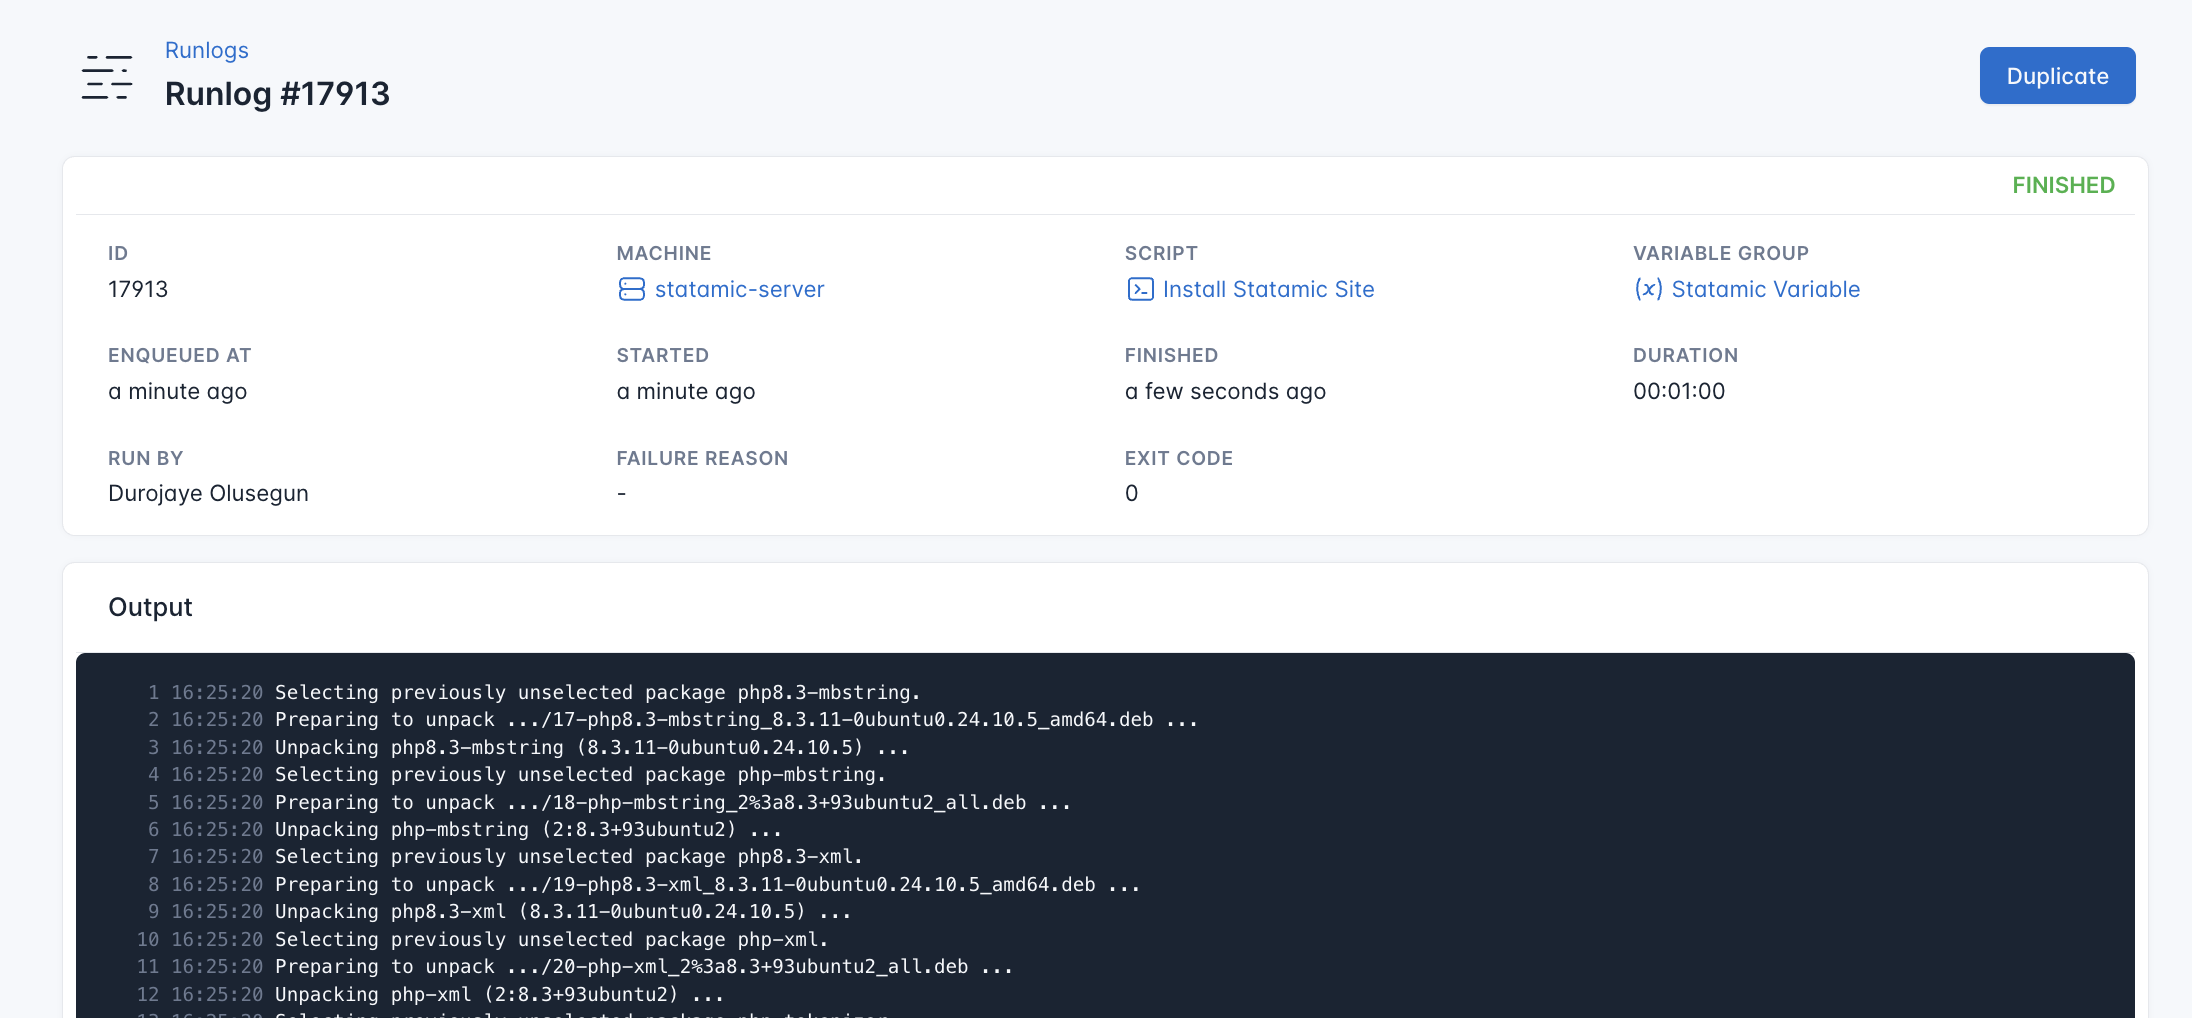
CloudRay will automatically connect to your server, run the Install Statamic Site, and provide live logs to track the process. If any errors occur, you can review the logs to troubleshoot the issue.
Once the deployment is complete, you can visit http://<your_domain>. You should see your Statamic site up and running.

Next Step
To improve your deployment and security:
- You can use Let’s Encrypt to add HTTPS support
- Use additional CloudRay scripts to automate database dumps, log rotation, or resource checks.
Summary
With CloudRay, automating the installation of Statamic to Ubuntu becomes a structured and repeatable process. Scripts remain organised, server access is centralised, and you can easily tweak configurations with variable groups. Storing this workflow in CloudRay means it’s versioned, reusable, and one‑click reproducible on any new Ubuntu machine.
For more installation guides and use cases, check out our CloudRay Guides or explore the CloudRay Docs.