
CloudRay makes it easy to automate application deployment across your infrastructure. Instead of juggling manual steps or switching between tools, you can integrate CloudRay with Terraform and GitHub to build a seamless deployment pipeline.
In this tutorial, you will learn how to use Terraform to provision infrastructure on DigitalOcean, and then configure CloudRay to automate the deployment and management of a Node.js application. Additionally, You will also learn how to implement a simple CI/CD pipeline using GitHub Actions and CloudRay webhook, so every push to your repository automatically triggers a deployment.
By the end, you’ll have a fully automated system that provisions a server, deploys your web app, and keeps it updated with zero manual effort.
Contents
- Prerequisites
- Provisioning Infrastructure with Terraform
- Configuring CloudRay for Automated Deployments
- Setting Up Continuous Deployment with GitHub and CloudRay
- Conclusion
Prerequisites
Before you begin, ensure you have the following set up:
- Terraform installed: You can install Terraform by following the official instructions
- CloudRay account: Sign up at https://app.cloudray.io
- DigitalOcean Personal Access Token: Create one via your DigitalOcean control panel. You will need this to authenticate Terraform with DigitalOcean
- SSH key added to your DigitalOcean account: Create and upload a key using this guide. Make note of the name you assign—it will be used in your Terraform configuration
- GitHub repository with a sample Node.js app: For this tutorial, we’ll use a sample Node.js app stored in GitHub. You can fork and clone this starter app or use your own
Provisioning Infrastructure with Terraform
Terraform lets you define infrastructure as code and supports a wide range of platforms through installable providers. Each provider acts as a bridge between Terraform and the APIs of the service you’re provisioning—like DigitalOcean in our case.
We will start by using Terraform to provision a virtual machine (droplet) on DigitalOcean. This will serve as the host for our Node.js application.
First, you create a project directory to house your infrastructure configuration files and navigate into the file:
mkdir infra-cloudray && cd infra-cloudrayNext, before running any terraform command, set the following environment variables to pass in your private SSH key and DigitalOcean API token securely. Replace the token value with your own generated token from the DigitalOcean dashboard:
export TF_VAR_pvt_key="~/.ssh/id_ed25519"
export TF_VAR_do_token="dop_v1_XXXXXXXXXXXXXXXXXXXXXXXXXXXX"
TIP
TF_VAR_ prefix allows you to pass environment variables to Terraform as input variables
Create a file named provider.tf which stores the configuration of the provider:
nano provider.tfThen add the following configuration into the file:
terraform {
  required_providers {
    digitalocean = {
      source  = "digitalocean/digitalocean"
      version = "~> 2.0"
    }
  }
}

provider "digitalocean" {
  token = var.do_token
}

data "digitalocean_ssh_key" "my_key" {
  name = "my_key"
}
This file sets up the Terraform provider configuration, which tells Terraform to use the DigitalOcean plugin and specifies your authentication token. Replace my_key with the exact name you used when uploading your SSH key to DigitalOcean.
Create the second file named variable.tf:
nano variables.tfAdd the following configurations into the file:
variable "do_token" {
  description = "DigitalOcean API token"
  type        = string
  sensitive   = true
}

variable "pvt_key" {
  description = "Path to the private SSH key"
  type        = string
  default     = "~/.ssh/id_ed25519"
}
This file declares input variables, including the DigitalOcean API token and your SSH private key path.
Finally, create the main infrastructure file named www-cloudray.tf:
nano www-cloudray.tfSimilarly, add the following configuration inside the file:
resource "digitalocean_droplet" "www-cloudray" {
  image  = "ubuntu-24-10-x64"
  name   = "www-cloudray"
  region = "nyc3"
  size   = "s-1vcpu-1gb"
  ssh_keys = [
    data.digitalocean_ssh_key.my_key.id
  ]

  connection {
    host        = self.ipv4_address
    user        = "root"
    type        = "ssh"
    private_key = file(var.pvt_key)
    timeout     = "2m"
  }
}
This is the main infrastructure file where we define our server. We use Ubuntu 24.10 and connect via SSH using your uploaded key. Furthermore, the configuration tells terraform to create a droplet named “www-cloudray”, use the SSH key you added to DigitalOcean and automatically connect connect using SSH for further provisioning.
Now, you initialize the terraform file:
terraform init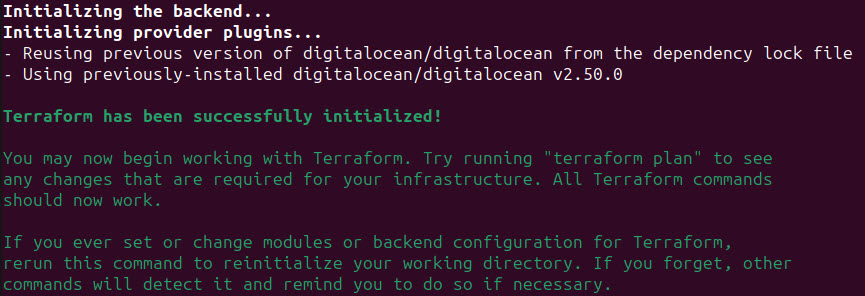
Next, you run the terraform plan to see your execution plan:
terraform plan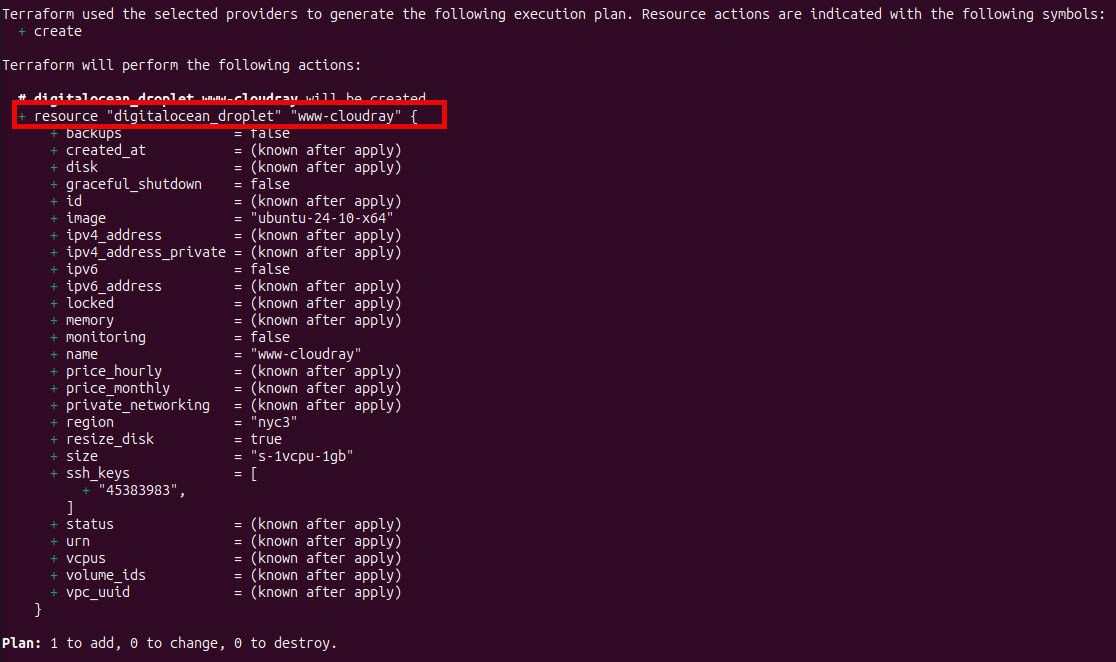
The + resource "digitalocean_droplet" "www-cloudray" shows that terraform will create a droplet resources named www-cloudray. Then, apply the configuration by running the command:
terraform applyWhen prompted, type yes to confirm.
After deployment, you can inspect the created infrastructure and get the server’s IP address using:
terraform show terraform.tfstate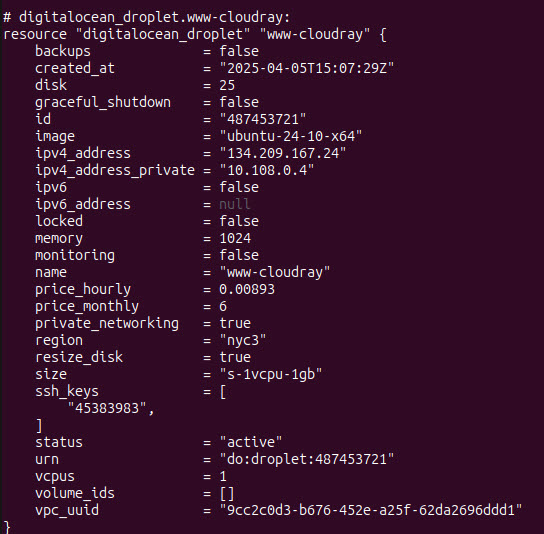
Now, you can add the server to CloudRay
Configuring CloudRay for Automated Deployments
Now that your DigitalOcean droplet is provisioned and added to CloudRay, let’s automate deployments using CloudRay’s script orchestration. This section covers:
- Creating a deployment script and webhook
- Modifying Terraform to trigger deployment of the application
Let’s get started.
Creating Deployment Script and CloudRay Webhook
First you create the deployment script by following these steps:
To create the setup script, you need to follow this steps:
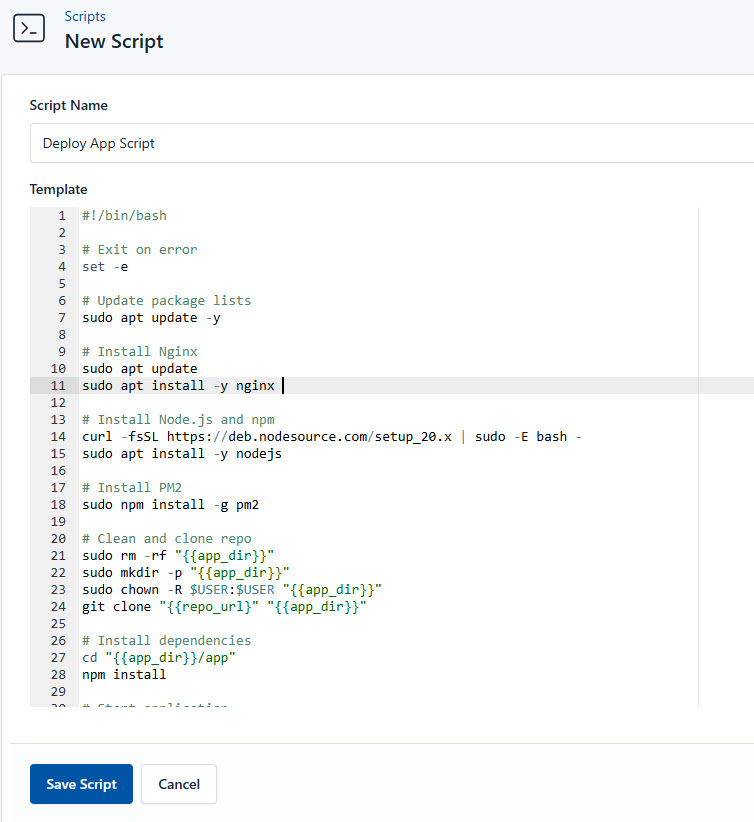
- Go to Scripts in your CloudRay project
- Click New Script
- Name:
Deploy App Script. You can give it any name of your choice - Copy this code:
#!/bin/bash

# Update package lists
sudo apt update -y

# Install Nginx
sudo apt update
sudo apt install -y nginx

# Exit on error
set -e

# Install Node.js and npm
curl -fsSL https://deb.nodesource.com/setup_20.x | sudo -E bash -
sudo apt install -y nodejs

# Install PM2
sudo npm install -g pm2

# Clean and clone repo
sudo rm -rf "{{app_dir}}"
sudo mkdir -p "{{app_dir}}"
sudo chown -R $USER:$USER "{{app_dir}}"
git clone "{{repo_url}}" "{{app_dir}}"

# Install dependencies
cd "{{app_dir}}/app"
npm install

# Start application
pm2 start server.js --name nodeapp
pm2 save
pm2 startup

sudo bash -c "cat > /etc/nginx/sites-available/nodeapp" <<EOF
server {
    listen 80;
    server_name {{domain}} www.{{domain}};
    location / {
        proxy_pass http://127.0.0.1:3000;
        proxy_http_version 1.1;
        proxy_set_header Upgrade \$http_upgrade;
        proxy_set_header Connection 'upgrade';
        proxy_set_header Host \$host;
        proxy_cache_bypass \$http_upgrade;
    }
}
EOF

# Enable config
sudo ln -sf /etc/nginx/sites-available/nodeapp /etc/nginx/sites-enabled/
sudo nginx -t
sudo systemctl restart nginx

# SSL with Certbot
sudo apt install -y certbot python3-certbot-nginx
sudo certbot --nginx -d {{domain}} -d www.{{domain}} --email {{email}} --agree-tos --non-interactive
sudo systemctl reload nginx
Here is a breakdown of what each command in the Deploy App Script does:
- Sets up the web server and runtime environment
- Clones your Node.js repository and installs dependencies
- Runs app as a managed background service
- Routes web traffic to your Node.js app
- Automatically provisions Let’s Encrypt SSL certificates
before using the scripts, you need to define values for the placeholders {{app_dir}}, {{repo_url}}, {{domain}}, and {{email}}, used in the scrips. CloudRay processes all scripts as Liquid templates. This allows you to use variables dynamically across different servers.
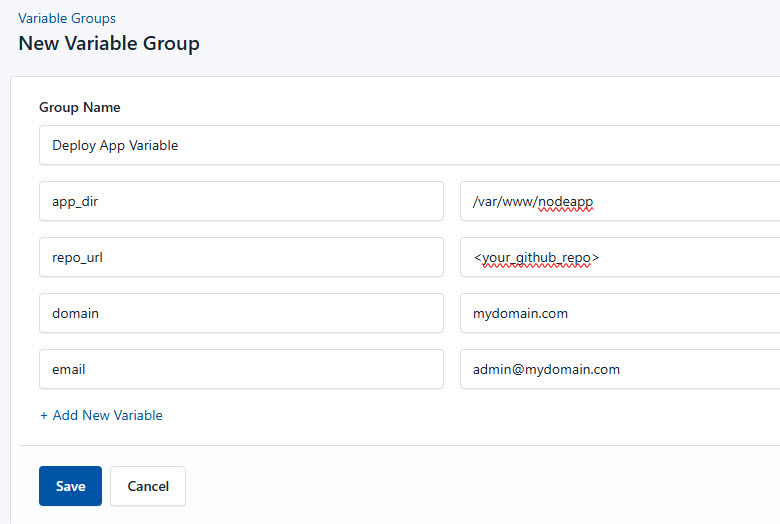
To ensure that these values are automatically substituted when the script runs, follow these steps to create a variable Group:
- Navigate to Variable Groups: In your CloudRay project, go to “Scripts” in the top menu and click on “Variable Groups”.
- Create a new Variable Group: Click on “Variable Group”.
- Add the following variables:
{{app_dir}}: This is the application install path{{repo_url}}: This is the GitHub repository URLdomain: The registered domain name for SSL certificate configurationemail: The email address associated with the SSL certificate (used for renewal alerts)
Since the script and variables are setup, proceed to creating a Webhook for the deployment script.
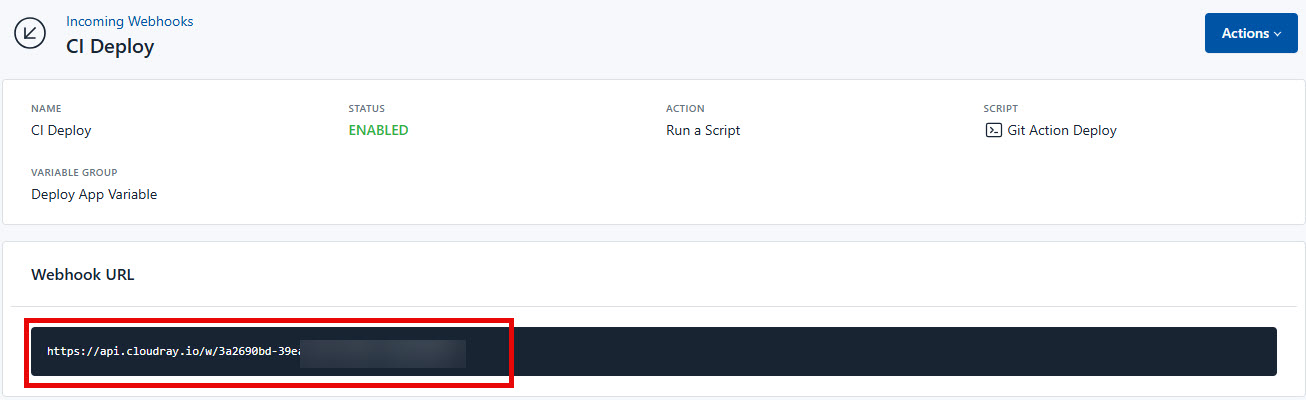
To create an Incoming Webhook in CloudRay follow these steps:
- In CloudRay navigate and click on “Incoming Webhooks”
- Click on “New Incoming Webhook” and fill in the detials to create the Webhook
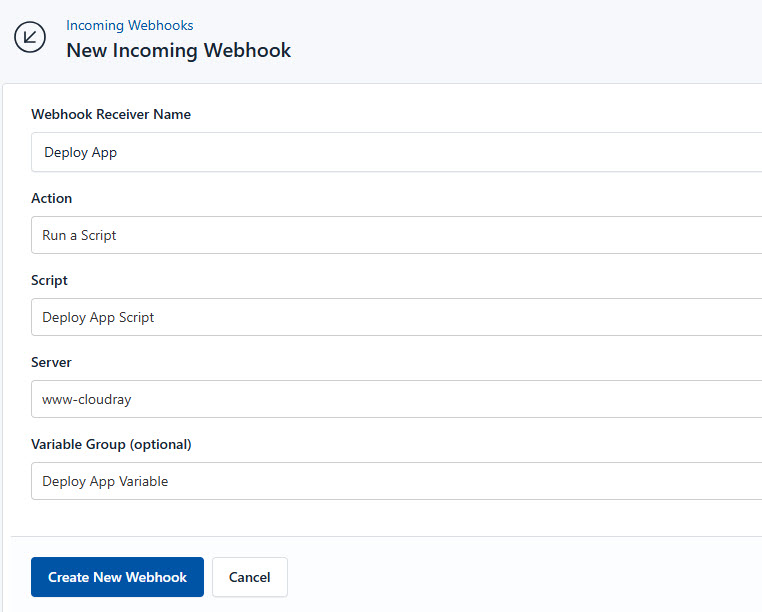
- Click “Create New Webhook”. This will generate a unique URL for your webhook
Now that your deployment script and CloudRay webhook are ready, the final step is to make sure Terraform can trigger that webhook
Integrating CloudRay Webhook in Terraform
We can update our Terraform configuration to trigger the CloudRay webhook after the droplet is successfully provisioned. Instead of using the remote-exec provisioner, we use a null_resource block with a local-exec provisioner, which runs the webhook call locally from the machine running Terraform.
Update your www-cloudray.tf file:
nano www-cloudray.tfAdd the following null_resource configuration outside the droplet block:
...
resource "null_resource" "trigger_cloudray_webhook" {
  provisioner "local-exec" {
    command = <<EOT
      curl -X POST \
        https://api.cloudray.io/w/58b3b37d-a77c-4b22-a6bc-ef3e2af8af34 \
        -H "Content-Type: application/json" \
        -d '{"test": false}'
    EOT
  }

  depends_on = [digitalocean_droplet.www-cloudray]
}
...
This tells Terraform to trigger the CloudRay webhook only after the www-cloudray droplet has been successfully created.
Your updated www-cloudray.tf file should now look like this:
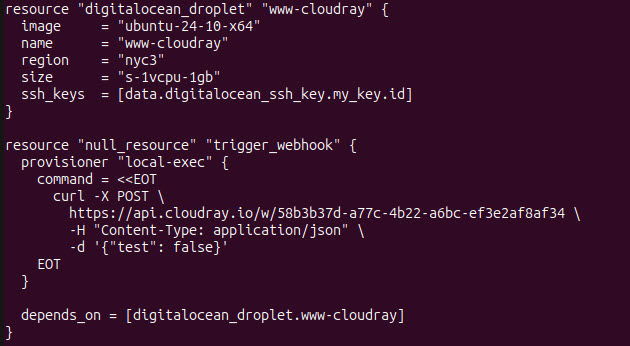
This approach ensures that the webhook is triggered reliably during the provisioning process without the need for SSH access into the droplet.
Before applying your changes, reinitialize your Terraform project and upgrade any modules or providers:
terraform init -upgradeThen apply the configuration:
terraform applyOnce terraform apply completes successfully, head over to your CloudRay Runlog to confirm that the webhook was received and the deployment job ran successfully.
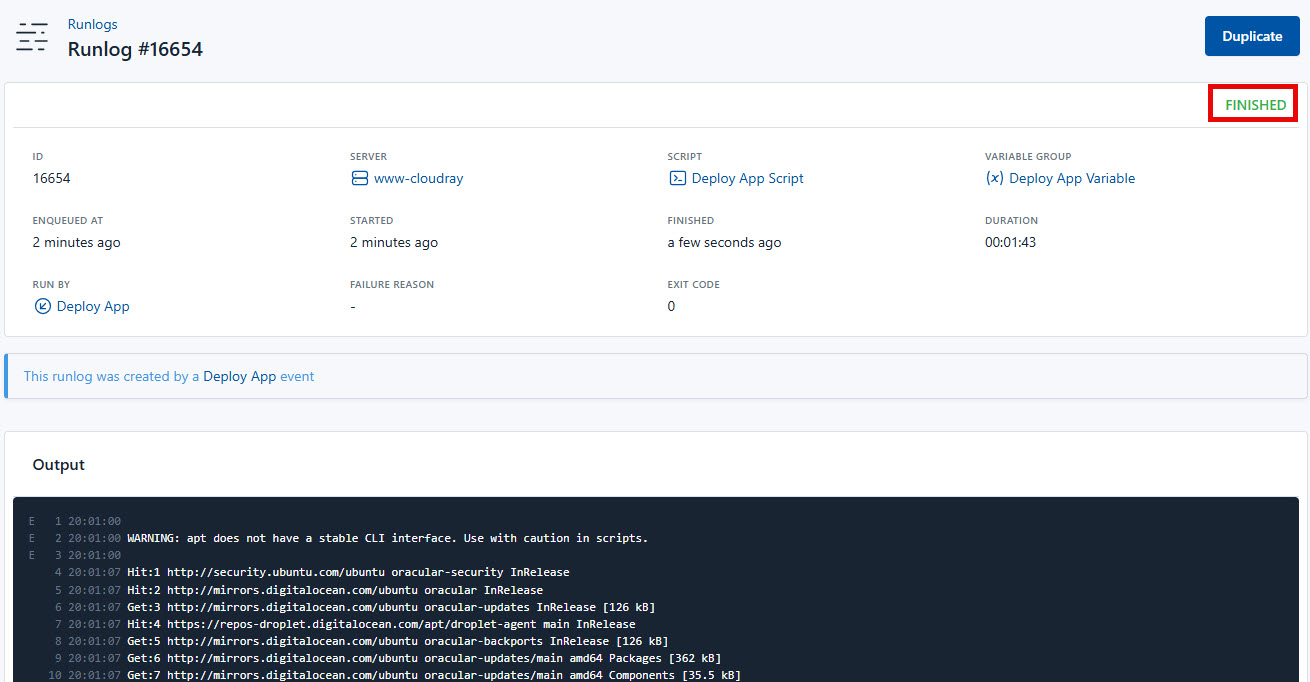
Open your browser and navigate to your configured domain (e.g., https://www.mydomain.com). You should now see your application live and running on the newly provisioned droplet.

Setting Up Continuous Deployment with GitHub and CloudRay
To automate your deployment pipeline, we’ll integrate GitHub Actions with CloudRay so that any push to the main branch triggers a webhook, which then updates your server with the latest code.
First, let’s create the script on CloudRay to update always update the application. You can follow similar process as the above and use this code:
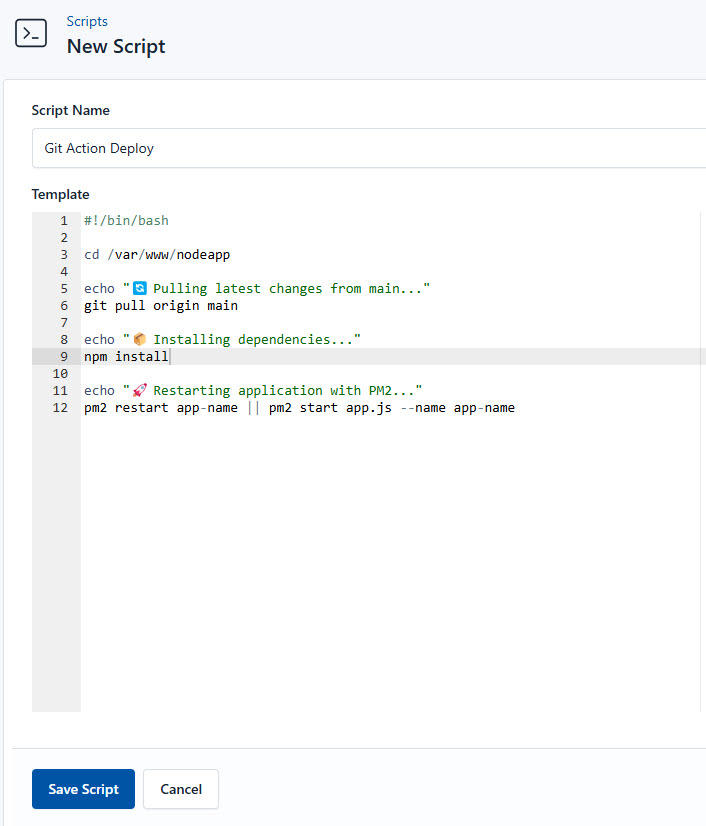
#!/bin/bash
set -e  # Exit immediately if any command fails

# Navigate to project root
cd /var/www/nodeapp

echo "➡️ Pulling latest changes..."
git pull origin main

# Move to app directory
cd app

echo "📦 Installing dependencies..."
npm install

echo "🔄 Restarting application..."
pm2 restart nodeapp || (pm2 delete nodeapp && pm2 start server.js --name nodeapp)
Next, we also create a Webhook following similar steps as discussed earlier
Then go to the project repository (the node.js application), create a directory and file:
mkdir -p .github/workflows
touch .github/workflows/deploy.yml
Then add the following content to .github/workflows/deploy.yml:
name: Deploy to CloudRay

on:
  push:
    branches: [ main ]

jobs:
  deploy:
    runs-on: ubuntu-latest
    steps:
      - name: Trigger CloudRay Webhook
        env:
          WEBHOOK_URL: ${{ secrets.CLOUDRAY_WEBHOOK }}
        run: |
          curl -X POST "$WEBHOOK_URL" \
            -H "Content-Type: application/json" \
            -d '{"test": false}'
To add your CloudRay webhook to GitHub secrets, follow these steps:
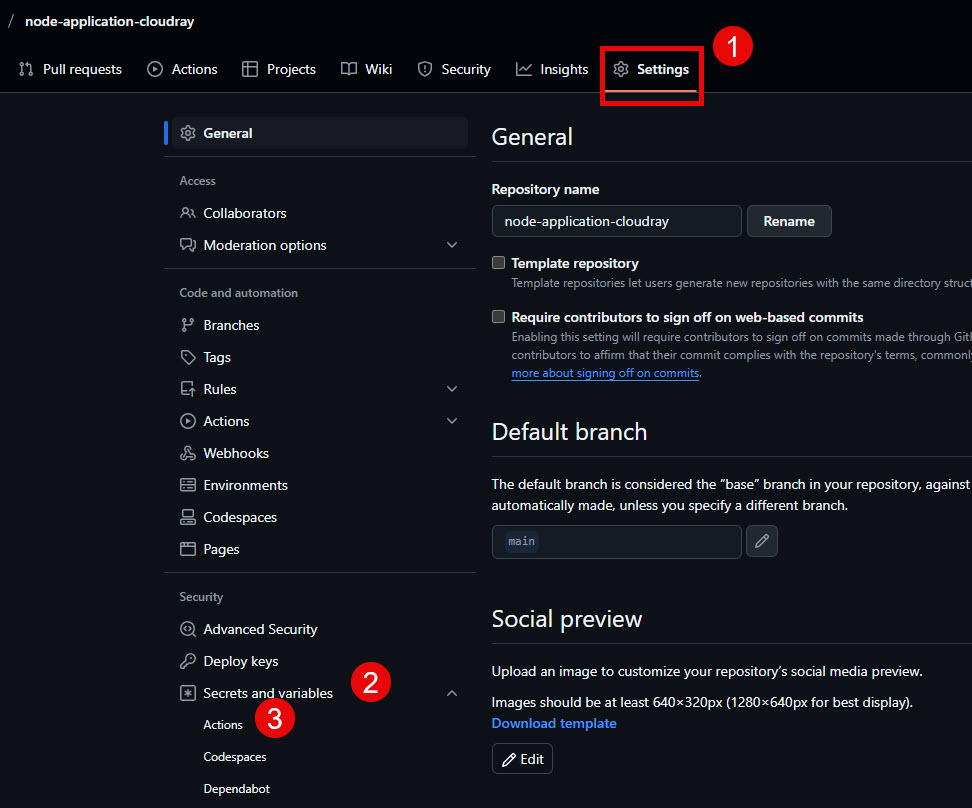
- Go to your GitHub repo Settings → Secrets → Actions
- Click “New repository secret”

- Name: CLOUDRAY_WEBHOOK
- Value: Paste your CloudRay webhook URL
- Click “Add secret”
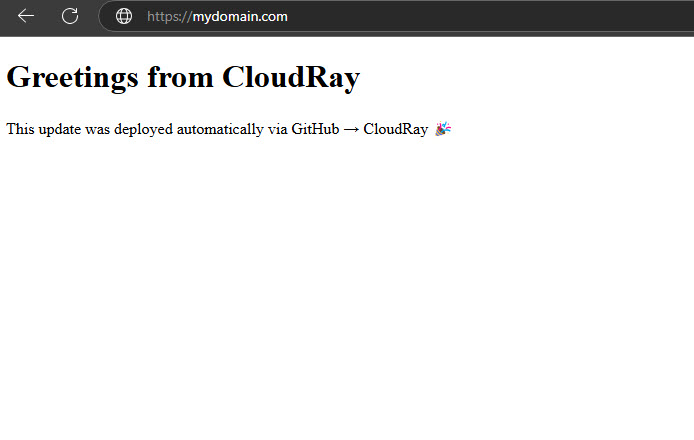
Finally, let’s test the pipeline, make a changes on the application (modify the index.html file):
<!DOCTYPE html>
<html lang="en">
<head>
    <meta charset="UTF-8">
    <meta name="viewport" content="width=device-width, initial-scale=1.0">
    <title>Welcome</title>
</head>
<body>
    <h1>Greetings from CloudRay</h1>
    <p>This update was deployed automatically via GitHub → CloudRay 🎉</p>
</body>
</html>
Commit and push to main:
git add .
git commit -m "Test CI/CD pipeline"
git push origin main
Watch the process, GitHub Actions will show the workflow running.

Additionally, CloudRay will display the script execution in Run Logs.

Finally, visit your domain to see changes live within seconds.
Conclusion
By following this guide, you’ve successfully built a complete infrastructure automation and CI/CD pipeline that combines Terraform, DigitalOcean, CloudRay, and GitHub Actions.
The entire process from server creation to application updates now happens automatically whenever you push code changes, giving you more time to focus on development rather than deployment tasks.
Ready to streamline your own deployment workflow? Sign up for CloudRay today and experience the power of infrastructure automation firsthand.

Olusegun Durojaye
CloudRay Engineering Team