Incoming Webhooks
Incoming webhooks are your gateway to seamless integration with external services and events. By creating a Webhook Receiver, you generate a unique URL that can be used as a webhook endpoint in other applications or platforms. Whenever that URL is called, CloudRay can automatically trigger actions like running a script.
Key Features
Here are the key features of using CloudRay’s Incoming Webhooks:
- Generate unique, secure endpoints for external services
- Trigger scripts or script playlists automatically
- Access webhook data (headers, body, query params) in your scripts
- Monitor executions via detailed Runlogs
How Incoming Webhooks Work
The following diagram illustrates the flow of incoming webhooks from external services through CloudRay to script execution:

Creating a Webhook Receiver
Setting up a webhook in CloudRay takes just three steps to connect external services to your automation workflows:
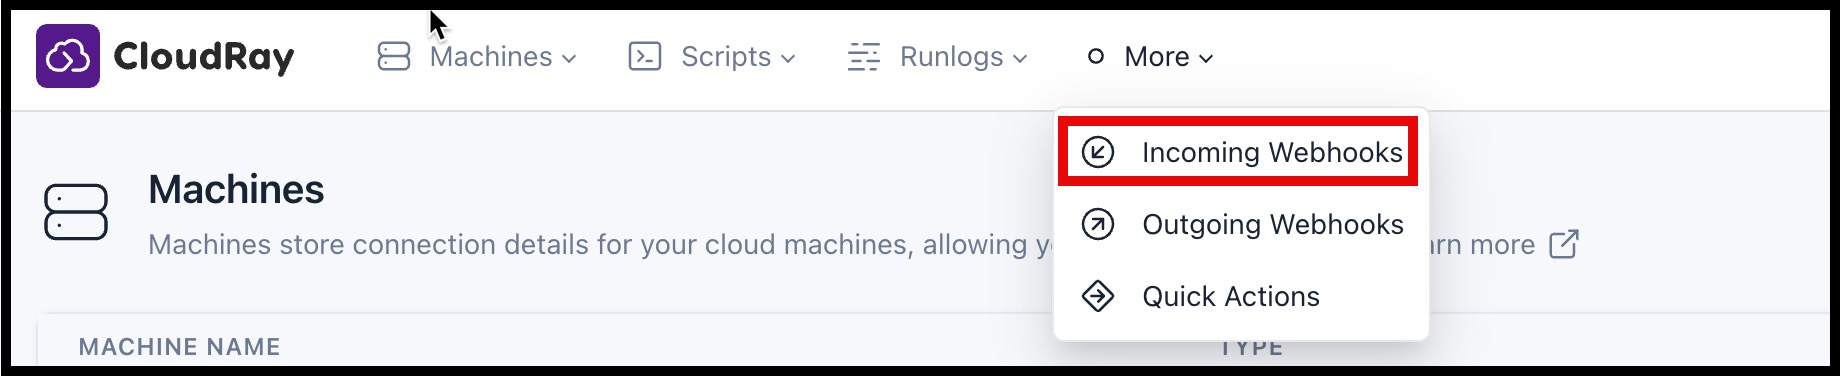
- Create a Webhook Receiver: In CloudRay, navigate to the “More” tab and click “Incoming Webhooks”

- Configure the Receiver: Click on “New Incoming Webhook”

- Webhook Receiver Name: Give your receiver a descriptive name (For Example “GitHub Push Event”, “Payment Notification”)
- Action: Currently, the main action is “Run a Script”
- Script/Script Playlist: Select the script or script playlist you want to execute when the webhook is triggered (For Example “Deploy-Production”)
- Variable Group (Optional): If your script uses variables, choose the appropriate variable group
- Save and Get URL: Click “Create New Webhook”. This will generate a unique URL for your webhook
Using the Webhook URL
Once created, your webhook URL becomes a live endpoint ready to trigger automations. You can use it for several purposes:
- External Integration: Copy the generated URL and paste it into the webhook configuration of your external service (e.g., GitHub, Stripe, Zapier).
- Triggering Events: When an event occurs in the external service (e.g., a new commit, a payment), it will send an HTTP request to your CloudRay webhook URL.
- CloudRay Action: CloudRay will receive the request, process any data included (query parameters or request body), and trigger the associated action (e.g., running your script).
Example: Deploy an Apache Server
Scenario: Automatically deploy Apache to your production server when receiving a webhook trigger (e.g., from a CI/CD pipeline or deployment tool).
- Create the Deployment Script: First, create a new script in CloudRay named “Deploy Apache” with:
#!/bin/bash

# Install/update Apache on webhook trigger
sudo dnf install httpd -y
sudo systemctl enable --now httpd
sudo firewall-cmd --add-service=http --permanent
sudo firewall-cmd --reload
echo "Apache deployed at $(date)" >> /var/log/apache-deploy.log- Configure the Receiver:
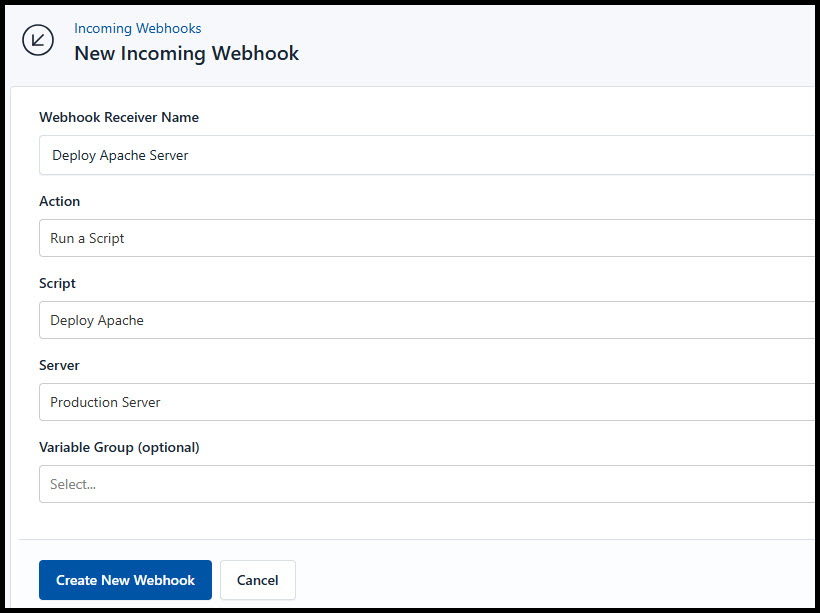
- Webhook Receiver Name: Give it a name “Deploy Apache Server”
- Action: Currently, the main action is “Run a Script”
- Script/Script Playlist: select the script “Deploy Apache”
- Variable Group (Optional): If your script uses variables, choose the appropriate variable group
- Save and Get URL: Click “Create New Webhook”. This will generate a unique URL for your webhook
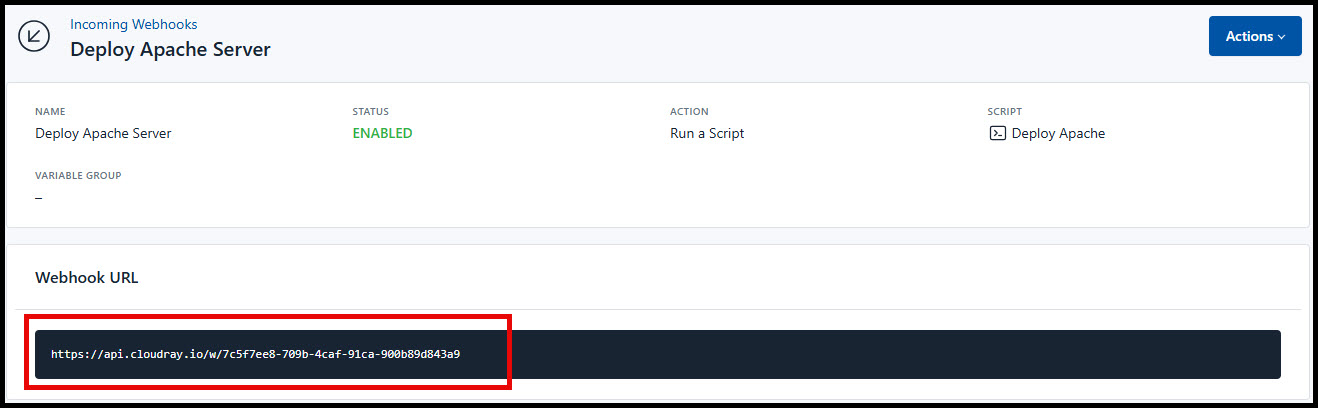
You can copy this URL into your CI/CD pipeline (example Jenkins, GitLab CI, etc.). However, you can also trigger a deployment from your terminal:
curl -X POST \
  https://your-cloudray-webhook \
  -H "Content-Type: application/json" \
  -H "Content-Length: 0" \
  -d '{"test":true}'
Then verify by checking Runlogs for the execution status.
Data Access in Scripts
When your script is triggered by a Webhook Receiver, you have access to the following data through built-in CloudRay variables:
{{ cr.webhook_query_params }}: This contains any query parameters included in the webhook URL{{ cr.webhook_post_body }}: This contains the body of the POST request (if any) sent by the external service
You can use these variables within your script template to dynamically respond to the webhook data.
Important Considerations
When working with incoming webhooks, keep these critical factors in mind to ensure secure and reliable automation:
- Security: Be mindful of potential security risks when exposing a webhook endpoint to the internet. Consider using authentication mechanisms or IP whitelisting to restrict access to your webhook
- Data Validation: Always validate and sanitise any data received from the webhook before using it in your scripts to prevent vulnerabilities
- Debugging: Use Runlogs to inspect the data received from webhooks and troubleshoot any issues with your scripts or integrations