CloudRay Agent on Azure
You can deploy the CloudRay Agent on Azure Virtual Machines using two main approaches:
- Option 1: Installing during VM creation using Azure Custom Data (cloud-init)
- Option 2: Installing manually on existing VMs via SSH or Azure Bastion
The CloudRay Agent enables secure, real-time server management and metric collection without requiring SSH access to your virtual machine.
TIP
Make sure you have a CloudRay account and locate your REG_CODE in your project dashboard.
Option 1: New Azure VM (via User Data)
Use cloud-init to automatically install and register the CloudRay Agent when provisioning a new virtual machine.
- In the Azure Portal, begin creating a new Virtual Machine.
- Under the Advanced tab, find the Custom data section.
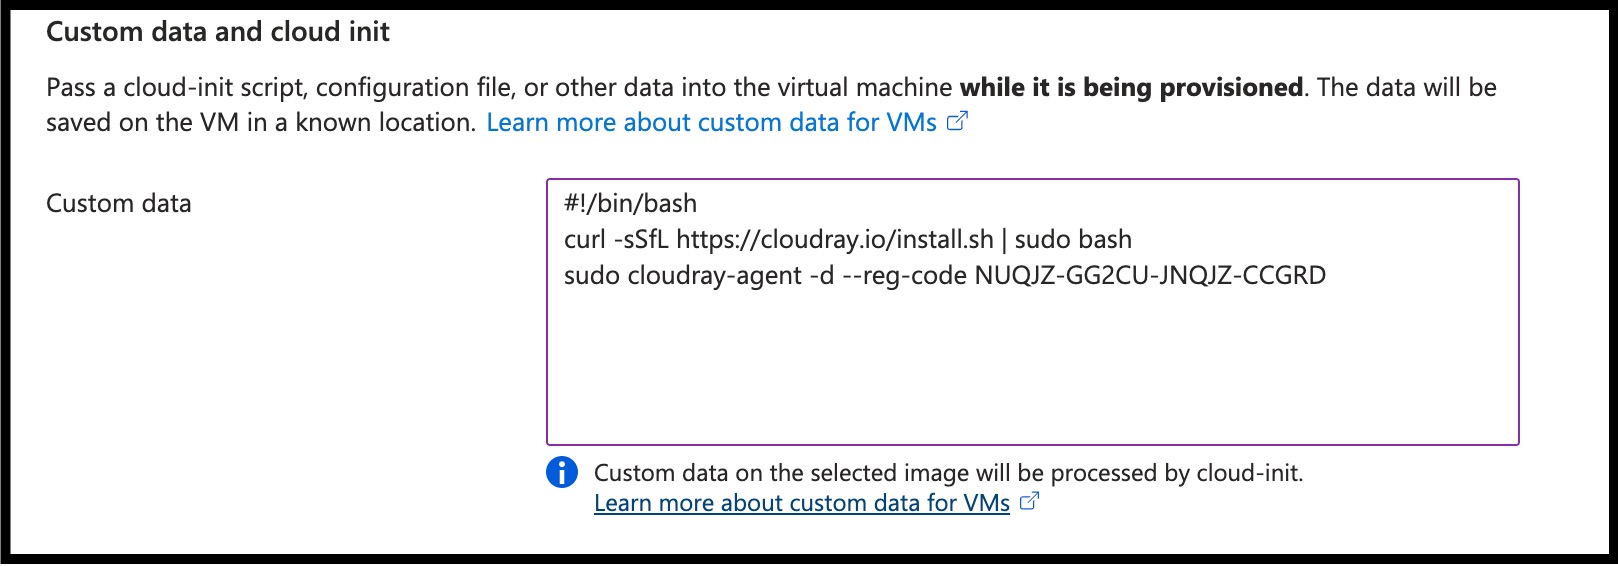
- Paste the following cloud-init compatible shell script (replace
<REG_CODE>):
#!/bin/bash
curl -sSfL https://cloudray.io/install.sh | sudo bash
sudo cloudray-agent install-service --reg-code <REG_CODE>
The installation script is safe to run multiple times. It checks for existing Agent and upgrades them if a newer version is available.
- Complete the rest of the VM creation steps and deploy the instance.
Option 2: Existing Azure VMs
If you already have a running virtual machine, you can install the Agent manually using SSH or Azure Bastion.
- Connect to your VM via SSH or Azure Bastion
- Run the following commands:
curl -sSfL https://cloudray.io/install.sh | sudo bash
sudo cloudray-agent install-service --reg-code <REG_CODE>- Head to your CloudRay dashboard, go to Machines, and verify that your Azure VM is listed as connected.
Alternative: Connect via SSH
If you can’t install the CloudRay Agent, you can still manage your machines using SSH. See SSH-Based Servers to get started with traditional SSH connections.