
This guide outlines a method for deploying isolated WordPress instances with enhanced security measures, leveraging automated provisioning through bash scripts executed via CloudRay.
The deployment model addresses three core requirements:
- User-level process isolation where each WordPress instance runs under its own Linux system account
- Database security via separate MySQL accounts
- Automated SSL certificate provisioning
This approach prevents cross-site contamination from common WordPress threats including malware infections via vulnerable plugins, credential stuffing attacks, and file inclusion exploits.
Contents
- Adding Servers to CloudRay
- Create the Automation Script
- Create a Variable Group
- Running the Script with CloudRay
- Restart WordPress Server (Optional)
- Managing WordPress Files After Deployment
Adding Servers to CloudRay
Before getting started with your automation, make sure your target servers are connected to CloudRay. If you haven’t done this yet, follow our servers docs to add and manage your server
NOTE
This guide uses Bash scripts, providing a high degree of customisation. You can adapt the scripts to fit your specific Installations needs and environment. Additionally, if you’re using a different version or a different distribution, adjust the commands accordingly
Create the Automation Script
To streamline the deployment and management processes, you’ll need three Bash scripts:
- Server Environment Setup: Installs dependencies, creates users, and configures the server environment
- Deploy Wordpress: Downloads WordPress, configures databases, and sets up Caddy virtual hosts
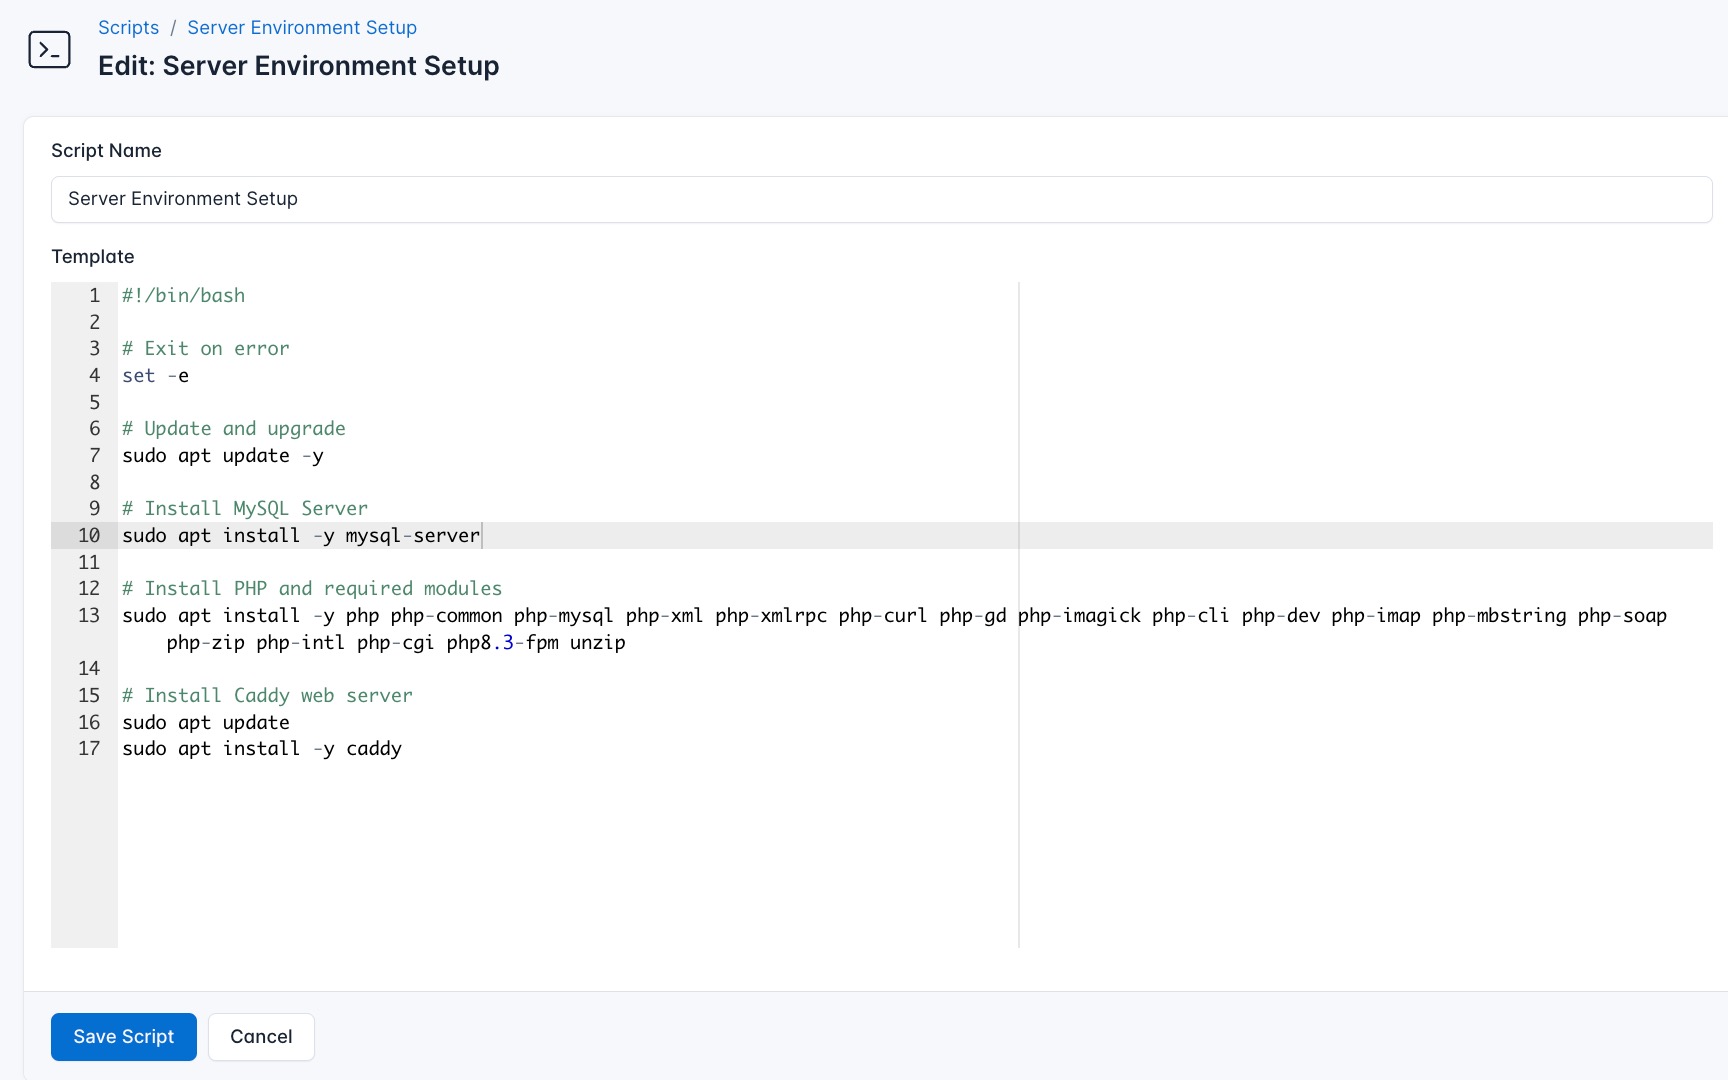
Server Environment Setup
This script prepares your server by installing all required dependencies and configuring the base environment for isolated WordPress installations. To create the Server Environment Setup script, you need to follow these steps:
- Go to Scripts in your CloudRay project
- Click New Script
- Name:
Server Environment Setup. You can give it any name of your choice. - Copy this code:
#!/bin/bash

# Exit on error
set -e

# Update and upgrade
sudo apt update -y

# Install PHP and required modules
sudo apt install -y php php-common php-mysql php-xml php-xmlrpc php-curl php-gd php-imagick php-cli php-dev php-imap php-mbstring php-soap php-zip php-intl php-cgi php8.3-fpm unzip

# Install Caddy web server
sudo apt update
sudo apt install -y caddy
Below is a breakdown of what the Server Environment Setup does:
- Updates all system packages to their latest versions
- Installs PHP 8.3 with FPM pools optimised for WordPress
- Deploys Caddy with automatic HTTPS configuration
This script assumes MySQL is already installed. For configuring a remote MySQL server instead, see our MySQL Server Guide.
Deploy Wordpress
Once your server environment is prepared, this script handles the actual WordPress deployment process for each isolated user account. It takes care of downloading WordPress, configuring database connections, setting appropriate permissions, and configuring Caddy to serve each site securely.
To create the Deploy WordPress Script, follow these steps:
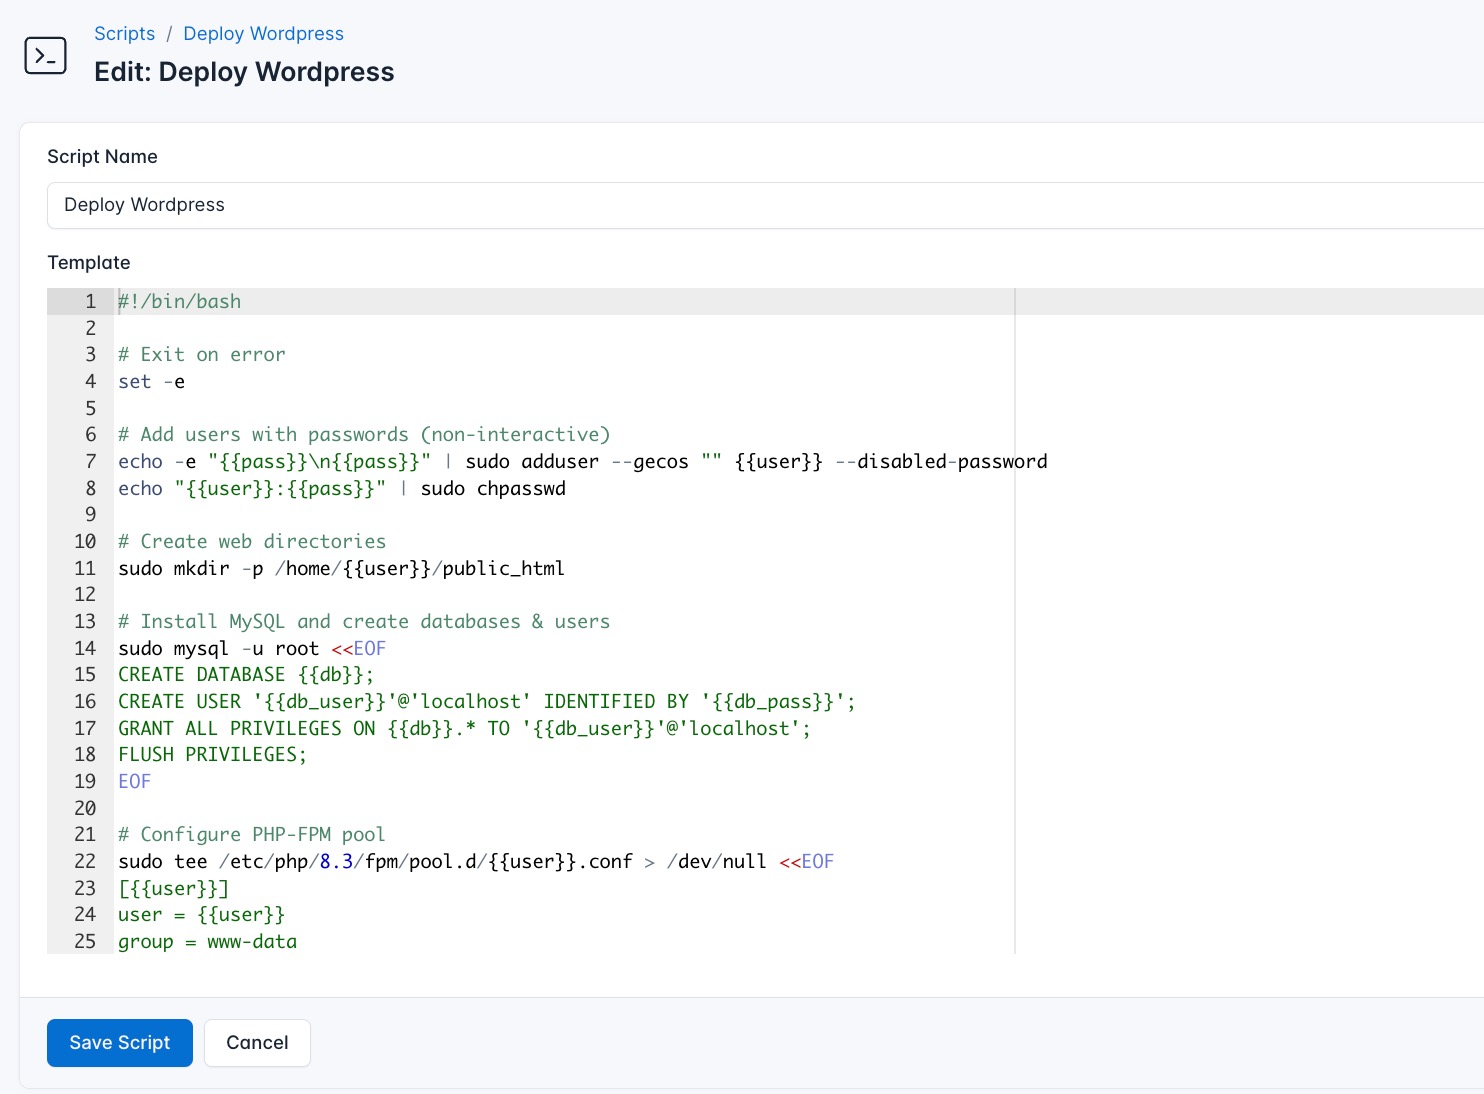
- Go to Scripts > New Script
- Name:
Deploy Wordpress - Add code:
#!/bin/bash

# Exit on error
set -e

# Add users with passwords (non-interactive)
echo -e "{{pass}}\n{{pass}}" | sudo adduser --gecos "" {{user}} --disabled-password
echo "{{user}}:{{pass}}" | sudo chpasswd

# Create web directories
sudo mkdir -p /home/{{user}}/public_html

# Install MySQL and create databases & users
sudo mysql -u root <<EOF
CREATE DATABASE {{db}};
CREATE USER '{{db_user}}'@'localhost' IDENTIFIED BY '{{db_pass}}';
GRANT ALL PRIVILEGES ON {{db}}.* TO '{{db_user}}'@'localhost';
FLUSH PRIVILEGES;
EOF

# Configure PHP-FPM pool
sudo tee /etc/php/8.3/fpm/pool.d/{{user}}.conf > /dev/null <<EOF
[{{user}}]
user = {{user}}
group = www-data
listen = /run/php/{{user}}.sock
listen.owner = www-data
listen.group = www-data
pm = dynamic
pm.max_children = 5
pm.start_servers = 2
pm.min_spare_servers = 1
pm.max_spare_servers = 3
chdir = /
security.limit_extensions = .php
php_admin_value[error_log] = /var/log/php8.3-fpm/{{user}}-error.log
php_admin_flag[log_errors] = on
EOF

# Restart PHP-FPM service
sudo systemctl restart php8.3-fpm

# Set ownership and permissions
sudo chown -R {{user}}:{{user}} /home/{{user}}
sudo chmod 755 /home/{{user}}/public_html

# Download and configure WordPress for USER
sudo -u {{user}} bash <<EOF
cd ~/public_html
wget https://wordpress.org/latest.tar.gz
tar xzf latest.tar.gz --strip-components=1
rm latest.tar.gz
cp wp-config-sample.php wp-config.php
sed -i "s/database_name_here/{{db}}/" wp-config.php
sed -i "s/username_here/{{user}}/" wp-config.php
sed -i "s/password_here/{{db_pass}}/" wp-config.php
EOF

# Set final permissions
sudo chown -R {{user}}:www-data /home/{{user}}/public_html
sudo find /home/{{user}}/public_html -type d -exec chmod 750 {} \;
sudo find /home/{{user}}/public_html -type f -exec chmod 640 {} \;
sudo chmod 600 /home/{{user}}/public_html/wp-config.php
sudo chmod 710 /home/{{user}}
sudo chown -R {{user}}:www-data /home/{{user}}
sudo chmod 750 /home/{{user}}
sudo chmod 755 /home/{{user}}/public_html
sudo -u www-data ls -la /home/{{user}}/public_html

# Setup Caddy configuration
sudo tee /etc/caddy/Caddyfile > /dev/null <<EOF
{{domain}} {
    root * /home/{{user}}/public_html
    php_fastcgi unix//run/php/{{user}}.sock
    file_server
    encode gzip
}
EOF

# Reload Caddy and check services
sudo systemctl reload caddy
sudo systemctl status php8.3-fpm caddy
This is what the Deploy Wordpress does:
- Creates Linux user (For example,
{{user1}}) with dedicated directory - Sets strict file ownership (user:www-data) and socket permissions
- Sets ownership and permissions for the user web directory
- Downloads and extracts WordPress for user under its isolated directory
- Configures unique database credentials in
wp-config.phpfor each instance - Applies secure file and directory permissions to protect sensitive files and limit access
- Generates a Caddyfile with virtual host configurations for domains, mapping each to its respective PHP-FPM pool
- Reloads Caddy and verifies service status to apply the changes
With this script, your WordPress sites will be fully deployed, isolated by user accounts, securely served over HTTPS via Caddy.
Create a Variable Group
Before running the scripts, you need to define values for the placeholders {{user}}, {{pass}}, {{db}}, {{db_user}}, {{db_pass}}, and {{domain}} used in the scrips. CloudRay processes all scripts as Liquid templates. This allows you to use variables dynamically across different servers.
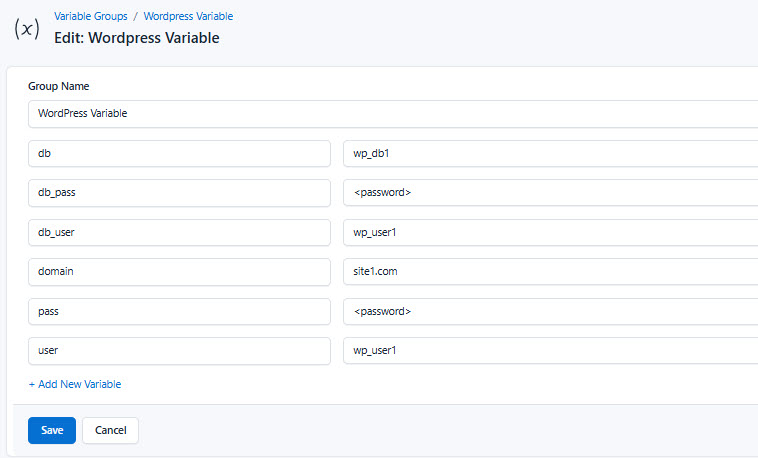
To ensure that these values are automatically substituted when the script runs, follow these steps to create a variable group:
- Navigate to Variable Groups: In your CloudRay project, go to “Scripts” in the top menu and click on “Variable Groups”.
- Create a new Variable Group: Click on “Variable Group”.
- Add the following variables:
user: The Linux system users for the Wordpress sitepass: The password for the Linux usersdb: The name of the MySQL database for the Wordpress sitedb_user: The MySQL usernamedb_pass: The password of the database usersdomain: The domain name associated with the Wordpress site
Running the Script with CloudRay
You can run the scripts individually or execute them all at once using CloudRay’s Script Playlists. The deployment process involves two distinct phases:
- Server Environment Setup: Run once per server to install dependencies
- WordPress Deployment: Run separately for each site you want to deploy
Running Server Environment Setup Script
Follow these steps:
- Navigate to Runlogs in your CloudRay project
- Click New Run a Script
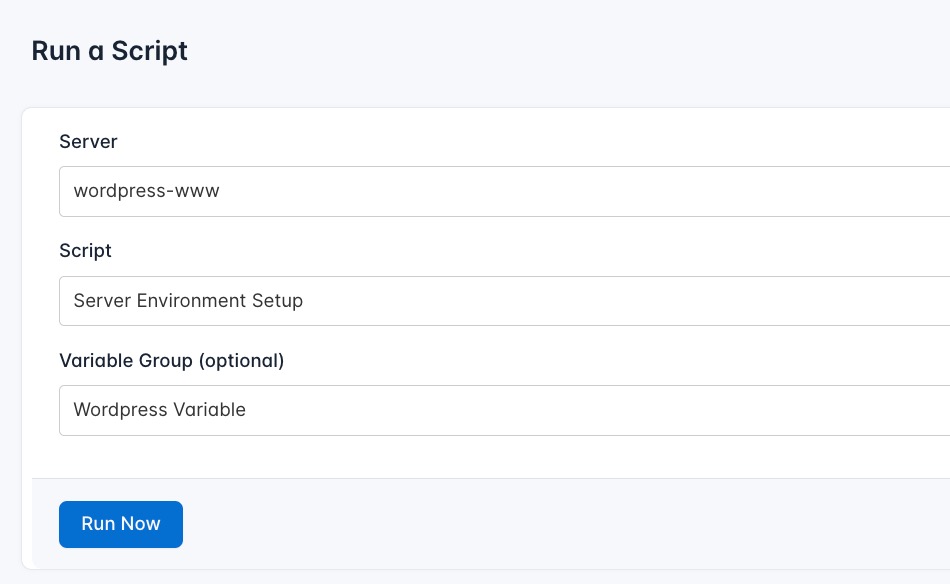
- Configure the runlog:
- Server: Select your target server
- Script: Choose “Server Environment Setup”
- Variable Group: Select the variable group you created earlier
- Run the script: Click on “Run” to execute the script on your server
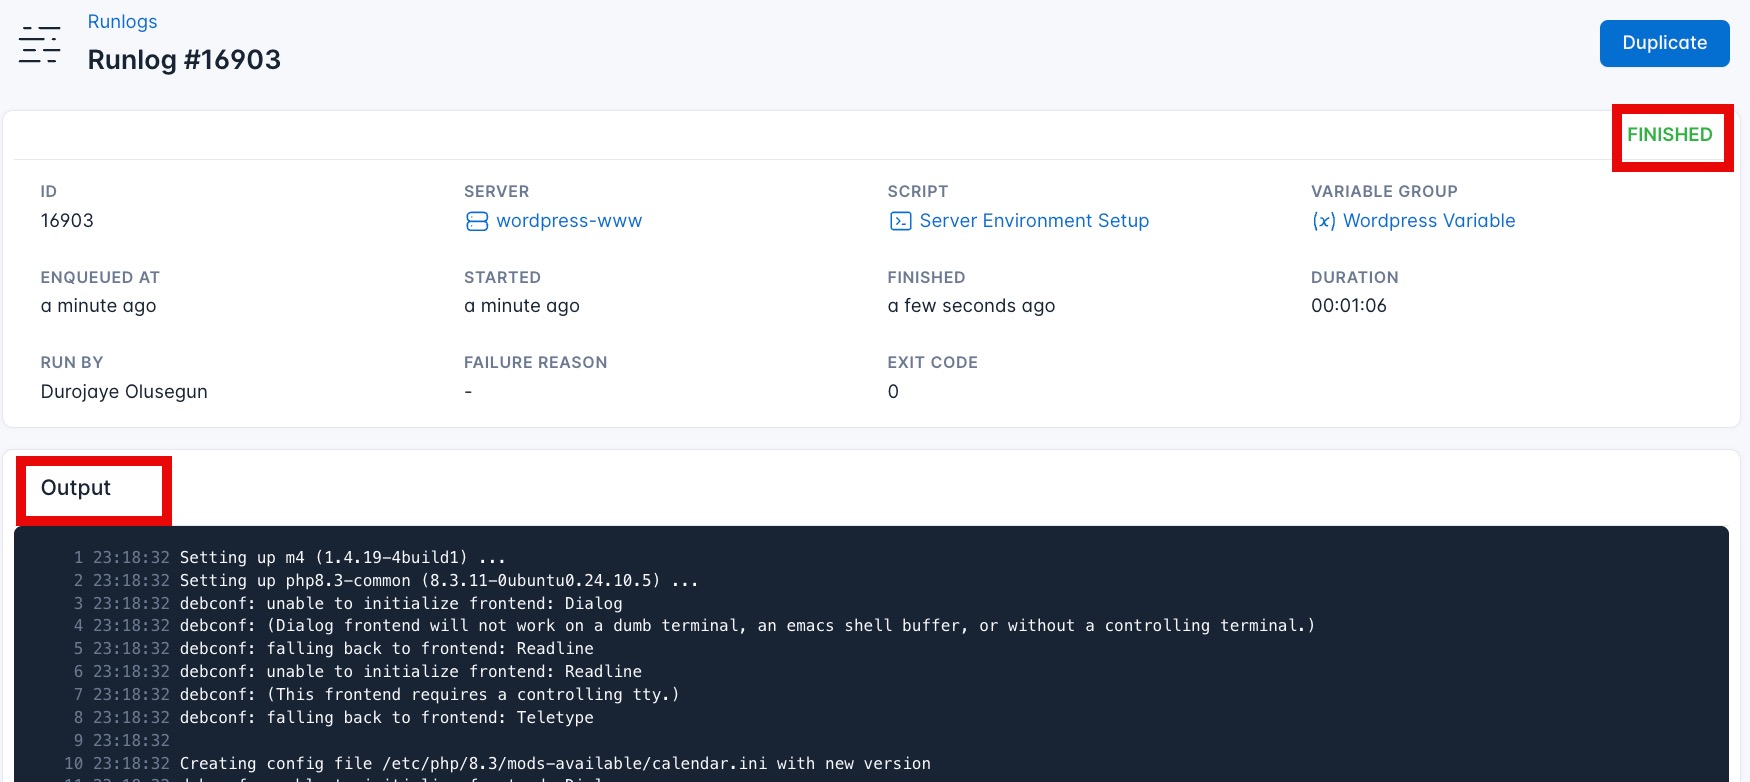
CloudRay will connect to your server, run the Server Environment Setup script, and show you the live output as the script executes. This one-time setup installs all required system packages and services. You only need to run this script once when setting up a new server.
Running the Deploy WordPress Script
For each WordPress site you want to deploy:
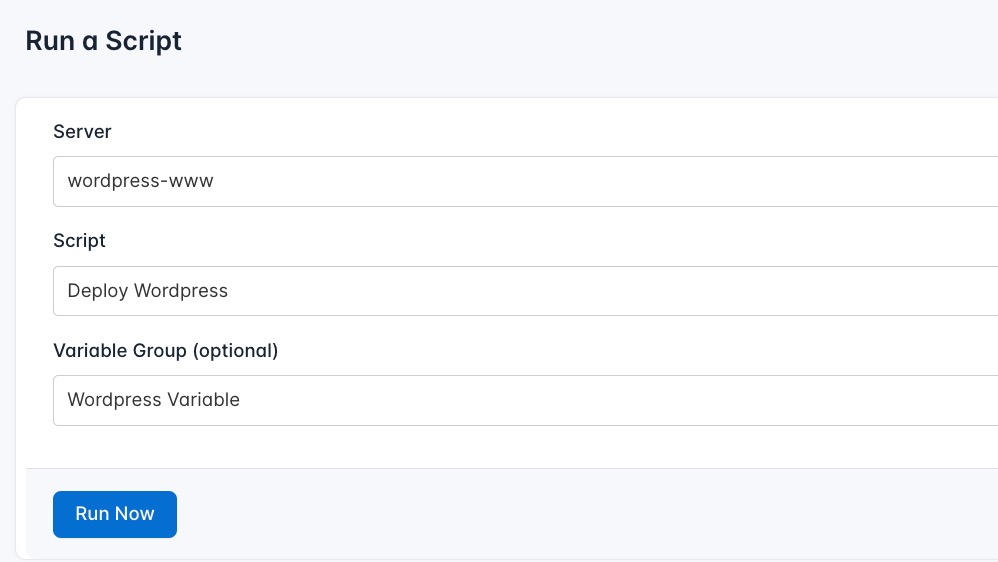
- Navigate to Runlogs > Run a Script
-
Configure the runlog:
- Server: Select the same server where you ran the setup
- Script: Choose “Deploy WordPress”
- Variable Group: Select your predefined variables (or create new ones for this site)
-
Click Run Now to deploy
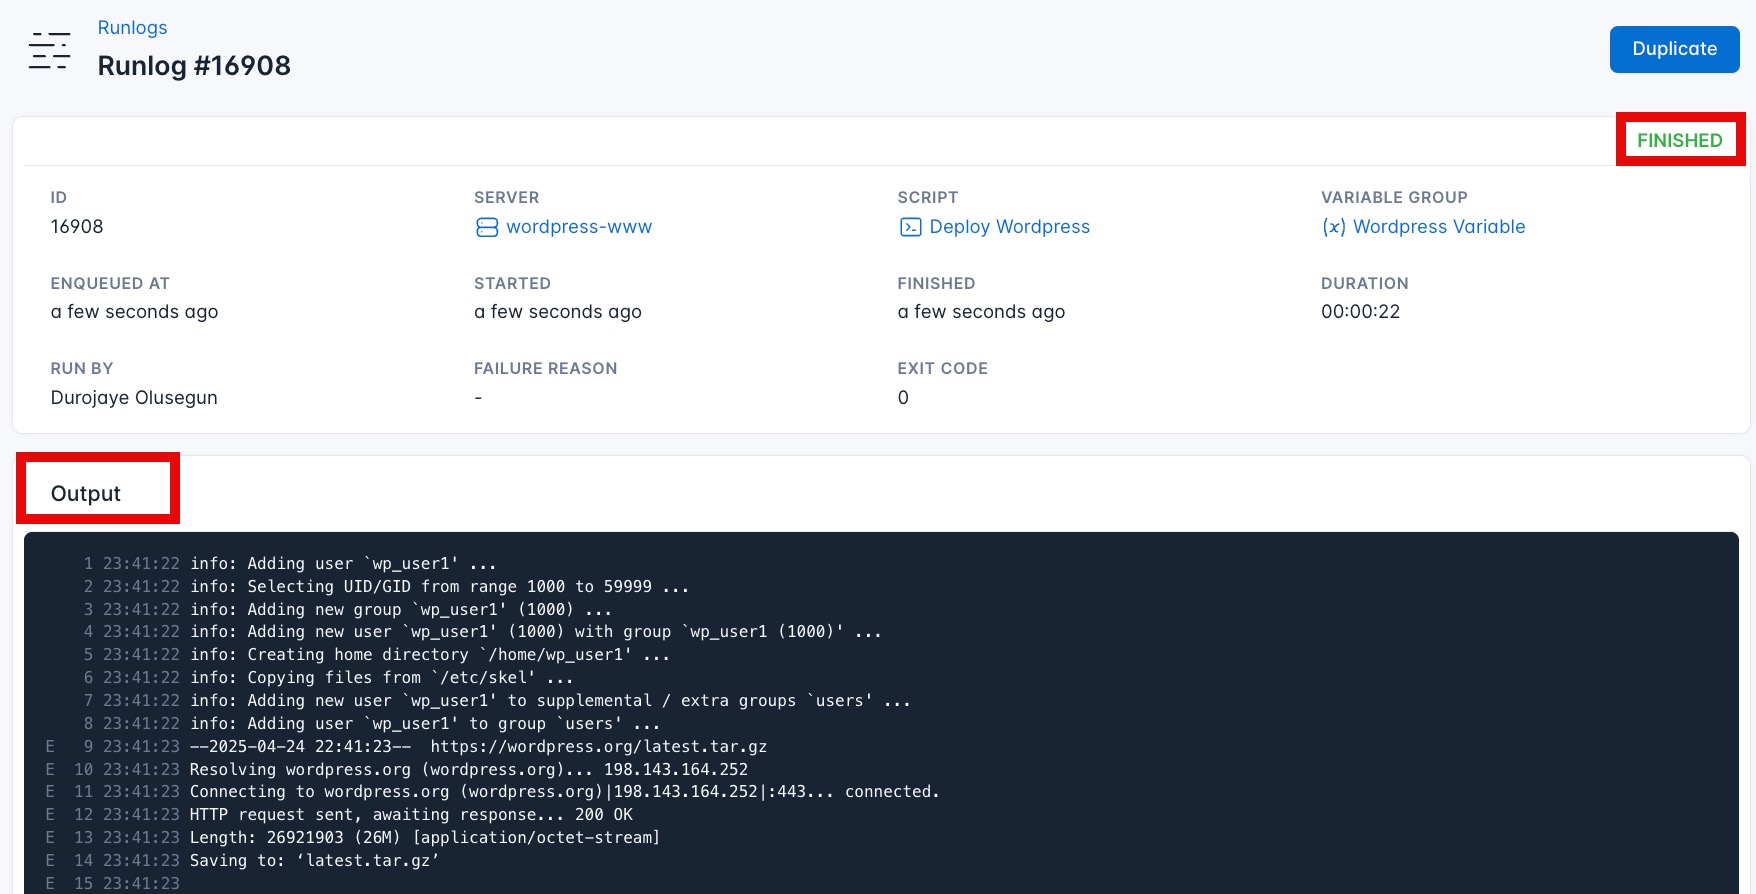
You can now visit one of the Wordpress sites using your domains (For Example, https://site1.com, https://site2.com, etc).
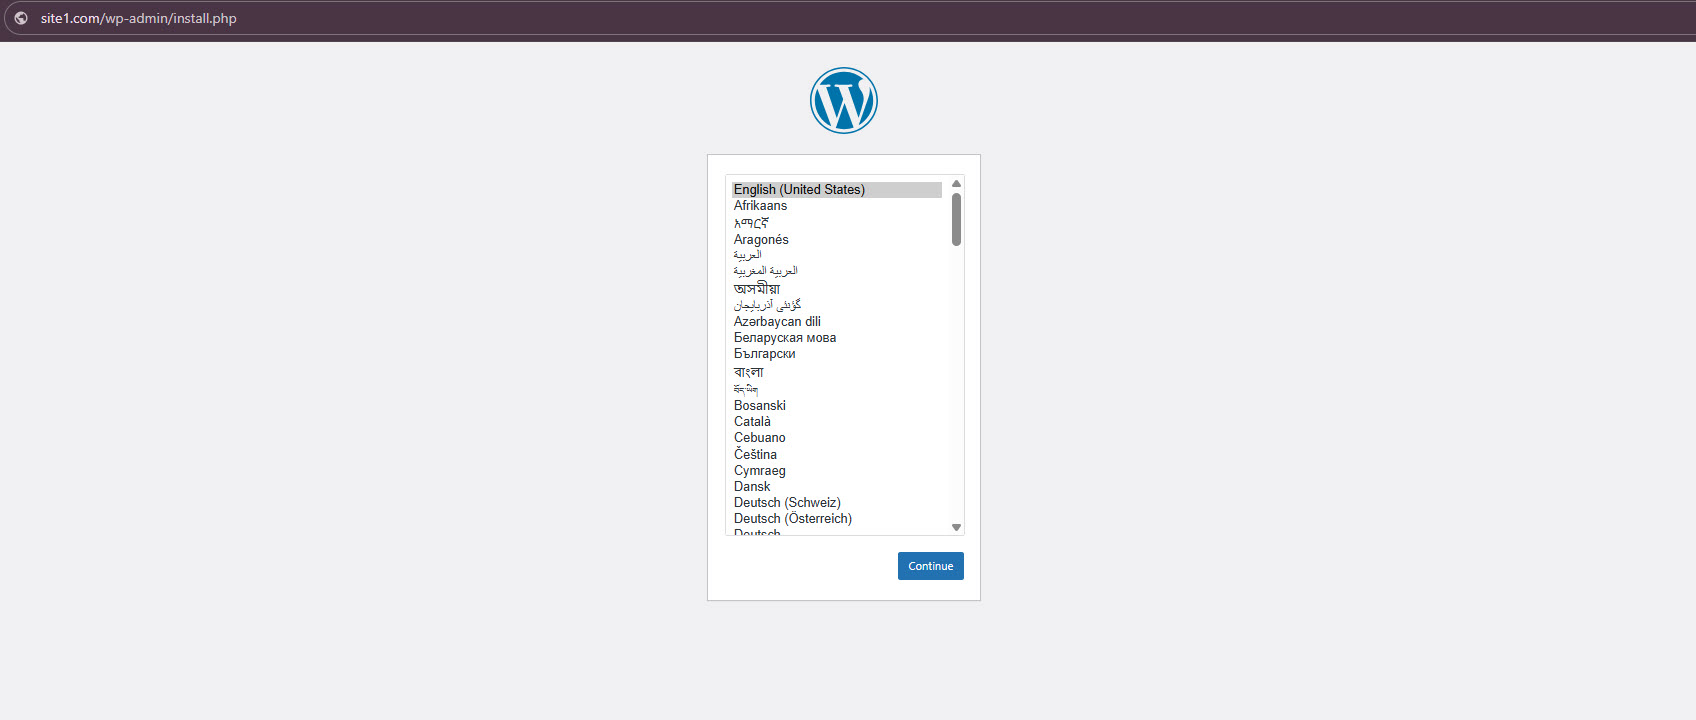
Your Wordpress sites are now deployed and managed with CloudRay.
If you wish to deploy additional WordPress sites on your server using CloudRay, the process is straightforward. Simply update the variables in your Variable Group such as user, pass, db, db_user, db_pass, and domain to reflect the new site’s details. Once these variables are set, rerun the existing Deploy WordPress script through CloudRay. This approach allows you to provision new, isolated WordPress instances efficiently, without modifying the underlying scripts.
TIP
You can create multiple variable groups in CloudRay to store configurations for different WordPress sites, making it easy to redeploy or manage them individually.
Restart WordPress Server (Optional)
For maintenance or troubleshooting, use this script to safely restart all WordPress services while minimising downtime. It preserves active connections and verifies each component.
- Go to Scripts > New Script in CloudRay
- Name: “Restart WordPress Services”
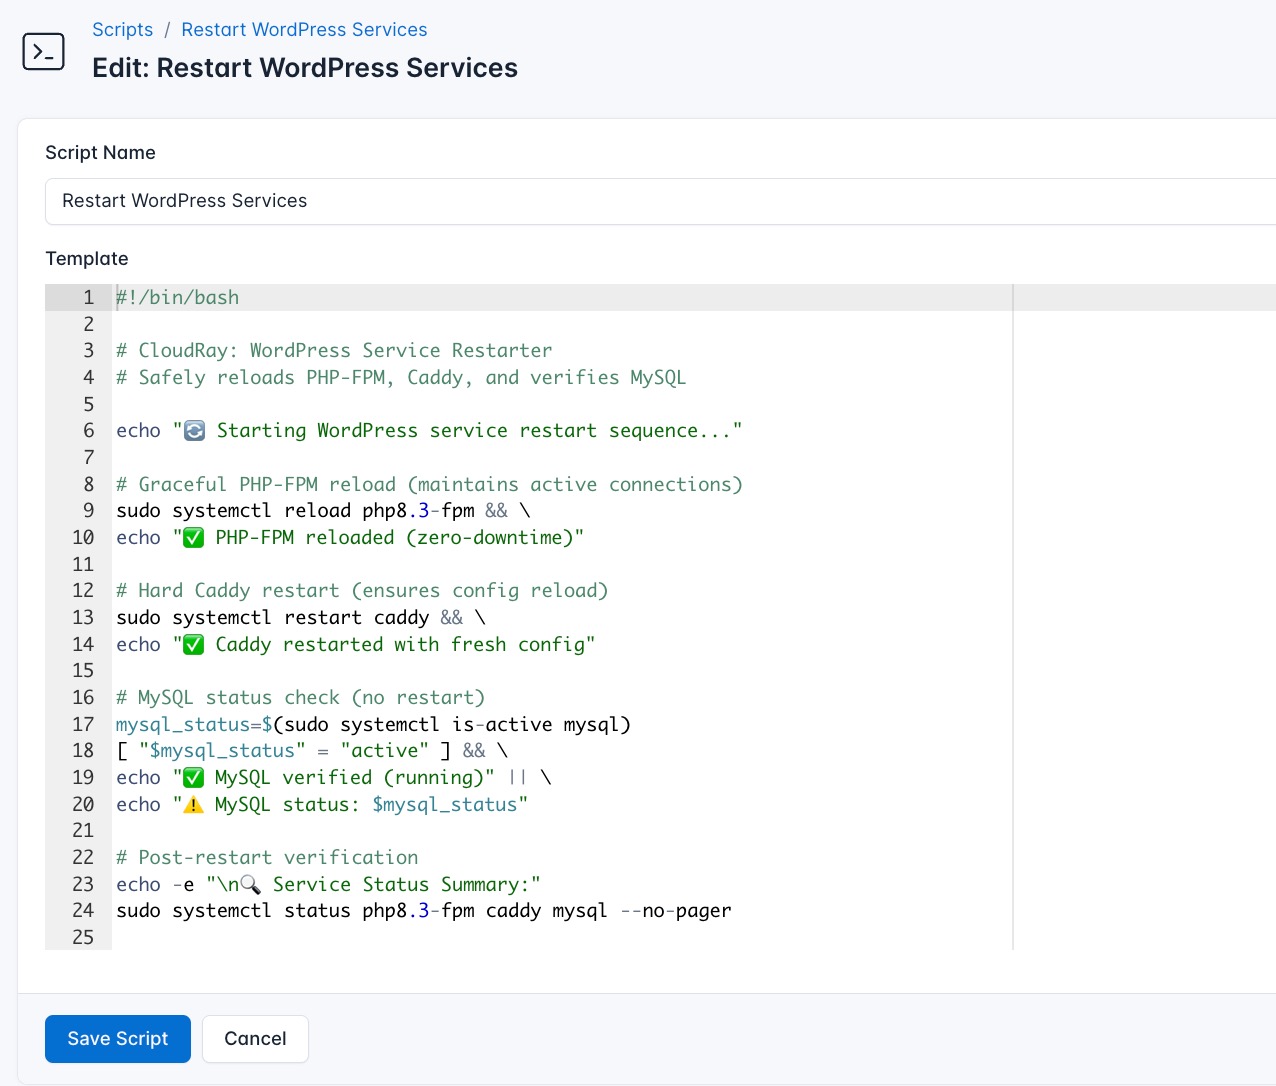
- Paste the following code:
#!/bin/bash

# CloudRay: WordPress Service Restarter
# Safely reloads PHP-FPM, Caddy, and verifies MySQL

echo "🔄 Starting WordPress service restart sequence..."

# Graceful PHP-FPM reload (maintains active connections)
sudo systemctl reload php8.3-fpm && \
echo "✅ PHP-FPM reloaded (zero-downtime)"

# Hard Caddy restart (ensures config reload)
sudo systemctl restart caddy && \
echo "✅ Caddy restarted with fresh config"

# MySQL status check (no restart)
mysql_status=$(sudo systemctl is-active mysql)
[ "$mysql_status" = "active" ] && \
echo "✅ MySQL verified (running)" || \
echo "⚠️ MySQL status: $mysql_status"

# Post-restart verification
echo -e "\n🔍 Service Status Summary:"
sudo systemctl status php8.3-fpm caddy mysql --no-pager

# WordPress connectivity test
echo -e "\n🌐 Testing WordPress at {{domain}}..."
curl -Is https://{{domain}} | grep -E "HTTP|Location" || \
echo "Failed to connect to WordPress"

echo -e "\n🟢 Restart completed at $(date +'%Y-%m-%d %H:%M:%S')"
Run this script with the same variable group as your WordPress site to automatically test the correct domain.
Managing WordPress Files After Deployment
Once your WordPress sites are deployed, you may need to manage files directly. For secure file transfers, we recommend setting up an FTP server with user isolation that matches your WordPress account structure. Our guide on Automating FTP Server Installation with CloudRay shows how to configure vsftpd with the same user accounts created for WordPress, enabling secure file management through clients like FileZilla while maintaining your security isolation.
The multi-site deployment approach used here provides several advantages:
- Resource Efficiency: Hosting multiple isolated WordPress instances on a single server optimises hardware utilisation
- Simplified Management: Centralised administration through CloudRay while maintaining site independence
- Cost Effective: Eliminates the need for separate servers for each WordPress installation
- Consistent Security: Uniform security policies with individualised access controls
For production environments, consider implementing our Automated WordPress Backup Solution to protect all sites simultaneously while maintaining their isolated structures.

Olusegun Durojaye
CloudRay Engineering Team