
Ghost CMS is a blasing fast, modern publishing platform for building professional blogs and newsletters. It’s built on Node.js and designed to be simple, secure, and extendable. In this guide, you’ll learn how to install and deploy Ghost CMS on Ubuntu 24.04 using Nginx, MySQL, and the official Ghost CLI.
For teams managing multiple servers or performing repeatable setups, CloudRay can help automate the installation and deployment of Ghost CMS using Bash scripts, without needing to SSH into each server manually.
Contents
- Update the System & Create a Ghost User
- Install and Configure Nginx
- Install and Configure MySQL
- Install Node.js and Ghost CLI
- Create Ghost Directory and Install Ghost
Update the System & Create a Ghost User
To begin, update your system’s package index and create a dedicated user for managing Ghost. This helps isolate your CMS from the root user and enhances security.
- Update the APT package index
sudo apt update- Create a non-root user named
ghost
sudo adduser ghostWhen prompted, enter a strong password and optionally fill in the user details.
- Grant
ghostuser sudo privileges
sudo adduser ghost sudo- Verify the Java installation
su - ghostFrom this point on, you will operate as the ghost user for the remainder of the installation.
Install and Configure Nginx
Ghost CMS uses Nginx as a reverse proxy to serve your site over HTTP or HTTPS.
- Install Nginx
sudo apt install nginx -y- Allow Nginx through the firewall
sudo ufw allow 'Nginx Full'- Confirm Nginx is running
sudo systemctl status nginxYou should see output showing that the Nginx service is active (running)
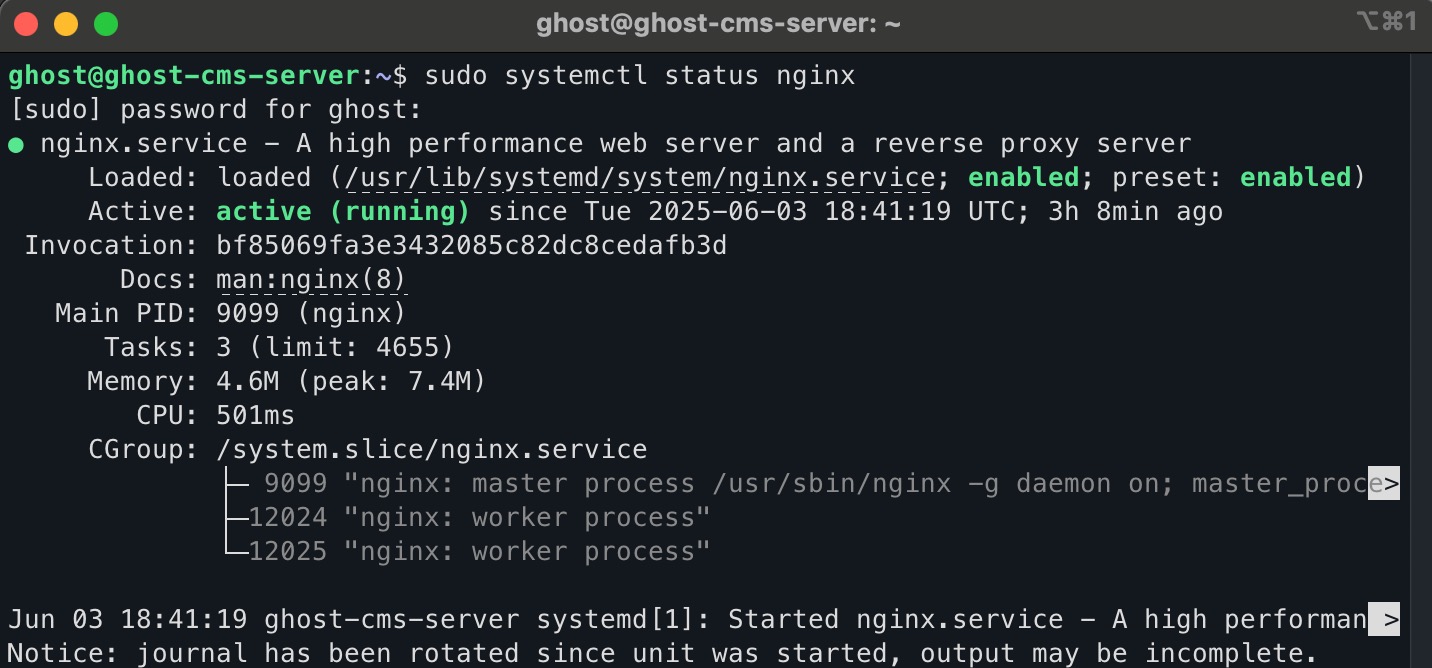
if it’s not active and running, you can start the nginx service
sudo systemctl start nginxInstall and Configure MySQL
Ghost CMS uses MySQL to store all its content and metadata. Let’s install and set up a new database for Ghost.
- Install MySQL Server
sudo apt install mysql-server -y- Access the MySQL shell
sudo mysql- Create a dedicated database and user for Ghost
CREATE USER 'ghostuser'@'localhost' IDENTIFIED BY 'your_strong_password';
CREATE DATABASE ghostdb;
GRANT ALL ON ghostdb.* TO 'ghostuser'@'localhost';
FLUSH PRIVILEGES;
EXIT;
You can replace the your_strong_password with a secure password
Looking to automate your MySQL setup? Check out this guide on automating MySQL installation in CloudRay.
Install Node.js and Ghost CLI
Ghost CMS is built on Node.js, so you’ll need to install Node and the Ghost CLI to manage your Ghost instance.
- Install Node.js and npm
sudo apt install nodejs npm -y- Install Ghost CLI globally using npm
sudo npm install -g ghost-cli@latest- Verify the installation
ghost --versionThis command confirms that Ghost CLI was installed correctly. You should see the version number in the output.
Create Ghost Directory and Install Ghost
Now that your environment is ready, it’s time to create a directory where Ghost will live and set the appropriate permissions.
- Create the Ghost installation directory
sudo mkdir -p /var/www/ghost- Change the directory ownership to the
ghostuser
sudo chown ghost:ghost /var/www/ghost- Give the right permissions to the directory
sudo chmod 775 /var/www/ghost- Navigate to the Ghost directory
cd /var/www/ghost/- Install Ghost using the CLI
ghost installThe CLI will guide you through configuration steps like setting your blog URL, configuring MySQL credentials, and setting up Nginx and SSL.
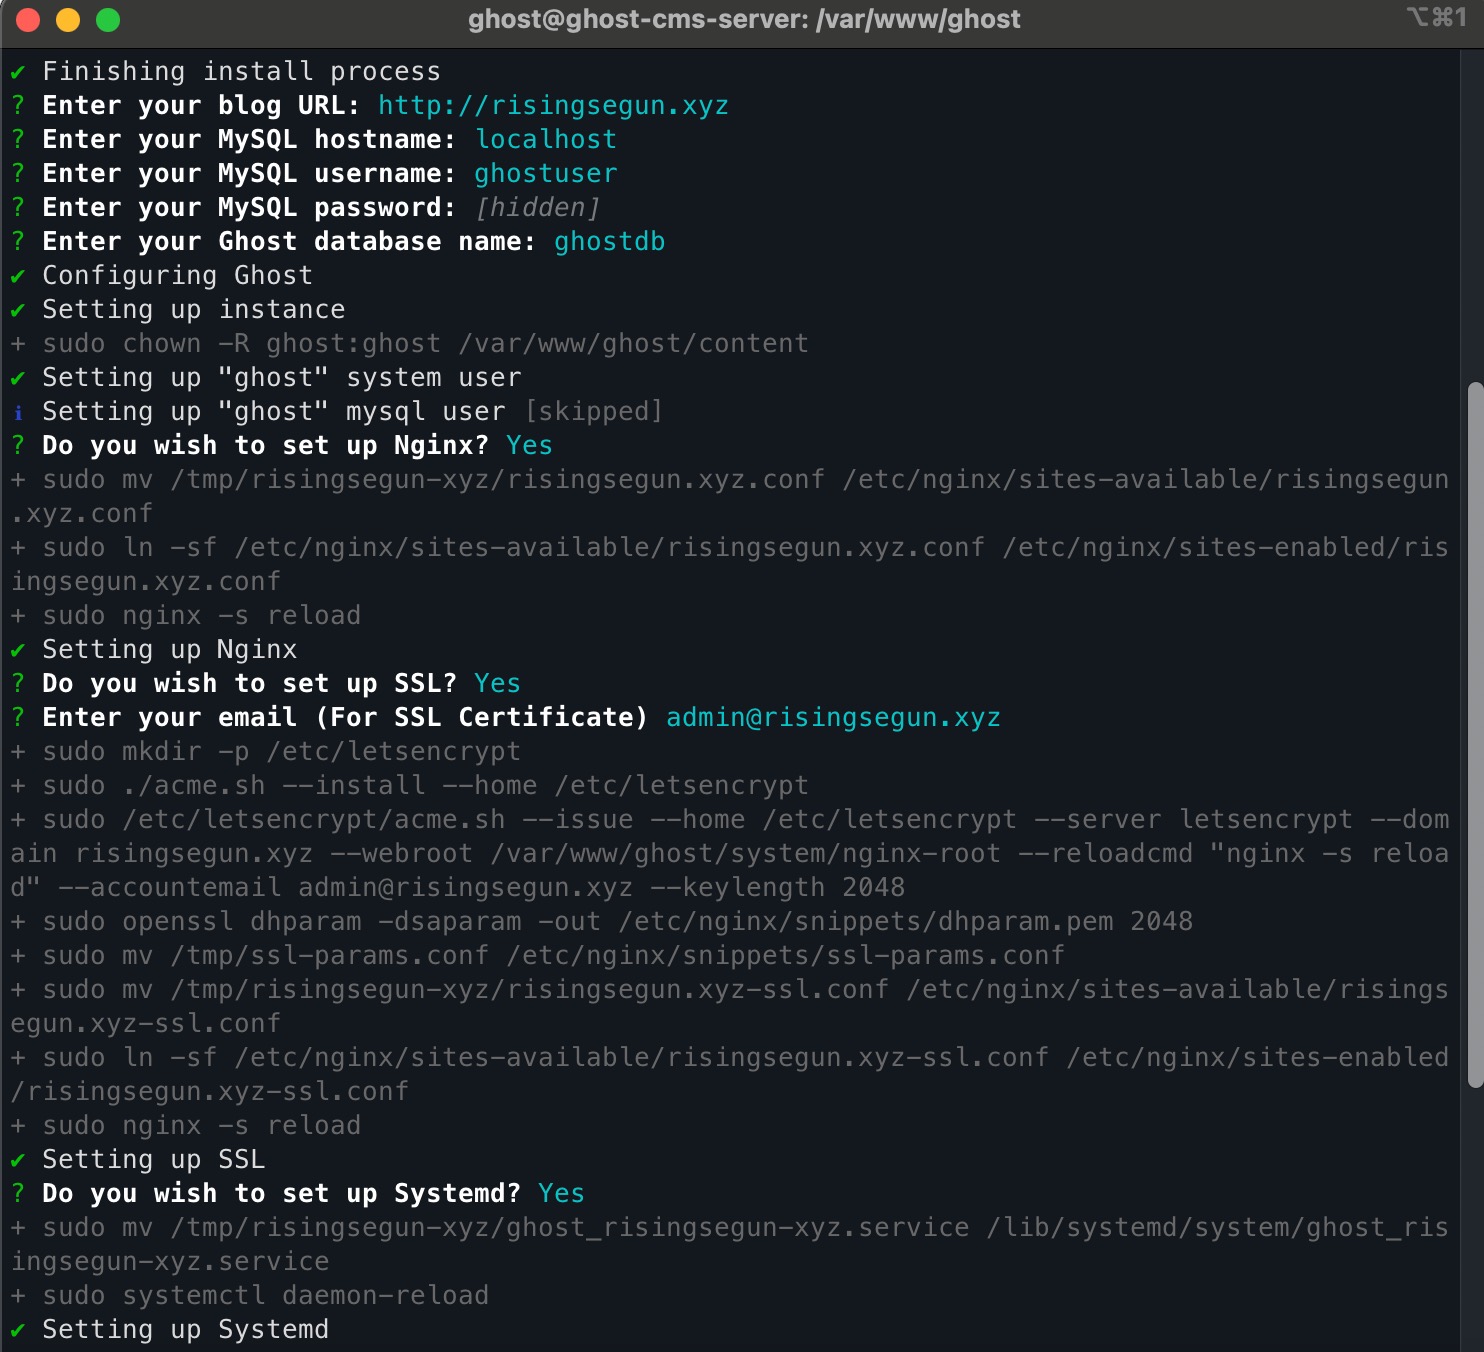
If all dependencies are met, Ghost will install and start automatically.
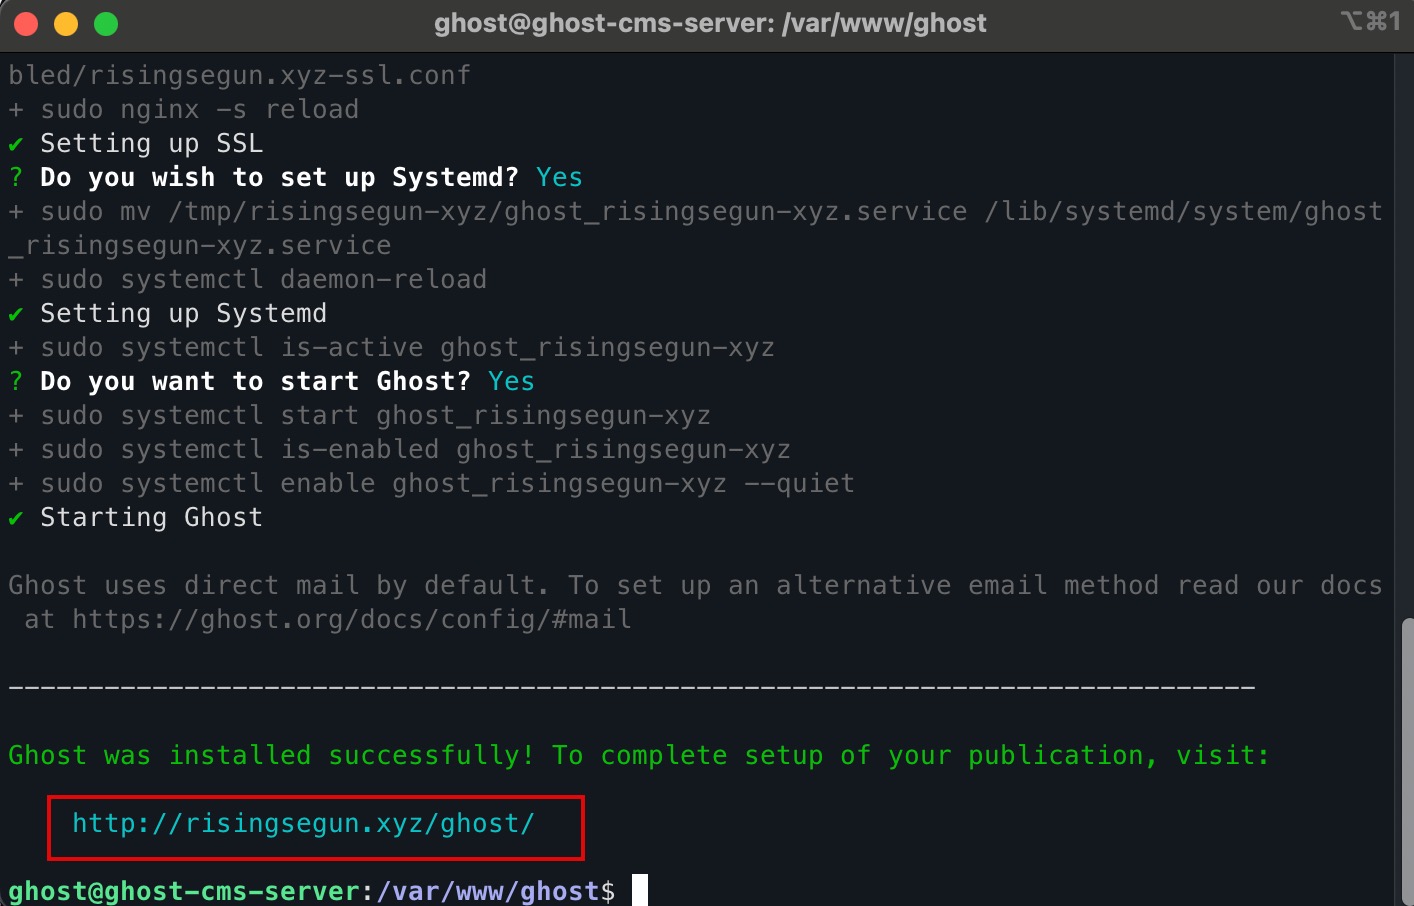
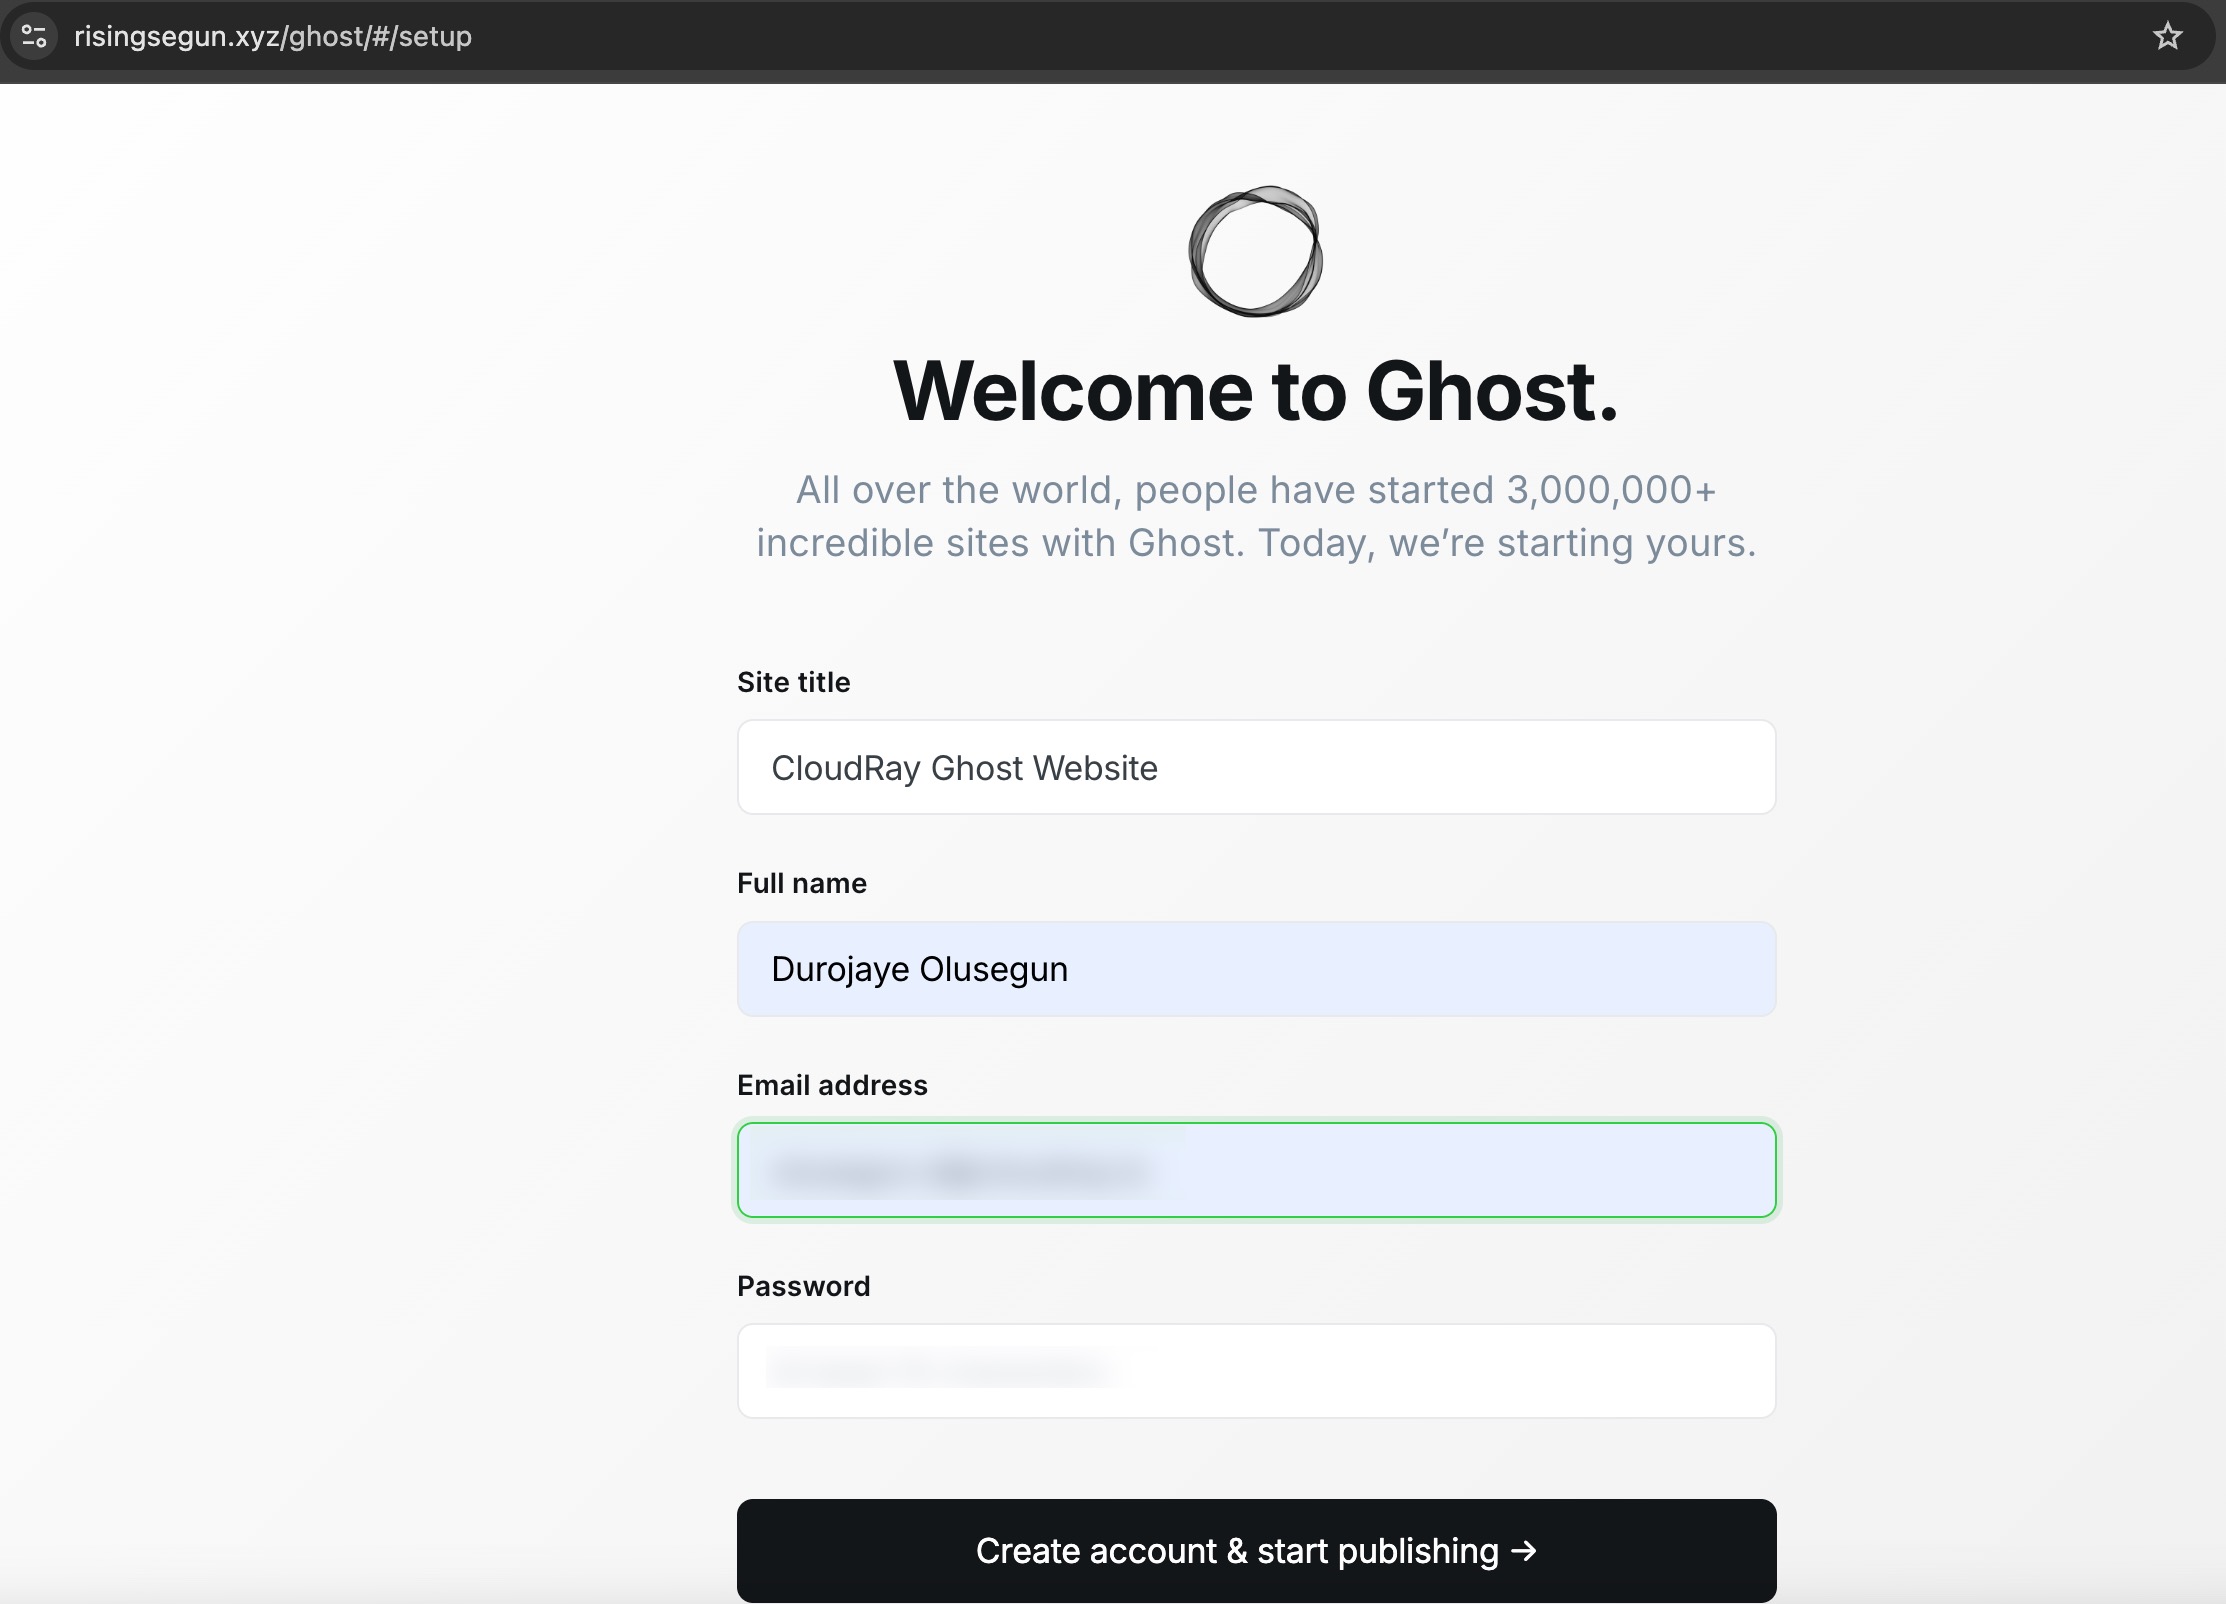
In this case you can visit the Ghost CMS website with your domain.
Manually setting up the Ghost CMS across multiple servers can be time-consuming, especially when repeating the same steps on each server. [CloudRay] simplifies this process by allowing you to create reusable Bash scripts that can be executed remotely across your infrastructure.
With CloudRay, you can automate the entire Ghost CMS setup:
- Create and configure the
ghostuser - Install required packages like Node.js, Nginx, and MySQL
- Set up the Ghost CLI and automate the Ghost installation
- Configure Nginx reverse proxy and SSL
Before you automate the installation process, connect your server to CloudRay using the CloudRay agent. This allows you to run bash scripts directly from the dashboard without SSH access.

Olusegun Durojaye
CloudRay Engineering Team