
Redis deployments require proper configuration of network binding, memory management, and authentication to prevent unauthorised access. This guide demonstrates how to automate Redis Server installation with CloudRay. This automation with CloudRay would implement secure password authentication, proper daemon configuration, network binding restrictions, and service lifecycle management.
Contents
- Adding Servers to CloudRay
- Create the Automation Script
- Create a Variable Group
- Running the Scripts to Install Redis with CloudRay
Adding Servers to CloudRay
Before beginning Redis deployment, ensure your target servers are connected to CloudRay. Follow the servers docs to add and manage servers if not already configure
NOTE
These scripts target Ubuntu/Debian systems. For RHEL-based distributions, replace apt commands with appropriate yum or dnf equivalents. The Redis configuration file path may differ on non-Debian systems.
Create the Automation Script
Two Bash scripts are required for complete Redis deployment:
- Redis Installation Script:: This script handles package installation and base configuration
- Redis Configuration Script: This script implement security settings and authentication
Let’s begin with the Redis installation script.
Redis Installation Script
This script performs the initial Redis Server deployment with production-ready defaults. Follow these steps to create the script:
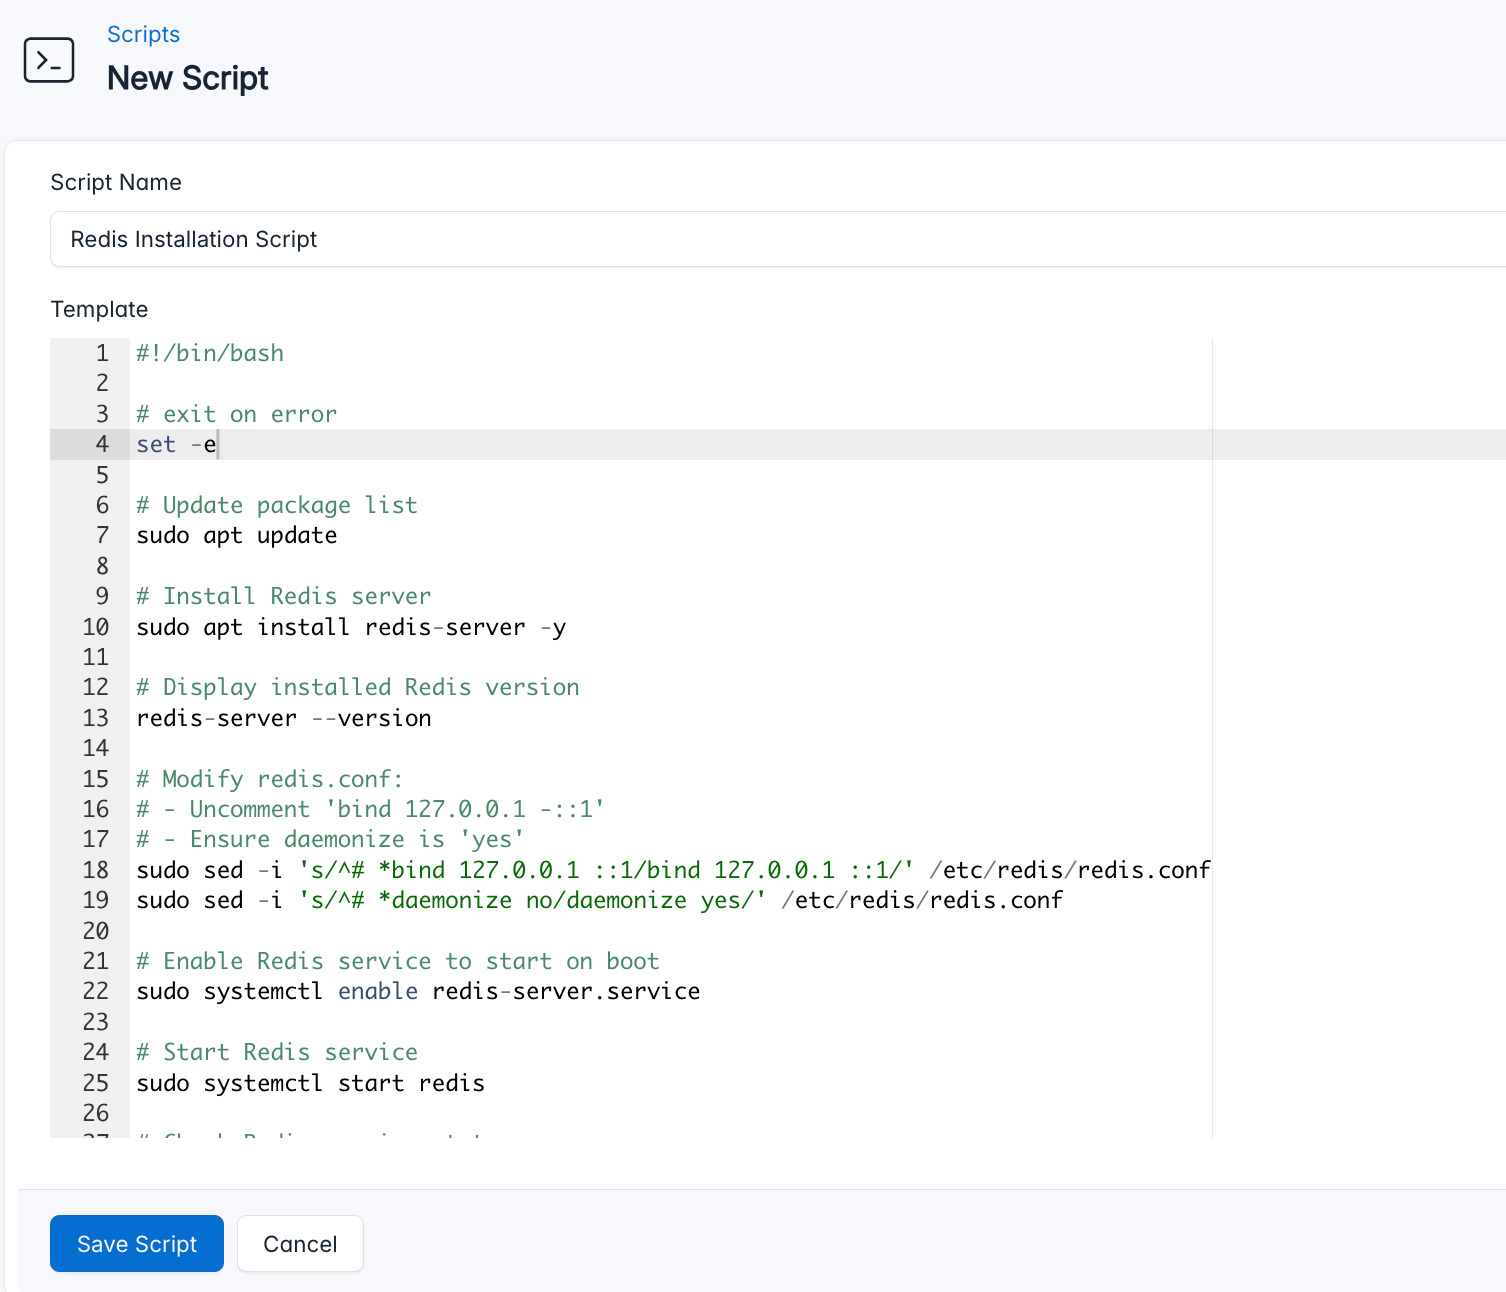
- Go to Scripts in your CloudRay project
- Click New Script
- Name:
Redis Installation Script. You can give it any name of your choice - Copy this code:
#!/bin/bash

# Exit on any error
set -e

# Update package list
sudo apt update

# Install Redis server
sudo apt install redis-server -y

# Display installed Redis version
redis-server --version

# Modify redis.conf:
# - Uncomment 'bind 127.0.0.1 -::1'
# - Ensure daemonize is 'yes'
sudo sed -i 's/^# *bind 127.0.0.1 ::1/bind 127.0.0.1 ::1/' /etc/redis/redis.conf
sudo sed -i 's/^# *daemonize no/daemonize yes/' /etc/redis/redis.conf

# Enable Redis service to start on boot
sudo systemctl enable redis-server.service

# Start Redis service
sudo systemctl start redis

# Check Redis service status
sudo systemctl status redis --no-pager
Here is a breakdown of what each command in the Redis Installation Script does:
- Installs Redis from system packages
- Configures loopback interface binding
- Enables daemon mode for service management
- Verifies successful service start
Redis Configuration Script
This script implements security controls and tests basic functionality.
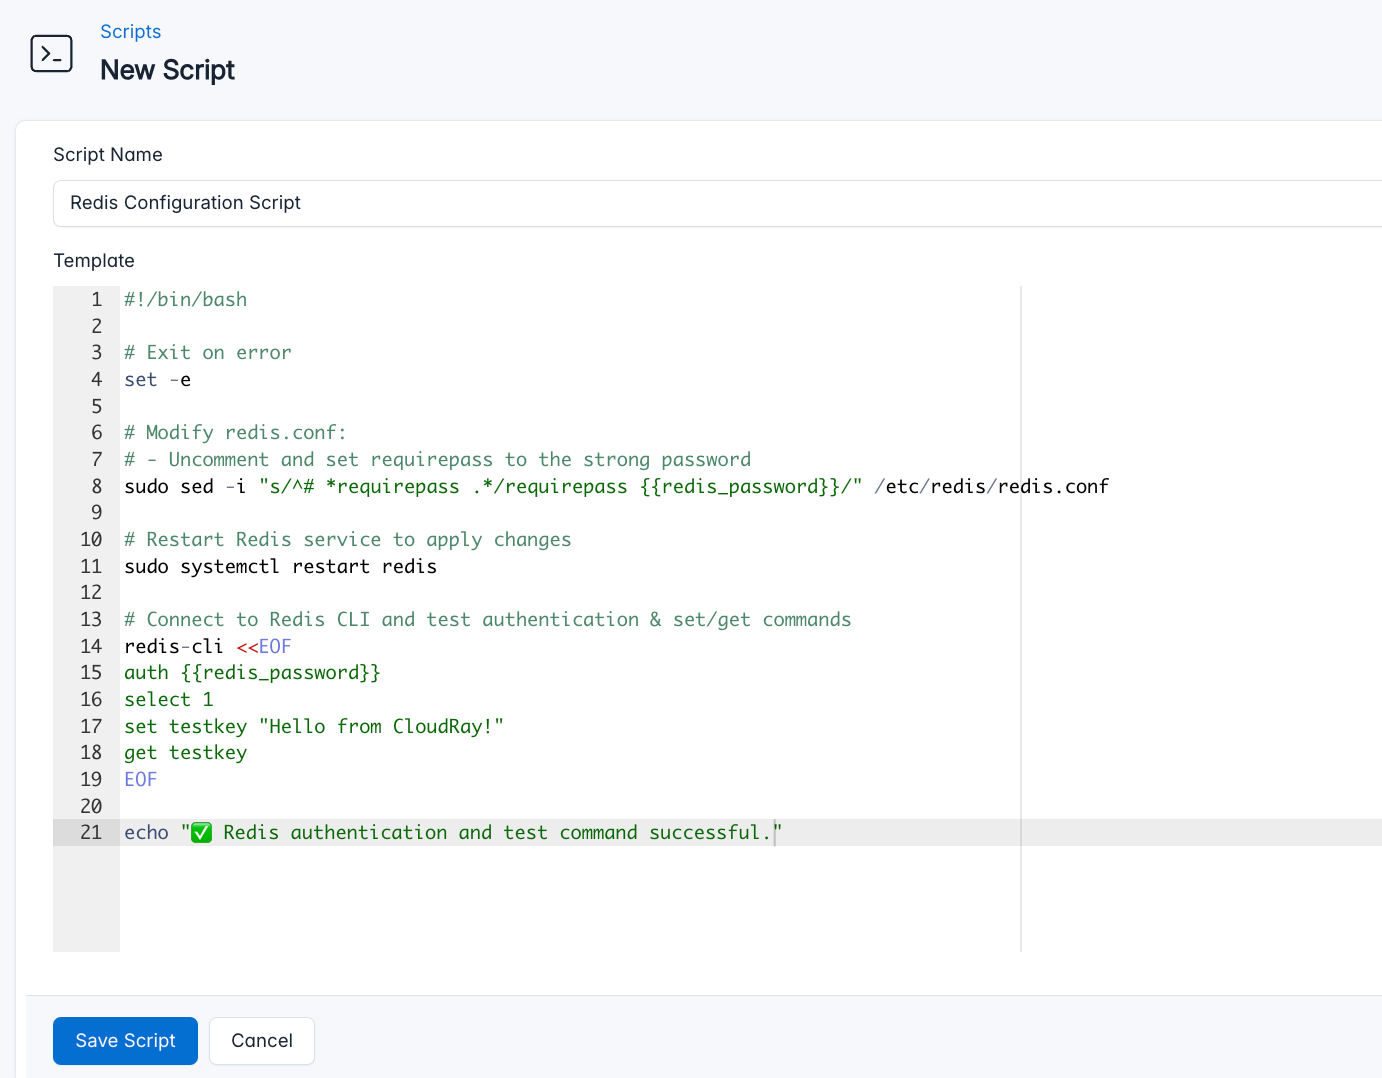
- Go to Scripts > New Script
- Name:
Redis Configuration Script - Add code:
#!/bin/bash

# Exit on any error
set -e

# Modify redis.conf:
# - Uncomment and set requirepass to the strong password
sudo sed -i "s/^# *requirepass .*/requirepass {{redis_password}}/" /etc/redis/redis.conf

# Restart Redis service to apply changes
sudo systemctl restart redis

# Connect to Redis CLI and test authentication & set/get commands
redis-cli <<EOF
auth {{redis_password}}
select 1
set testkey "Hello from CloudRay!"
get testkey
EOF

echo "✅ Redis authentication and test command successful."
This is what the Secure Cockpit Script does:
- Enables password authentication
- Restarts service to apply security settings
- Validates configuration with test operations
Create a Variable Group
The configuration script requires a password variable. Create a variable group to store this securely. CloudRay processes all scripts as Liquid templates. This allows you to use variables dynamically across different servers.
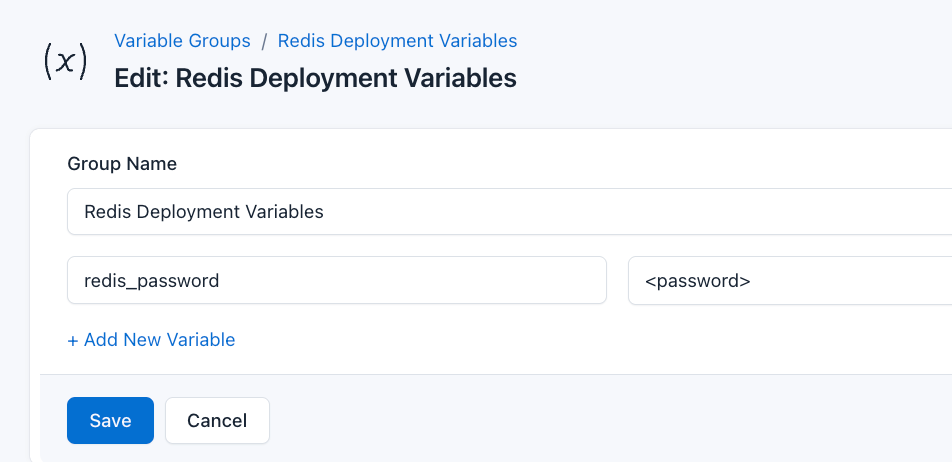
To ensure that these values are automatically substituted when the script runs, follow these steps to create a variable group:
- Navigate to Variable Group under Scripts
- Create a new group named
Redis Deployment Variables - Add the following variables:
redis_password: The password for Redis authentication
Since the variables are setup, proceed to run the scripts with CloudRay.
Running the Scripts to Install Redis with CloudRay
The Redis deployment consists of two dependent scripts that should execute sequentially. CloudRay’s Script Playlists provide an efficient way to orchestrate this workflow.
Here are the steps to follow:
- Navigate to “Script Playlists”: Click on the Scripts tab in the CloudRay interface
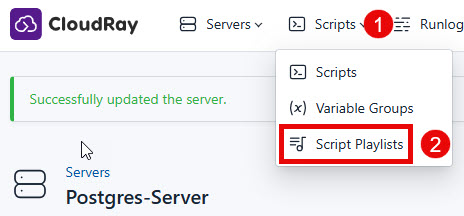
- Click “Add Script Playlist”: This initiates the creation of a new playlist
- Provide a Name: Give your playlist a unique name (For example “Automate Redis Server Installation”)
- Add Scripts in Order: Select and add the scripts sequentially
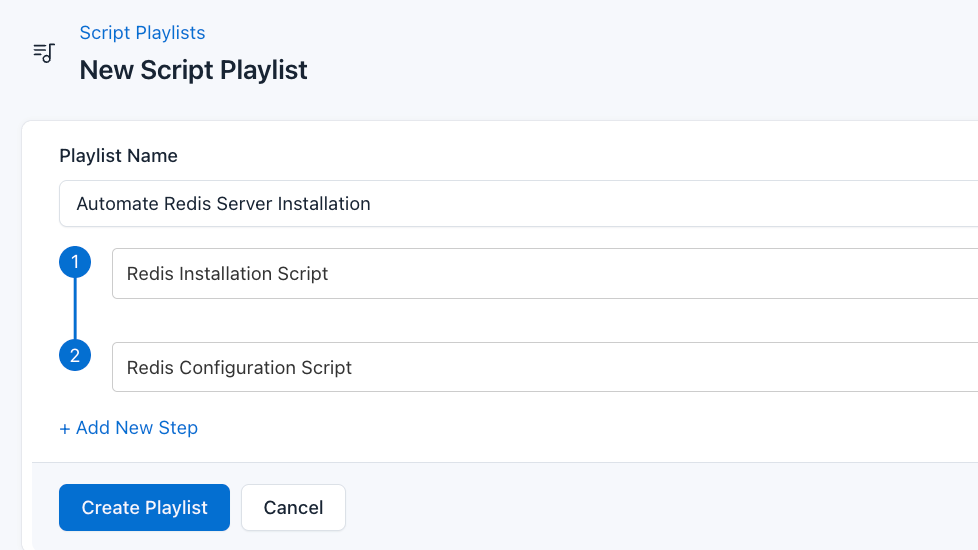
- Save the Playlist: Click “create playlist” to store your new playlist.
Once your script playlist is created, proceed with execution:
- Navigate to Runlogs: In your CloudRay project, go to the Runlogs section in the top menu.
- Create a New Runlog: Click on New Runlog.
- Configure the Runlog: Provide the necessary details:
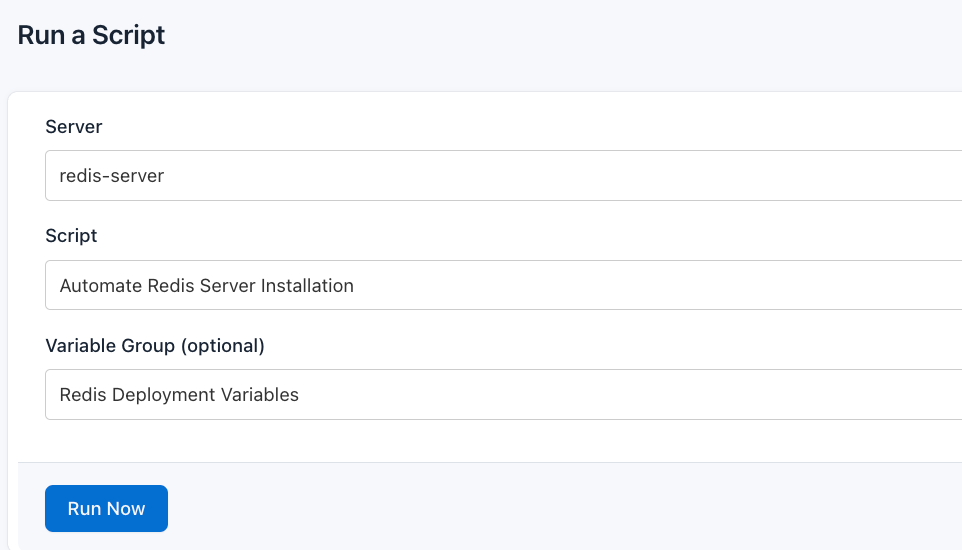
- Server: Select the server where Redis will be installed
- Script Playlist: Choose the playlist you created (For example “Automate Redis Server Installation”)
- Variable Group: Select the variable group you set up earlier
- Execute the Script: Click on Run Now to start the execution
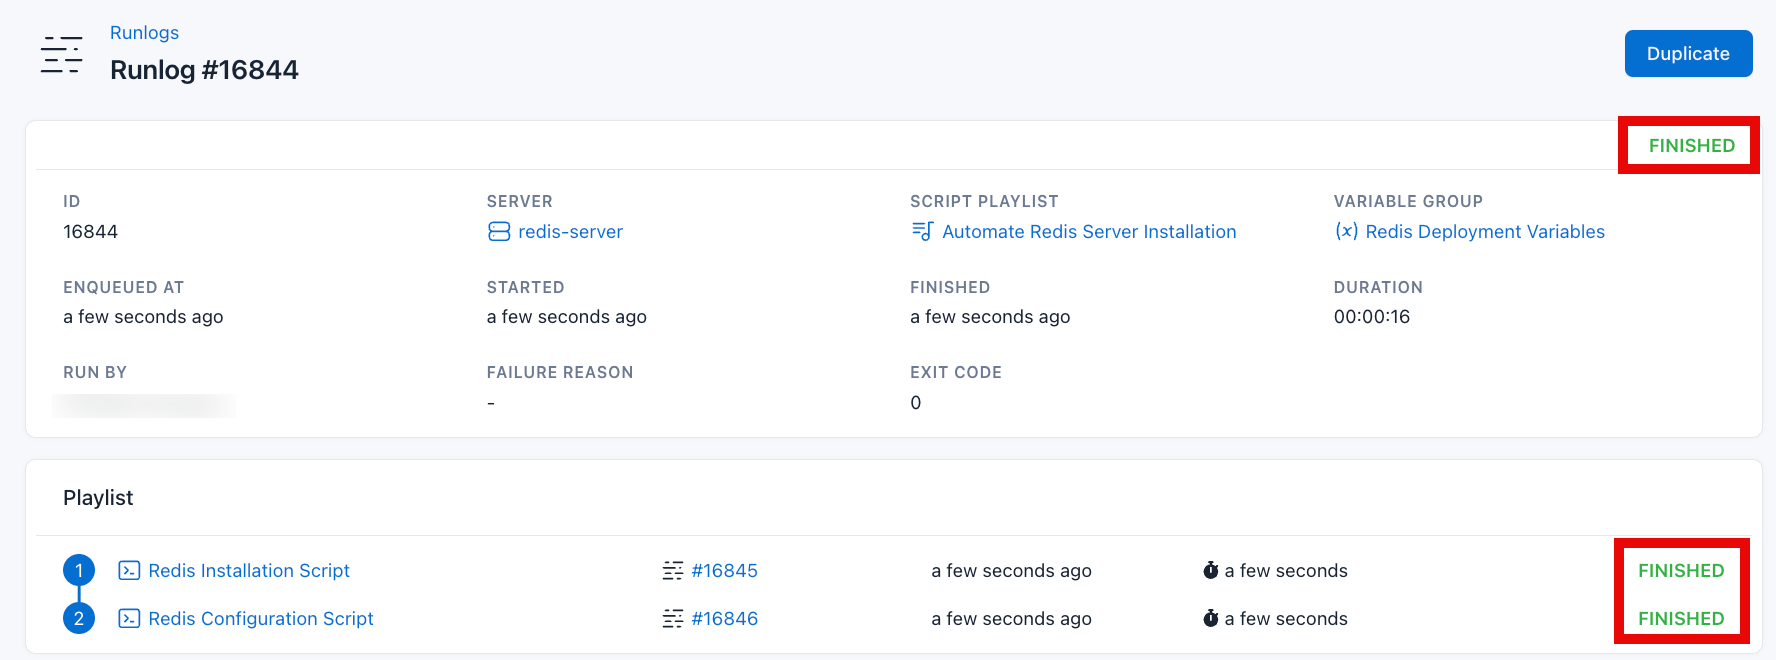
After successful script execution to install Redis Server. Validate the Redis installation by clicking the Runlog of the Configure Redis Script
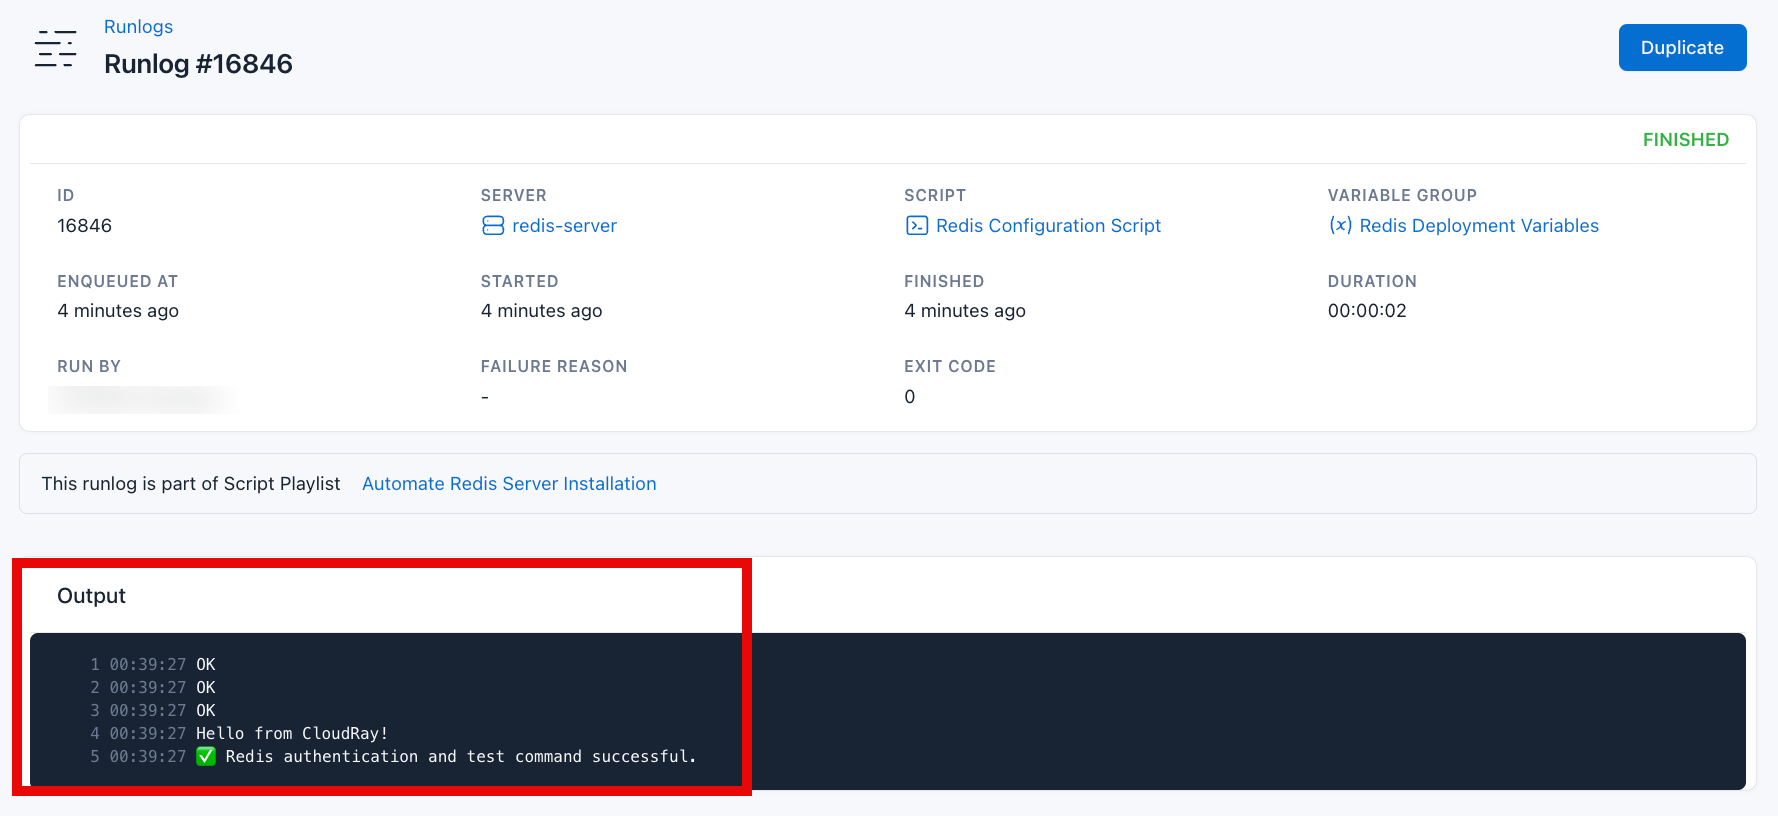
As seen in the ouput, Redis is successfully working correctly.
IMPORTANT
For production environments, we recommend running the installation playlist on multi nodes, configuring Redis Sentinel for higher availability, setting up monitoring.
For other database deployments using CloudRay check out our guides on:

Olusegun Durojaye
CloudRay Engineering Team