
Automating MongoDB deployment on remote servers can significantly streamline your database management process. CloudRay provides automation capabilities that eliminate manual configuration steps while ensuring consistency across environments.
In this guide, you will learn how to automate MongoDB installations and manage your entire deployment through CloudRay’s centralised platform. Finally, you will learn how to schedule automated backups for data protection.
By the end of this article, you will have a fully automated MongoDB deployment with built-in security and maintenance workflows.
Contents
- Adding Servers to CloudRay
- Assumptions
- Create the Automation Script
- Create a Variable Group
- Running the Script with CloudRay
- Scheduling MongoDB Database Backup with CloudRay’s Schedules (Optional)
- Related Guides
Adding Servers to CloudRay
Before getting started with your automation, make sure your target servers are connected to CloudRay. If you haven’t done this yet, follow our servers docs to add and manage your server
NOTE
This guide uses Bash scripts, providing a high degree of customisation. You can adapt the scripts to fit your specific Installations needs and environment.
Assumptions
- This guide assumes you’re using Ubuntu 24.04 LTS as your server’s operating system. If you’re using a different version or a different distribution, adjust the commands accordingly.
Create the Automation Script
We’ll use three specialized scripts to automate the MongoDB deployment:
- MongoDB Installation Script: This script will handle MongoDB package installation and basic security configuration
- User Configuration Script: This script will creates administrative and application users with proper roles
- Backup Script: This script will configures automated database backups with retention policies
Let’s begin with the MongoDB MongoDB Installation Script.
MongoDB Installation Script
To create the MongoDB Installation Script, you need to follow these steps:
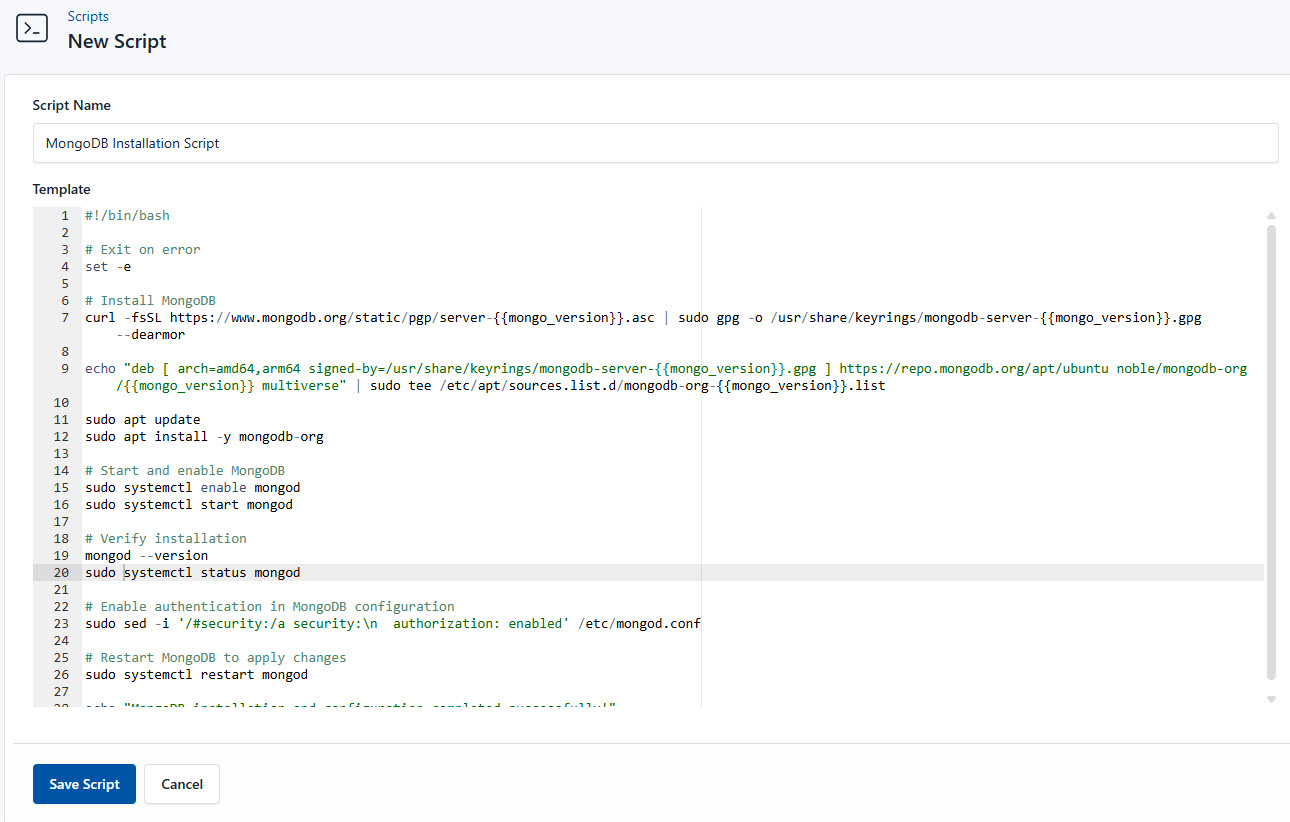
- Go to Scripts in your CloudRay project
- Click New Script
- Name:
MongoDB Installation Script. You can give it any name of your choice - Copy this code:
#!/bin/bash

# Exit immediately on errors
set -e

# Install MongoDB
curl -fsSL https://www.mongodb.org/static/pgp/server-{{mongo_version}}.asc | sudo gpg -o /usr/share/keyrings/mongodb-server-{{mongo_version}}.gpg --dearmor

echo "deb [ arch=amd64,arm64 signed-by=/usr/share/keyrings/mongodb-server-{{mongo_version}}.gpg ] https://repo.mongodb.org/apt/ubuntu noble/mongodb-org/{{mongo_version}} multiverse" | sudo tee /etc/apt/sources.list.d/mongodb-org-{{mongo_version}}.list

sudo apt update
sudo apt install -y mongodb-org

# Start and enable MongoDB
sudo systemctl enable mongod
sudo systemctl start mongod

# Verify installation
mongod --version
sudo systemctl status mongod

# Enable authentication in MongoDB configuration
sudo sed -i '/#security:/a security:\n  authorization: enabled' /etc/mongod.conf

# Restart MongoDB to apply changes
sudo systemctl restart mongod

echo "MongoDB installation and configuration completed successfully!"
Here is a breakdown of what each command in the MongoDB Installation Script does:
- Adds MongoDB’s official repository with GPG verification
- Installs the latest MongoDB packages
- Enables and starts the MongoDB service
- Configures mandatory authentication
- Verifies successful installation
User Configuration Script
After MongoDB installation, we need to properly configure database users with least-privilege access. This script creates:
- An administrative user with global management privileges
- An application user with restricted database access
Similarly, follow these steps to create the user configuration script:
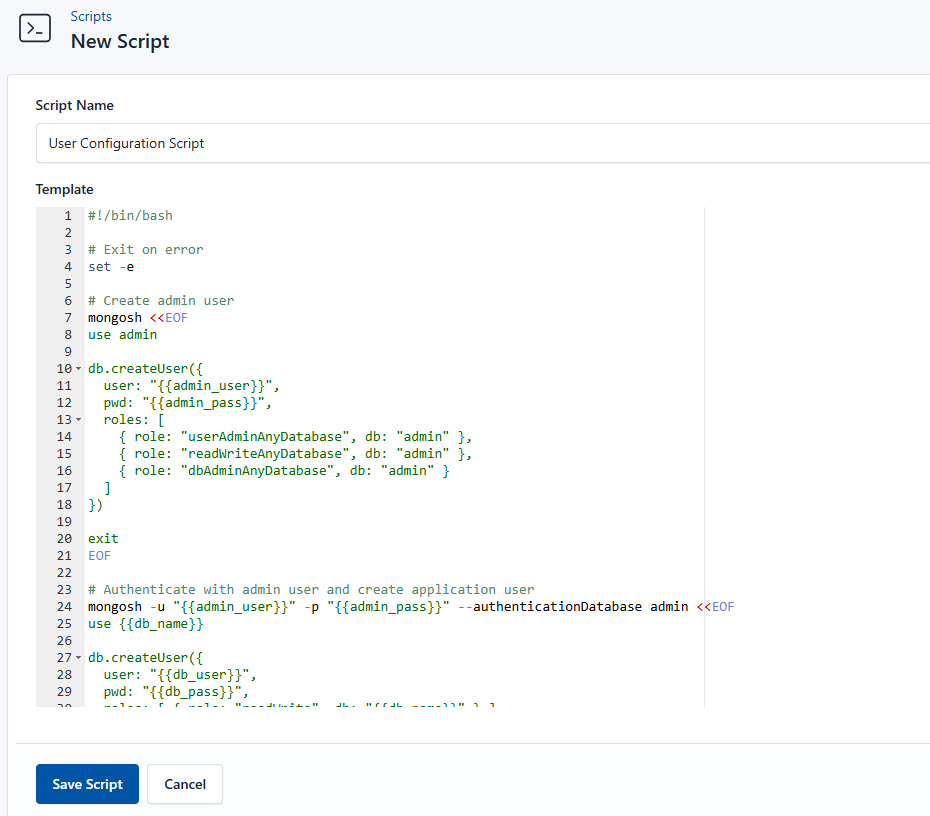
- Go to Scripts > New Script
- Name:
User Configuration Script - Add code:
#!/bin/bash

set -e

# Create admin user
mongosh <<EOF
use admin

db.createUser({
  user: "{{admin_user}}",
  pwd: "{{admin_pass}}",
  roles: [
    { role: "userAdminAnyDatabase", db: "admin" },
    { role: "readWriteAnyDatabase", db: "admin" },
    { role: "dbAdminAnyDatabase", db: "admin" }
  ]
})

exit
EOF

# Authenticate with admin user and create application user
mongosh -u "{{admin_user}}" -p "{{admin_pass}}" --authenticationDatabase admin <<EOF
use {{db_name}}

db.createUser({
  user: "{{db_user}}",
  pwd: "{{db_pass}}",
  roles: [ { role: "readWrite", db: "{{db_name}}" } ]
})

exit
EOF

# Insert test data
mongosh -u "{{db_user}}" -p "{{db_pass}}" --authenticationDatabase "{{db_name}}" <<EOF
use {{db_name}}

db.messages.insertOne({ message: "Greetings from CloudRay" })

exit
EOF

echo "MongoDB users have been successfully created!"
This is what the User Configuration Script does:
- Creates an administrative user with: user management privileges, cluster management rights, and global read/write access
- Create an application-specific user with: restriction to single database and only read/write privileges (no admin rights)
- Insert test data to verify functionality
Create a Variable Group
Now, before running the scripts, you need to define values for the placeholders {{mongo_version}}, {{admin_user}}, {{admin_pass}}, {{db_user}}, {{db_pass}}, {{db_name}}, and {{backup_dir}} used in the scrips. CloudRay processes all scripts as Liquid templates. This allows you to use variables dynamically across different servers.
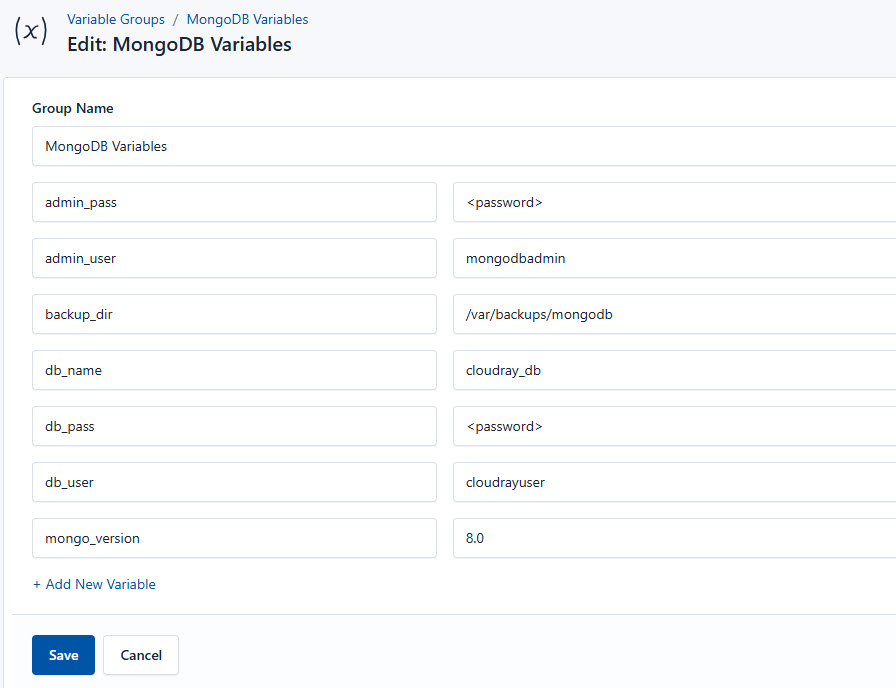
To ensure that these values are automatically substituted when the script runs, follow these steps to create a variable group:
- Navigate to Variable Groups: In your CloudRay project, go to “Scripts” in the top menu and click on “Variable Groups”.
- Create a new Variable Group: Click on “Variable Group”.
- Add the following variables:
mongo_version: This is the MongoDB version to be installedadmin_user: This is the administrative useradmin_pass: This is the password of the administrative userdb_user: This is the application userdb_pass: The application passworddb_name: The application database namebackup_dir: The backup directory of MongoDB
Since the variables are setup, proceed with running the scripts with CloudRay
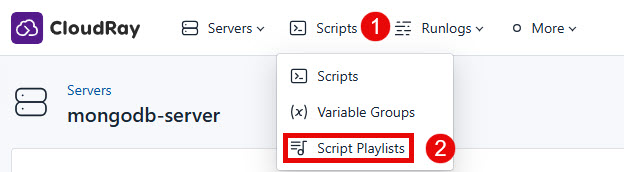
Running the Script with CloudRay
You can choose to run the scripts individually or execute them all at once using CloudRay’s Script Playlists. Since there are multiple scripts, using CloudRay playlists will help automate the execution sequence and save time.
Here are the steps to follow:
- Navigate to “Script Playlists”: Click on the Scripts tab in the CloudRay interface
- Click “Add Script Playlist”: This initiates the creation of a new playlist
- Provide a Name: Give your playlist a unique name (For example “MongoDB Setup Automation and Management”)
- Add Scripts in Order: Select and add the scripts sequentially
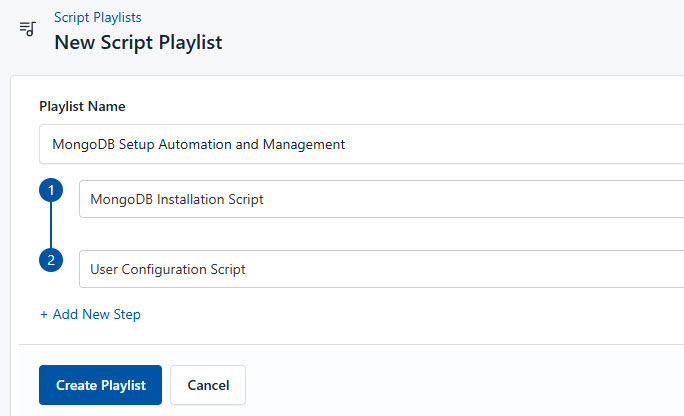
- Save the Playlist: Click “create playlist” to store your new playlist.
Once your script playlist is created, proceed with execution:
- Navigate to Runlogs: In your CloudRay project, go to the Runlogs section in the top menu.
- Create a New Runlog: Click on New Runlog
- Configure the Runlog: Provide the necessary details:
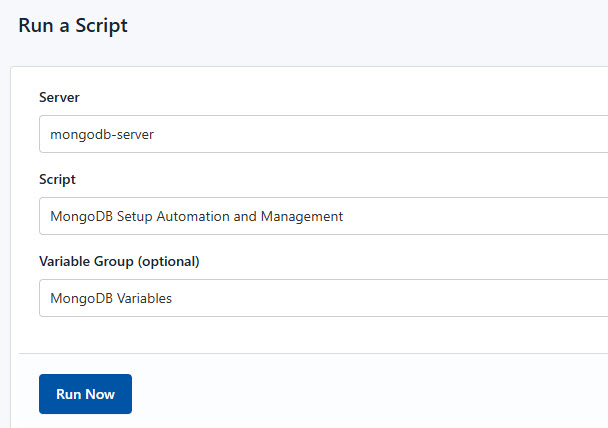
- Server: Select the server where you need MongoDB to be installed
- Script Playlist: Choose the playlist you created (For example “MongoDB Setup Automation and Management”)
- Variable Group: Select the variable group you set up earlier
- Execute the Script: Click on Run Now to start the execution
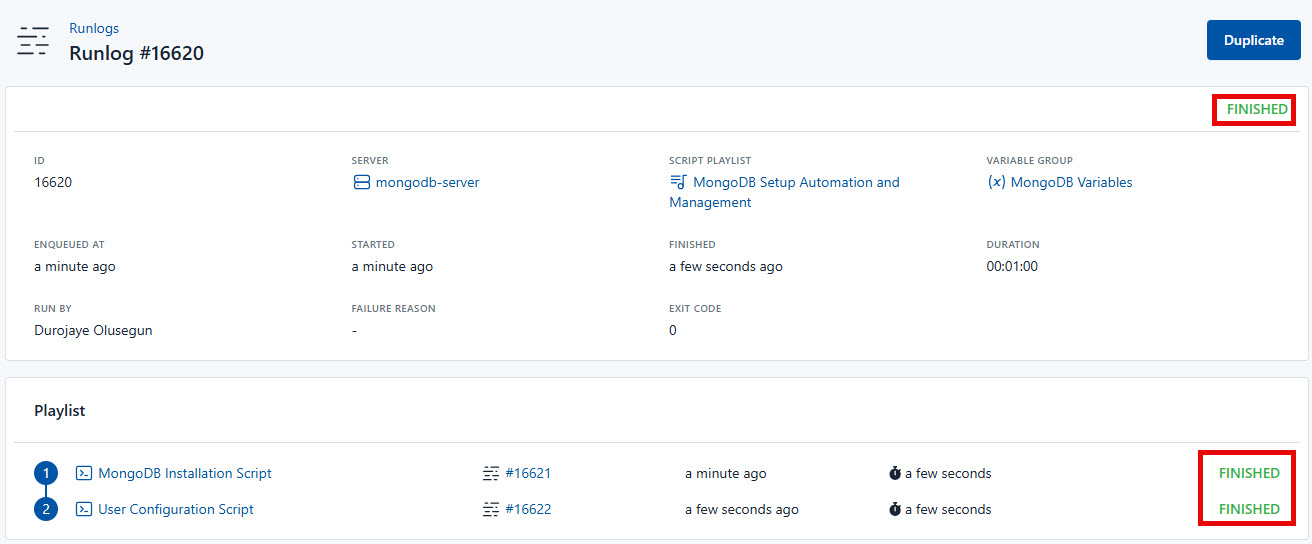
Your MongoDB is now seamlessly setup and managed with CloudRay. That’s it! Happy deploying!
Scheduling MongoDB Database Backup with CloudRay’s Schedules (Optional)
CloudRay also offers Schedules, allowing you to execute scripts automatically at specific intervals or times. This feature is useful for tasks such as automating database backups.
To automate MongoDB database backups with CloudRay, you first need to create a backup script that the scheduler will execute.
You can follow similar steps as the previous ones to create the backup script:
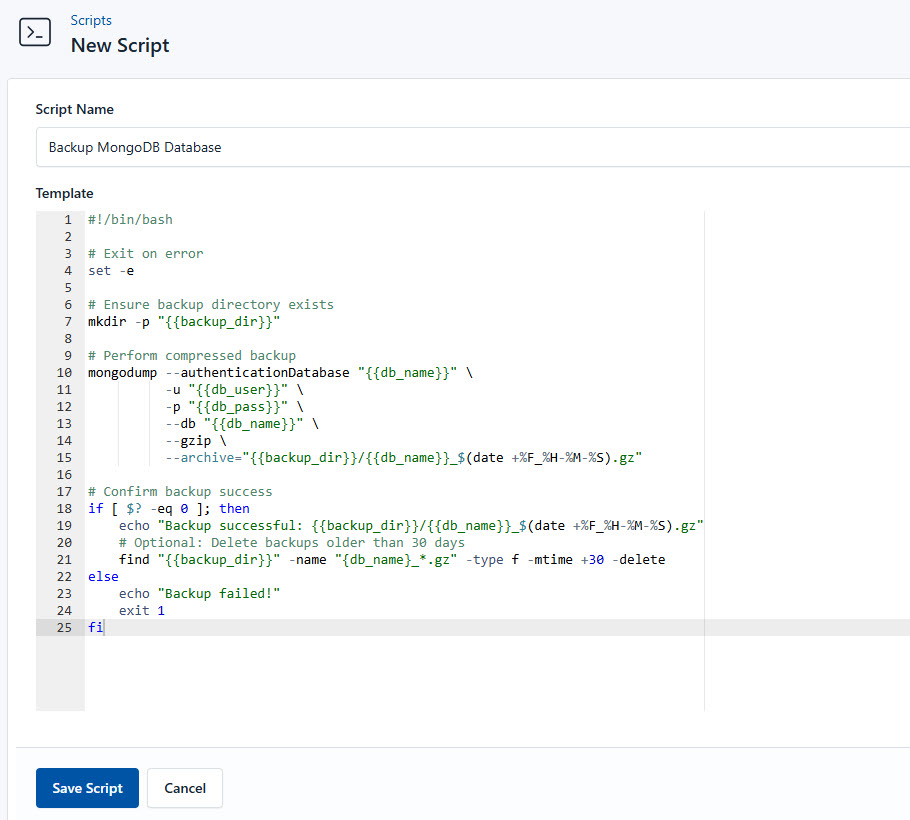
- Go to Scripts > New Script
- Name:
Backup MongoDB Database - Add code:
#!/bin/bash

# Exit on error
set -e

# Ensure backup directory exists
mkdir -p "{{backup_dir}}"

# Perform compressed backup
mongodump --authenticationDatabase "{{db_name}}" \
          -u "{{db_user}}" \
          -p "{{db_pass}}" \
          --db "{{db_name}}" \
          --gzip \
          --archive="{{backup_dir}}/{{db_name}}_$(date +%F_%H-%M-%S).gz"

# Confirm backup success
if [ $? -eq 0 ]; then
    echo "Backup successful: {{backup_dir}}/{{db_name}}_$(date +%F_%H-%M-%S).gz"
    # Optional: Delete backups older than 30 days
    find "{{backup_dir}}" -name "{db_name}_*.gz" -type f -mtime +30 -delete
else
    echo "Backup failed!"
    exit 1
fi
This is what the Backup MongoDB Database does:
- Compressed backups with timestamps
- Automatic retention policy (30 days)
- Checks if the backup was successful: If successful, it prints the backup path; otherwise, it reports failure and exits with an error code.
For example, if you want to back up your database on the first day of every month at 12:00 AM, you can configure a CloudRay schedule to handle this automatically.
Here are the steps to achieve this:
- Navigate to Schedules: In your CloudRay dashboard, go to the “Schedules” tab.
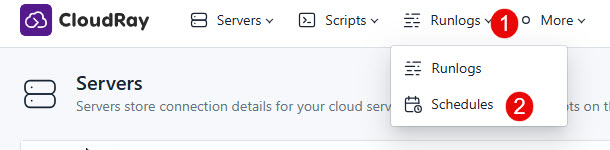
- Click “Add Schedule”: Start creating a new schedule.
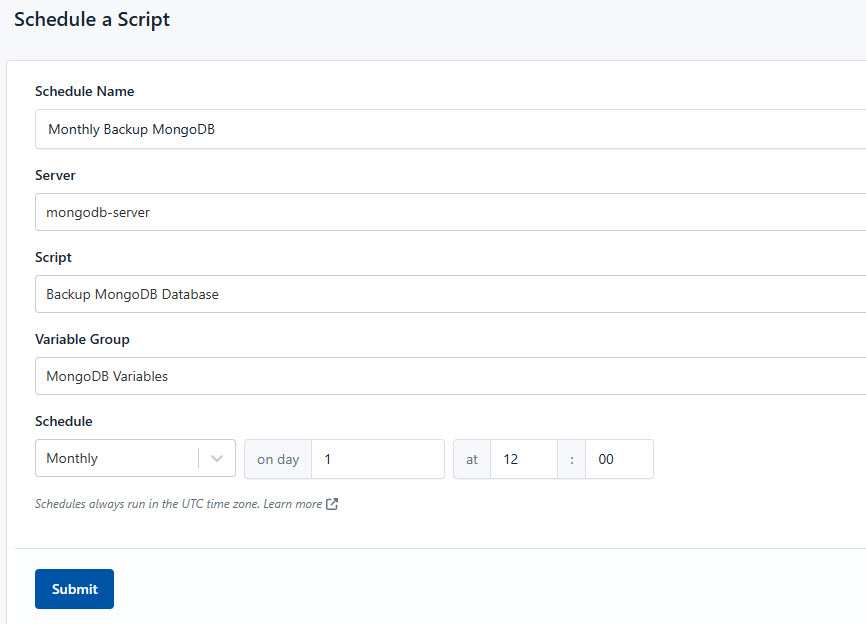
- Submit Schedule: Click “Submit” to activate your new schedule.
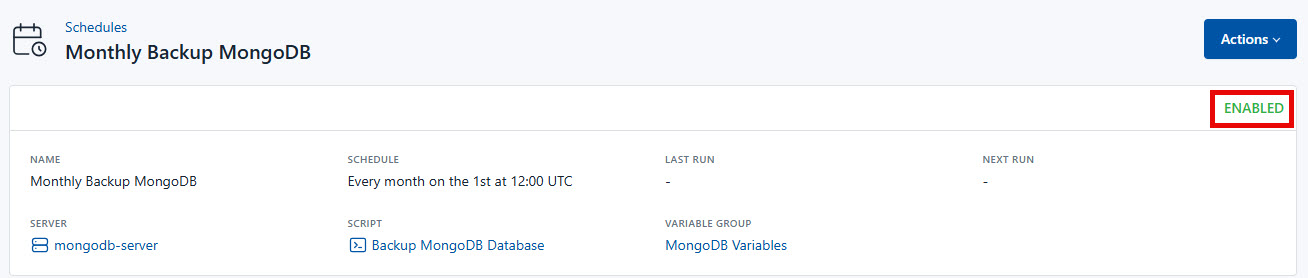
CloudRay will automatically execute the backup script at the scheduled time, ensuring that your database is regularly backed up without manual intervention.
Related Guides

Olusegun Durojaye
CloudRay Engineering Team