
Setting up a LAMP stack (Linux, Apache, MySQL, PHP) on a fresh Ubuntu server is often the first step when provisioning a web server. While it’s a common task, doing it manually across multiple servers or environments is time-consuming and error-prone.
This guide shows you how to automatically install the LAMP stack on Ubuntu 24.04 using a Bash script. Whether you’re configuring a single droplet or orchestrating a fleet of cloud instances, using a shell script to automate LAMP installation simplifies the process and enforces consistency. You will learn how to run the scripts using CloudRay, a centralised platform that helps you organise, run, and manage your bash scripts more effectively.
Contents
- Adding Servers to CloudRay
- Creating the Automation Script
- Create a Variable Group
- Running the Script with CloudRay
- Related Guides
Adding Servers to CloudRay
Before getting started, make sure your target servers are connected to CloudRay. If you haven’t done this yet, follow our Agent docs to add and manage your server.
Creating the Automation Script
To automate this process across one or more Ubuntu servers, start by adding your LAMP Stack Installation to your CloudRay project.
Follow these steps to create the script in CloudRay:
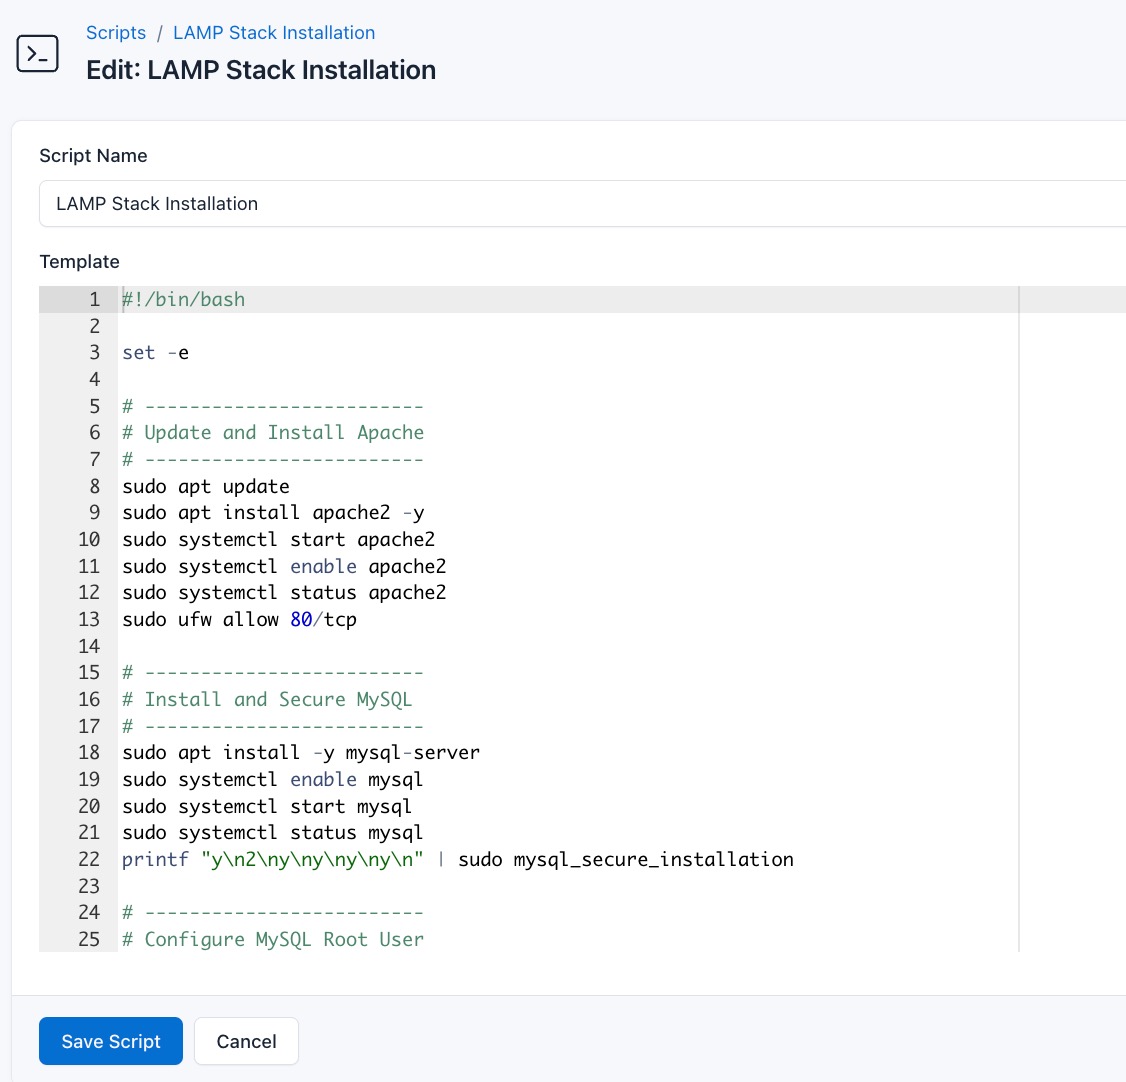
- Go to Scripts in your CloudRay project
- Click New Script
- Name:
LAMP Stack Installation - Copy this code:
#!/bin/bash

set -e

# -------------------------
# Update and Install Apache
# -------------------------
sudo apt update
sudo apt install apache2 -y
sudo systemctl start apache2
sudo systemctl enable apache2
sudo systemctl status apache2
sudo ufw allow 80/tcp

# -------------------------
# Install and Secure MySQL
# -------------------------
sudo apt install -y mysql-server
sudo systemctl enable mysql
sudo systemctl start mysql
sudo systemctl status mysql
printf "y\n2\ny\ny\ny\ny\n" | sudo mysql_secure_installation

# -------------------------
# Configure MySQL Root User
# -------------------------
sudo mysql <<EOF
ALTER USER 'root'@'localhost' IDENTIFIED BY '{{db_password}}';
FLUSH PRIVILEGES;
EXIT
EOF

# -------------------------
# Create Database and User
# -------------------------
sudo mysql <<EOF
CREATE DATABASE {{db_name}};
CREATE USER '{{db_user}}'@'localhost' IDENTIFIED BY '{{db_password}}';
GRANT ALL PRIVILEGES ON {{db_name}}.* TO '{{db_user}}'@'localhost';
FLUSH PRIVILEGES;
EXIT
EOF

# -------------------------
# Install PHP 8.3 and Extensions
# -------------------------
sudo apt install -y php php-fpm
sudo apt install -y php-mysql php-opcache php-cli libapache2-mod-php

# -------------------------
# Start and Enable PHP 8.3 FPM
# -------------------------
sudo systemctl start php8.3-fpm
sudo systemctl enable php8.3-fpm
sudo systemctl status php8.3-fpm

# -------------------------
# Configure Apache to Use PHP 8.3 FPM
# -------------------------
sudo a2enmod proxy_fcgi setenvif
sudo a2enconf php8.3-fpm
sudo systemctl restart apache2
sudo systemctl restart php8.3-fpm

# -------------------------
# Remove Default Apache Site
# -------------------------
sudo rm -rf /etc/apache2/sites-enabled/000-default.conf
sudo rm -rf /etc/apache2/sites-available/000-default.conf

# -------------------------
# Create Apache Virtual Host
# -------------------------
sudo tee /etc/apache2/sites-available/{{domain_name}}.conf > /dev/null <<EOF
<VirtualHost *:80>
ServerAdmin webmaster@{{domain_name}}
ServerName {{domain_name}}
DocumentRoot /var/www/{{domain_name}}

<Directory /var/www/{{domain_name}}>
    Options Indexes FollowSymLinks
    AllowOverride All
    Require all granted
</Directory>

<FilesMatch \.php$>
   SetHandler "proxy:unix:/var/run/php/php8.3-fpm.sock|fcgi://localhost/"
</FilesMatch>

ErrorLog \${APACHE_LOG_DIR}/{{domain_name}}_error.log
CustomLog \${APACHE_LOG_DIR}/{{domain_name}}_access.log combined
</VirtualHost>
EOF

# -------------------------
# Enable New Site
# -------------------------
sudo a2ensite {{domain_name}}.conf
sudo apache2ctl configtest

# -------------------------
# Create Web Root and Test PHP Page
# -------------------------
sudo mkdir -p /var/www/{{domain_name}}
sudo tee /var/www/{{domain_name}}/info.php > /dev/null <<EOF
<?php
phpinfo();
?>
EOF

# -------------------------
# Restart Apache
# -------------------------
sudo systemctl restart apache2
Once saved, this script will be ready to execute against any Ubuntu server you connect to CloudRay.
Create a Variable Group
To avoid hardcoding sensitive information like the database name, user, password, or domain across multiple servers, CloudRay lets you create variable groups.
This scripts use variables like {{db_name}}, {{db_user}}, {{db_password}}, and {{domain_name}} because CloudRay processes all scripts as Liquid templates. This allows you to use placeholders in your scripts, making them dynamic and reusable across different servers.
To provide values for these variables, you’ll need to create a variable group. Here’s how:
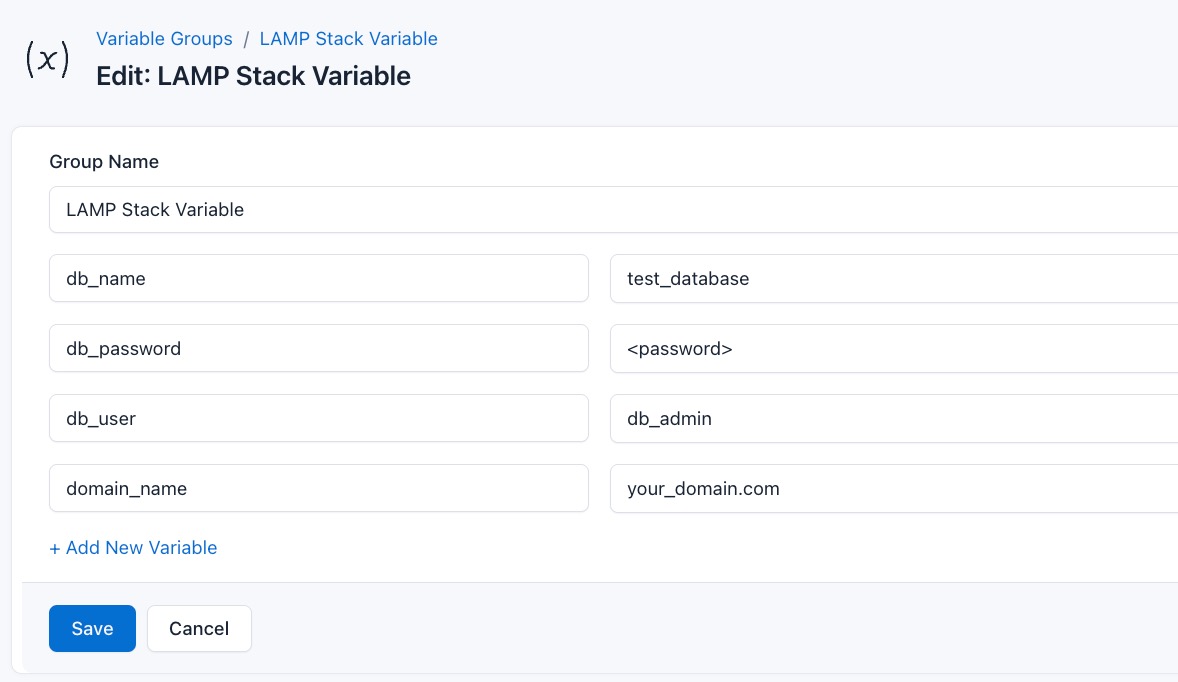
- Navigate to Variable Groups: In your CloudRay project, go to “Scripts” in the top menu and click on “Variable Groups”.
- Create a new Variable Group: Click on “New Variable Group”.
- Add the following variables:
db_name: This is the name of the databasedb_user: The name of the userdb_password: The password of the for the database userdomain_name: Your domain name of the LAMP stack server
Running the Script with CloudRay
Once your script is ready and saved in your CloudRay project, follow these steps to execute it on your Ubuntu server:
- Navigate to Runlogs: In your CloudRay project, go to the Runlogs section in the top menu.
- Create a New Runlog: Click on New Runlog.
- Configure the Runlog: Fill in the required details:
- Server: Select the server you added earlier.
- Script: Choose the “LAMP Stack Installation”
- Variable Group (optional): Select the variable group you created earlier.
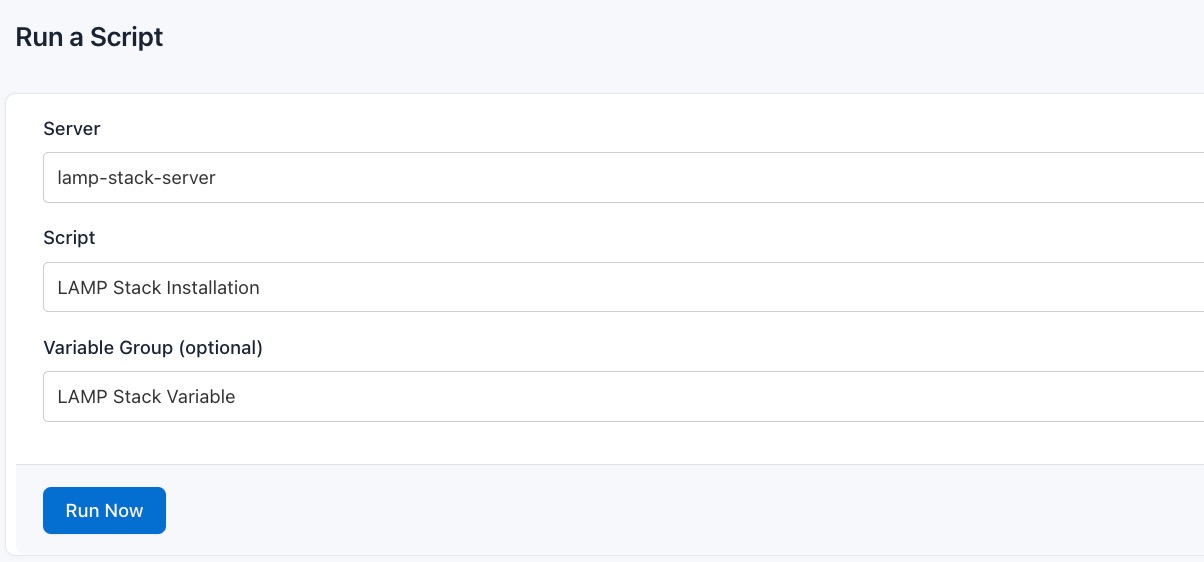
- Execute the Script: Click on Run Now to start the execution.
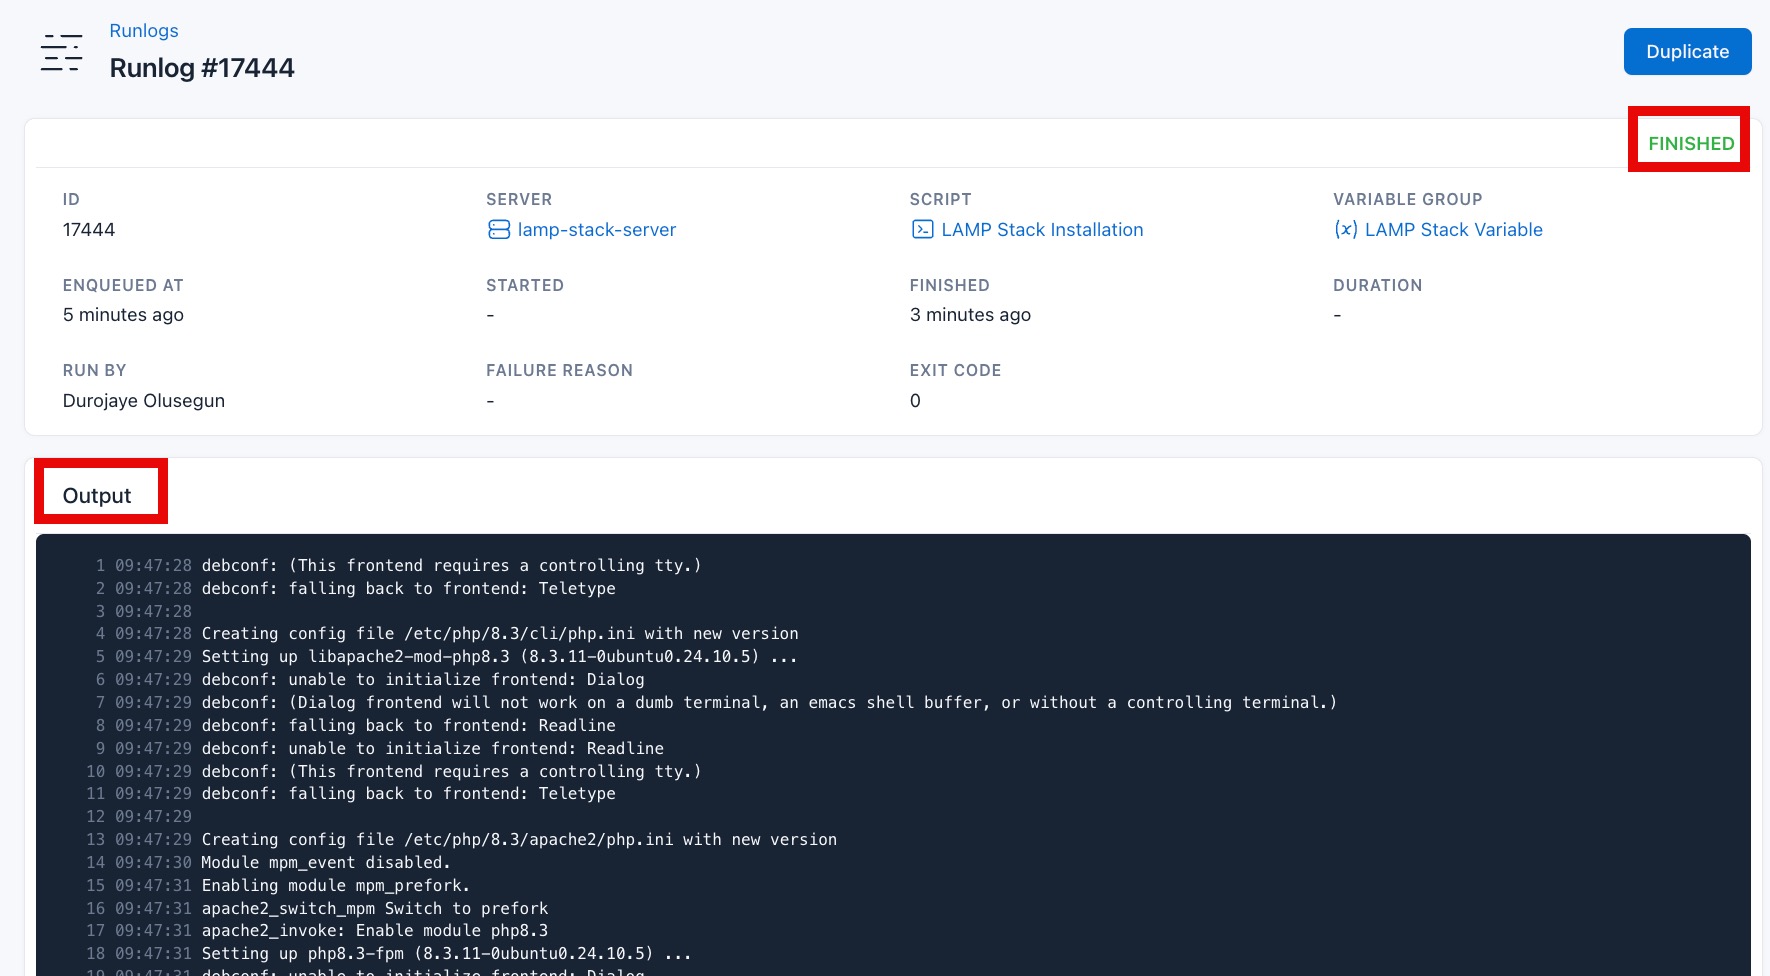
CloudRay will securely connecting to your server, executing the Bash script, and displaying real-time output logs. This allows you to monitor each step of the process and troubleshoot any issues directly from the dashboard.
Once the script completes successfully, open your browser and visit your domain to verify that Apache and PHP are working correctly.
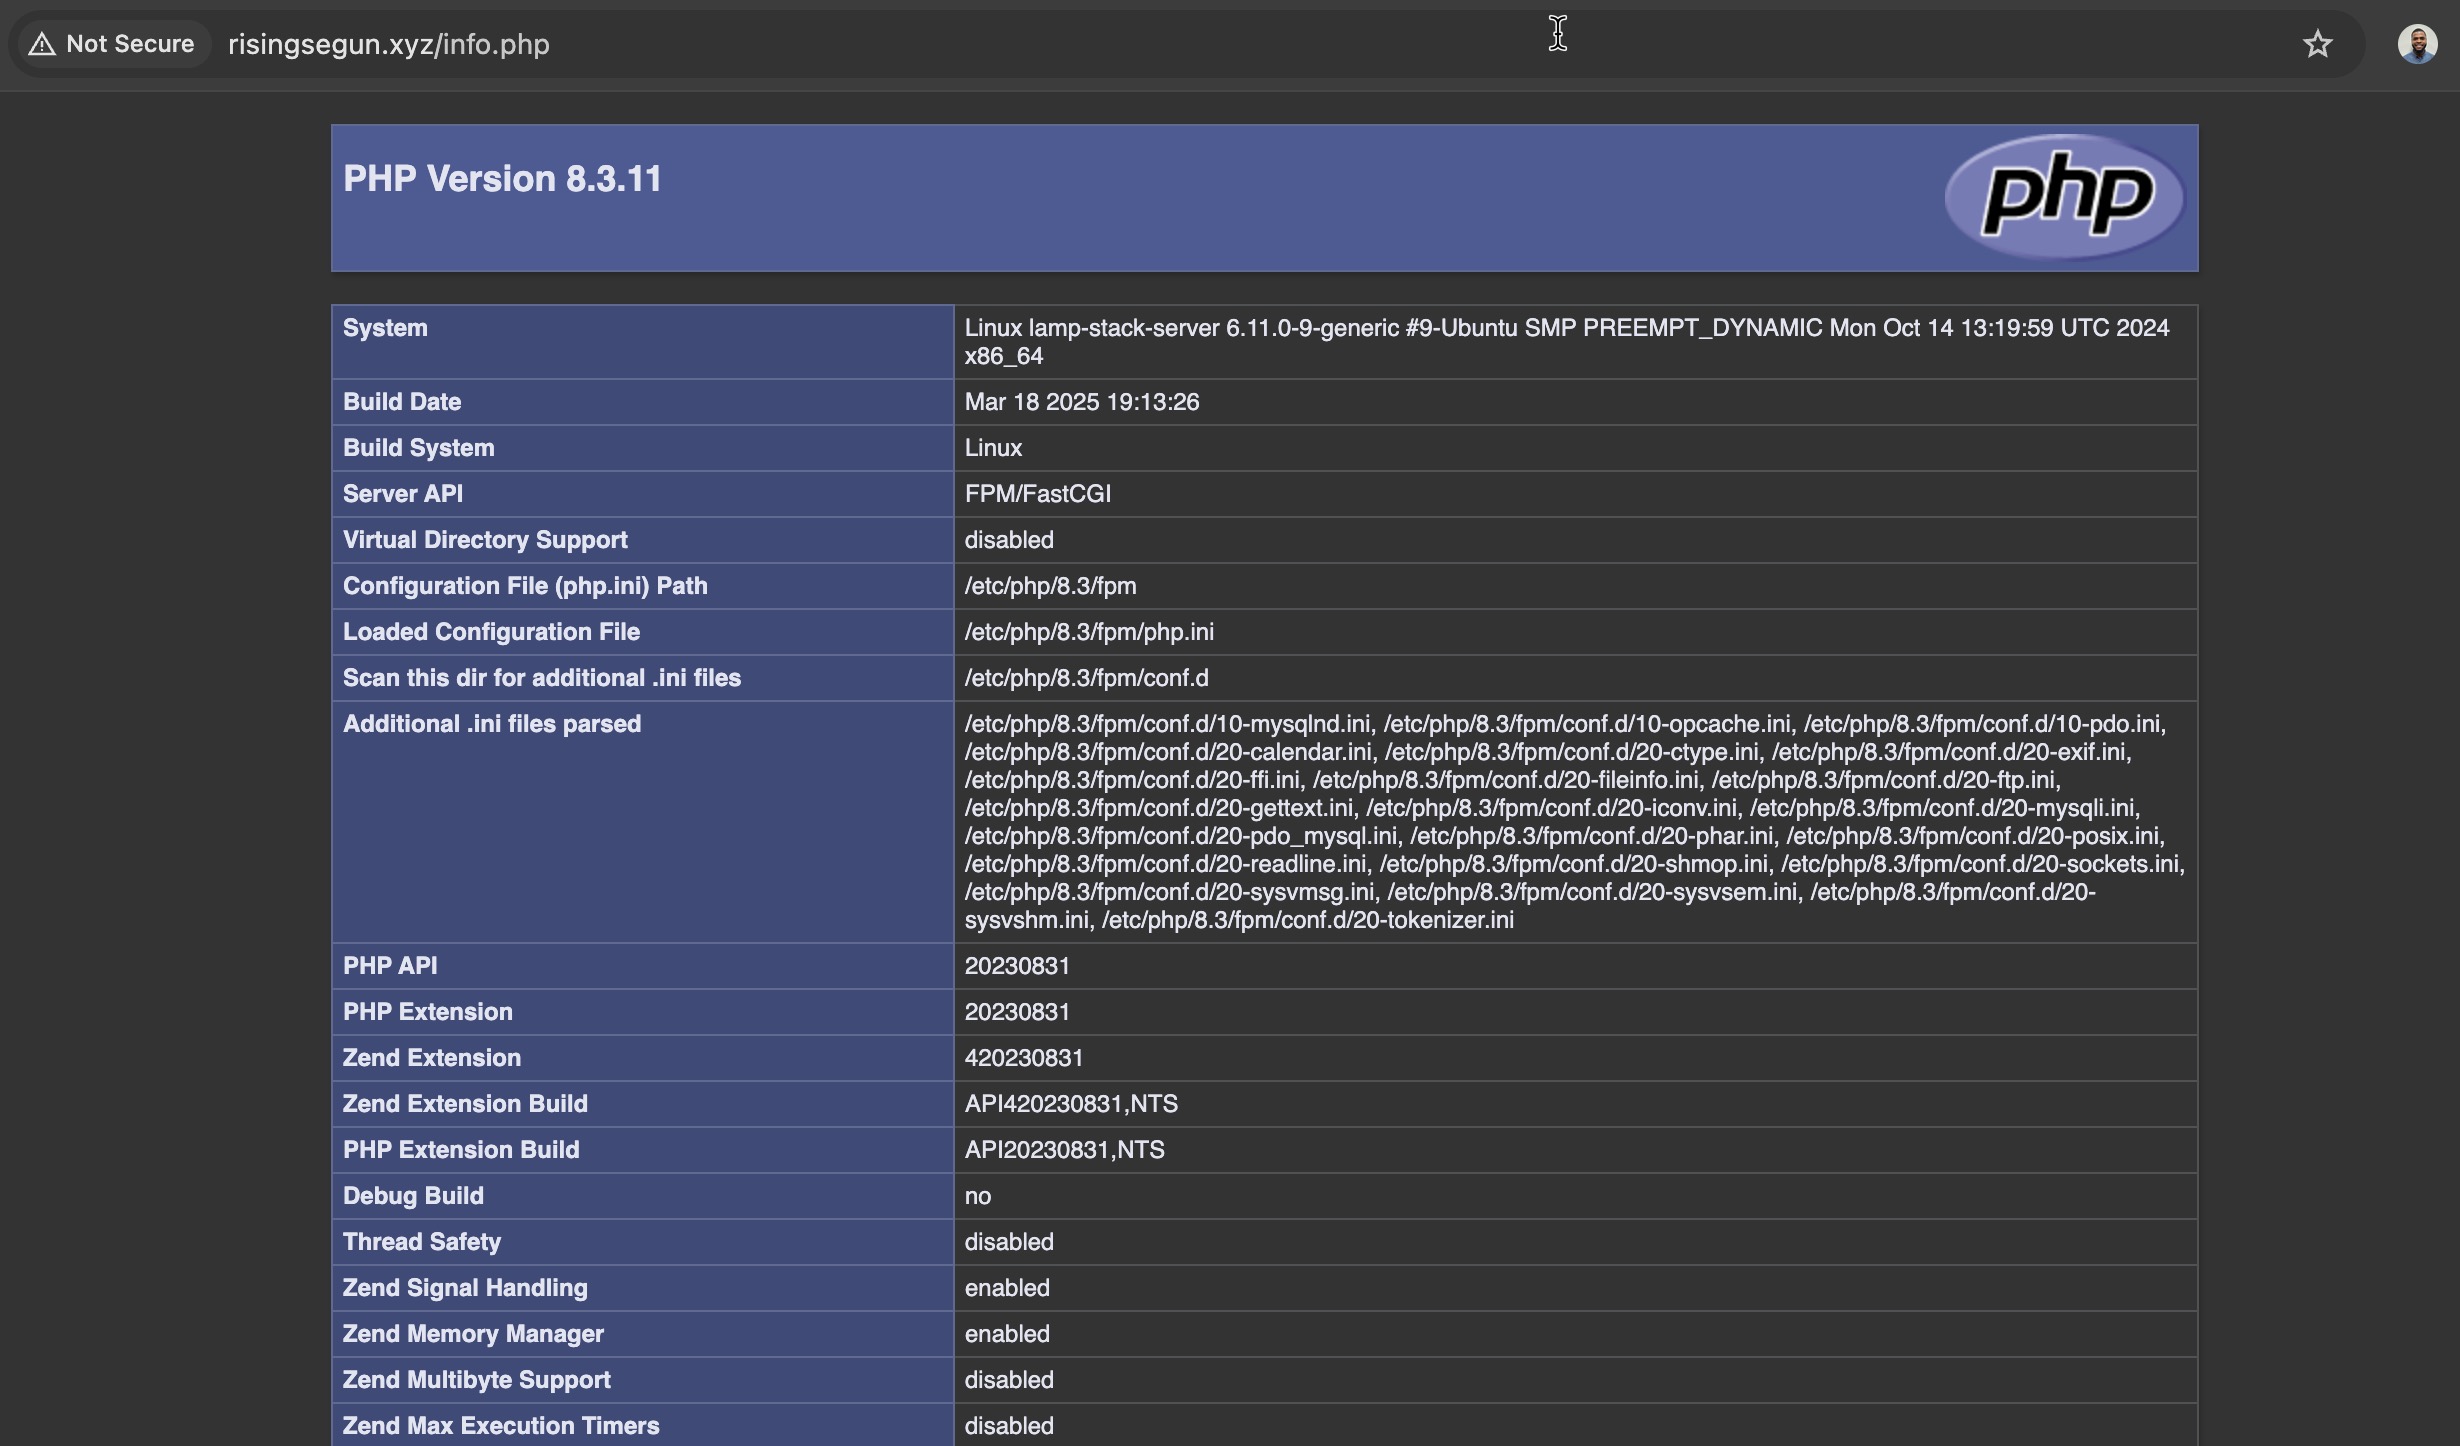
You should see the PHP information page, which confirms that your LAMP stack was installed and configured properly.
Related Guides
- Deploy Ruby on Rails
- Deploy Jenkins with Docker Compose
- Deploy Laravel
- Deploy SonarQube
- Deploy Static Website from GitHub
- Deploy Next.js Application

Olusegun Durojaye
CloudRay Engineering Team