This guide walks through automating Rails deployments with CloudRay. You will configure Puma, Caddy and ASDF to create a production environment where updates deploy with a single command, handling code updates, dependencies, assets and migrations automatically.
The setup runs under a dedicated deploy user with systemd for process management, while Caddy provides HTTPS and static file serving. All infrastructure is defined in reusable Bash scripts, making your deployment process consistent and version-controlled.
This guide focuses on deploying Rails applications with Puma. For deploying background workers (e.g., Delayed Jobs), refer to our Deploy Deplayed Jobs guide.
Contents
- Adding Servers to CloudRay
- Assumptions
- Create the setup script
- Create the deployment script
- Create a variable group
- Run the setup script
- Run the deployment script
- Troubleshooting
- Related Guides
Adding Servers to CloudRay
Before getting started, make sure your target servers are connected to CloudRay. If you have not done this yet, follow our servers docs to add and manage your server
NOTE
This guide uses Bash scripts, providing a high degree of customisation. You can adapt the scripts to fit your specific deployment needs and environment.
Assumptions
- This guide assumes that the database is hosted on a separate server. Installing and configuring the database on the same server as the Rails application is not within the scope of this document. For database setup, see our PostgreSQL, MySQL, or MongoDB guides.
- This guide assumes you’re using Ubuntu 24.04 LTS as your server’s operating system. If you’re using a different version or a different distribution, adjust the commands accordingly.
Create the setup script
To streamline the deployment process, you’ll need two Bash scripts:
- Setup Script: You’ll run this once when setting up a new server to install dependencies and configure services.
- Deployment Script: You can run this anytime you want to update your application with new code.
In this section, we’ll create the Setup Script.
The setup script prepares your server by:
- Creating a deploy user that runs Rails server as a non-privileged service
- Installing Caddy web server for automatic HTTPS
- Setting up asdf to install Ruby and Node.js
- Creating a systemd service to manage the Rails server
- Setting up the repository for the first time
To create the setup script:
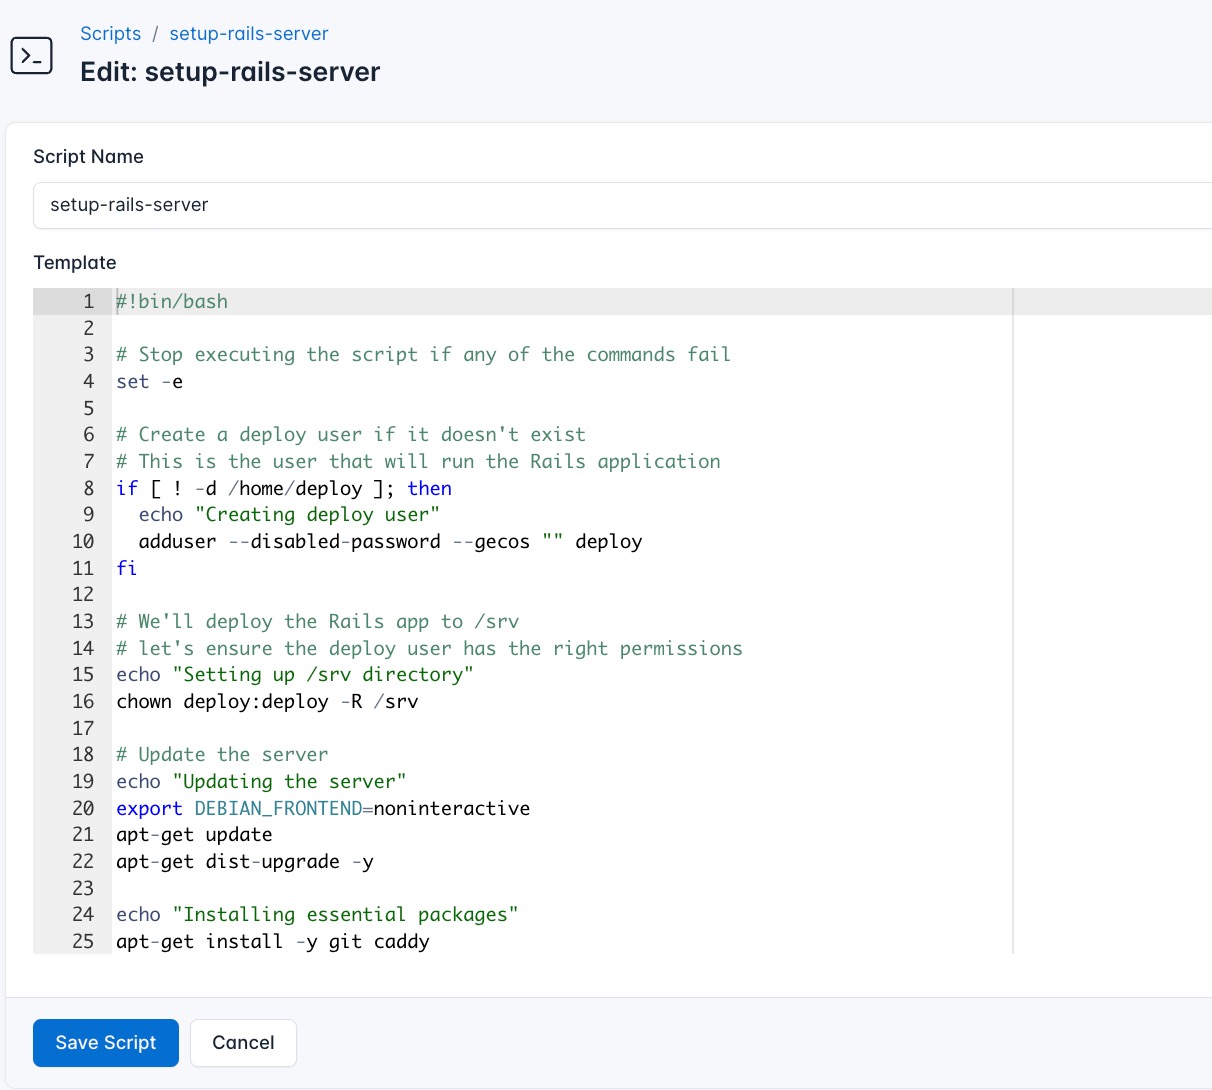
- Go to Scripts in your CloudRay project
- Click New Script
- Name:
setup-rails-server - Copy this code:
# Stop executing the script if any of the commands fail
set -e

# Create a deploy user if it doesn't exist
# This is the user that will run the Rails application
if [ ! -d /home/deploy ]; then
  echo "Creating deploy user"
  adduser --disabled-password --gecos "" deploy
fi

# We'll deploy the Rails app to /srv
# let's ensure the deploy user has the right permissions
echo "Setting up /srv directory"
chown deploy:deploy -R /srv

# Update the server
echo "Updating the server"
export DEBIAN_FRONTEND=noninteractive
apt-get update
apt-get dist-upgrade -y

echo "Installing essential packages"
apt-get install -y git caddy

# Additional packages for Nokogiri
echo "Installing additional packages for Ruby & Nokogiri"
apt-get install -y build-essential patch zlib1g-dev liblzma-dev libyaml-dev libreadline-dev libffi-dev

# Remove these lines if you don't need MySQL libraries for the mysql gem
echo "Installing packages for mysql2"
apt-get install -y libmysqlclient-dev

# Remove these lines if you don't need PostgreSQL libraries for the pg gem
echo "Installing packages for pg"
apt-get install -y libpq-dev

echo "Configuring Caddy to serve the Rails application"
cat > /etc/caddy/Caddyfile <<'EOT'
{{app_domain}} {
  root * /srv/{{app_name}}/public
  encode zstd gzip
  file_server
  @notStatic not file
  reverse_proxy @notStatic unix//srv/{{app_name}}/tmp/puma.sock
}
EOT

su -l deploy <<'EOT'
  set -e
  if [ ! -d "$HOME/.asdf" ]; then
    echo "Installing asdf"
    git clone https://github.com/asdf-vm/asdf.git ~/.asdf
    echo "source $HOME/.asdf/asdf.sh" >> ~/.bashrc
  else
    echo "Updating asdf"
    cd ~/.asdf
    git pull
  fi

  source $HOME/.asdf/asdf.sh

  if ! grep -q "legacy_version_file" ~/.asdfrc; then
    echo "legacy_version_file = yes" >> ~/.asdfrc
  fi
  asdf plugin add ruby
  asdf plugin add nodejs
  echo "Installing Ruby version {{ruby_version}}"
  asdf install ruby {{ruby_version}}
  echo "Installing Node.js version {{node_version}}"
  asdf install nodejs {{node_version}}
  asdf reshim
  echo "Finished installing Ruby and Node.js"
EOT

echo "Creating the {{app_name}}-rails-server service"
cat <<'EOT' > /etc/systemd/system/{{app_name}}-rails-server.service
[Unit]
Description={{app_name}}-rails
After=network.target

[Service]
Type=simple
User=deploy
Environment=RAILS_ENV=production
EnvironmentFile=/etc/environment
WorkingDirectory=/srv/{{app_name}}
ExecStart=/bin/bash -lc "source $HOME/.asdf/asdf.sh && rails server -b /srv/{{app_name}}/tmp/puma.sock"
Restart=always

[Install]
WantedBy=multi-user.target
EOT

echo "Enabling the {{app_name}}-rails-server service"
systemctl enable {{app_name}}-rails-server.service

echo "Setting up the repository for the first time"
su -l deploy <<'EOT'
  set -e
  source "$HOME/.asdf/asdf.sh"
  mkdir -p /srv/{{app_name}}
  cd /srv/{{app_name}}
  if [ ! -d "/srv/{{app_name}}/.git" ]; then
    git clone https://{{github_access_token}}@github.com/{{github_repo_name}} .
  fi
EOT

echo "Done."
TIP
If you find this script too long to manage, you can break it into smaller scripts and use Script Playlists to run them together.
Create the deployment script
You’ll use this script whenever you want to update your application. Here is what the script does:
- Pulls latest code from your Git repository’s main branch
- Updates Ruby dependencies and installs new gems
- Precompiles JavaScript/CSS assets for production
- Runs any pending database migrations safely
- Restarts the Rails server
To create the deployment script:
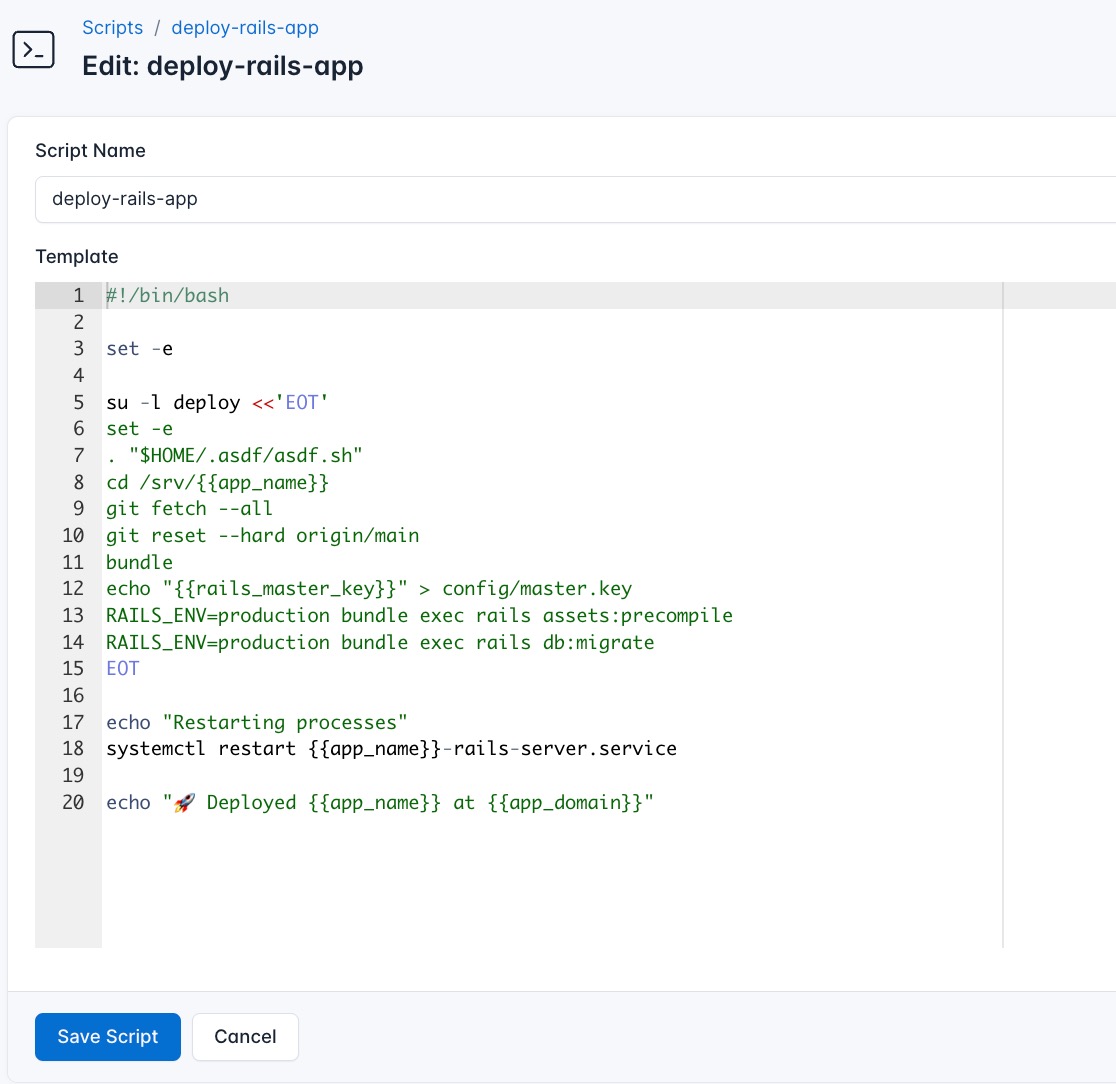
- Go to Scripts > New Script
- Name:
deploy-rails-app - Add code:
set -e

su -l deploy <<'EOT'
set -e
. "$HOME/.asdf/asdf.sh"
cd /srv/{{app_name}}
git fetch --all
git reset --hard origin/main
bundle
echo "{{rails_master_key}}" > config/master.key
RAILS_ENV=production bundle exec rails assets:precompile
RAILS_ENV=production bundle exec rails db:migrate
EOT

echo "Restarting processes"
systemctl restart {{app_name}}-rails-server.service

echo "🚀 Deployed {{app_name}} at {{app_domain}}"
Create a variable group
Our scripts use variables like {{app_name}}, {{app_domain}}, {{ruby_version}}, and {{node_version}} because CloudRay processes all scripts as Liquid templates. This allows you to use placeholders in your scripts, making them dynamic and reusable across different servers.
To provide values for these variables, you’ll need to create a variable group. Here’s how:
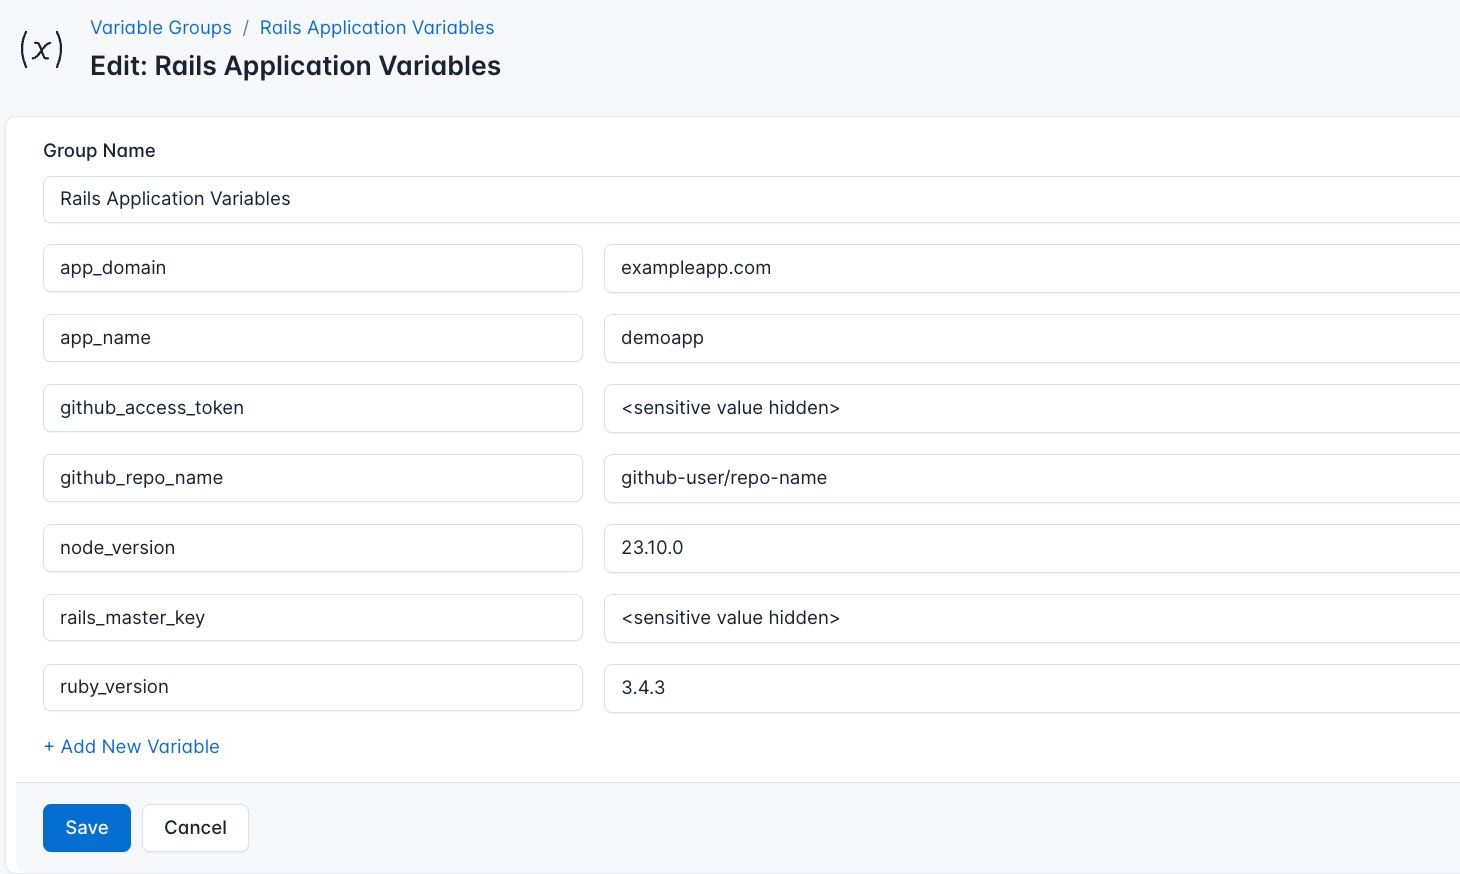
- Navigate to Variable Groups: In your CloudRay project, go to “Scripts” in the top menu and click on “Variable Groups”
- Create a new Variable Group: Click on “New Variable Group”
- Add the following variables:
app_name: Your application’s name (use underscores instead of spaces), e.g.,my_appapp_domain: Your application’s domain name, e.g.,myapp.example.comruby_version: The version of Ruby you want to install. E.g.,3.4.3node_version: The version of Node.js you want to install. E.g.,23.10.0rails_master_key: Your Rails master key fromconfig/master.key.github_access_token: Your GitHub personal access token for cloning the repository.github_repo_name: Your GitHub repository in the formatusername/repository, e.g.,yourusername/your-repo.
Run the setup script
To run the setup-rails-server script, you’ll use a Runlog in CloudRay. A Runlog allows you to execute scripts on your servers and provides detailed logs of the execution process.
Here’s how to create and run a Runlog:
- Navigate to Runlogs: In your CloudRay project, go to “Runlogs” in the top menu.
- Create a new Runlog: Click on “New Runlog”.
- Fill in the form:
- Server: Select the server you added earlier.
- Script: Choose the
setup-rails-serverscript. - Variable Group: Select the variable group you created earlier.
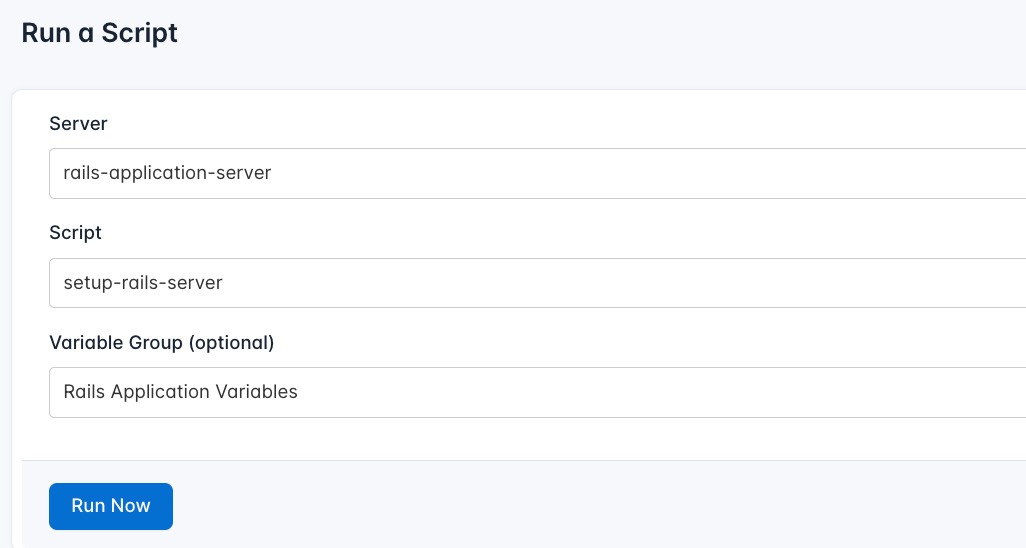
- Run the script: Click on “Run” to execute the script on your server.
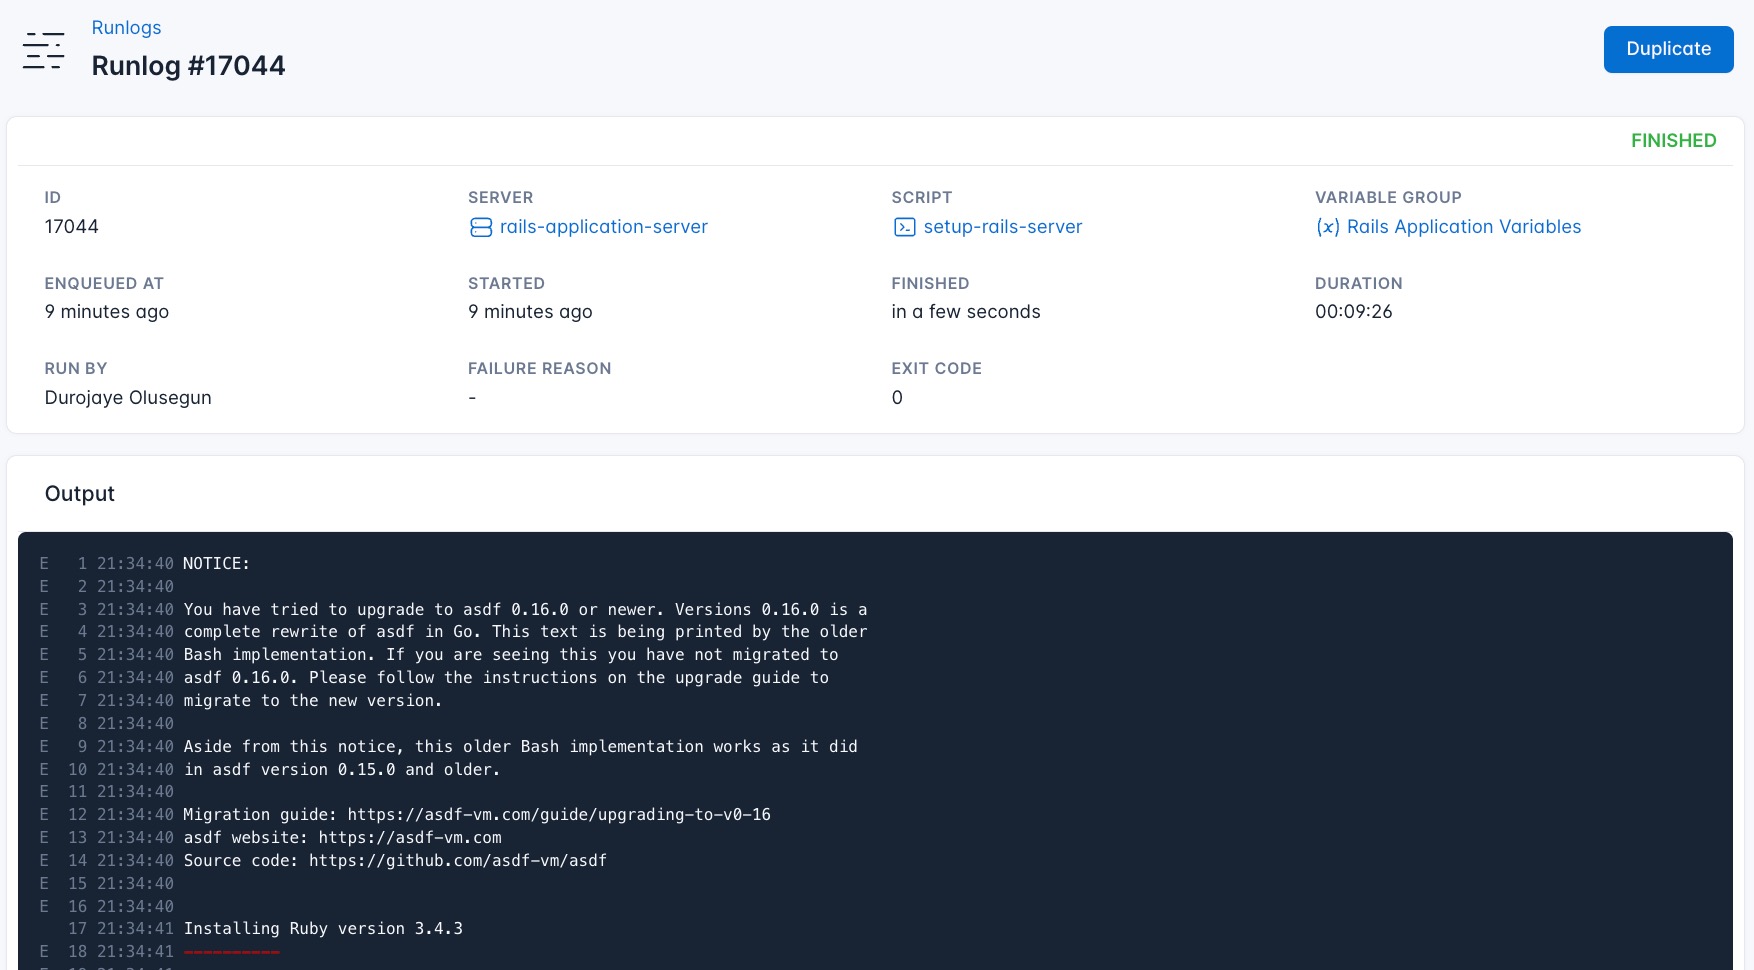
CloudRay will connect to your server, run the setup-rails-server script, and show you the live output as the script executes.
Run the deployment script
You can run the deploy-rails-app script whenever you want to deploy a new version of your application. Here’s how to create a Runlog for the deployment script:
- Navigate to Runlogs: In your CloudRay project, go to “Runlogs” in the top menu.
- Create a new Runlog: Click on “New Runlog”.
- Fill in the form:
- Server: Select the server you added earlier.
- Script: Choose the
deploy-rails-appscript. - Variable Group: Select the variable group you created earlier.
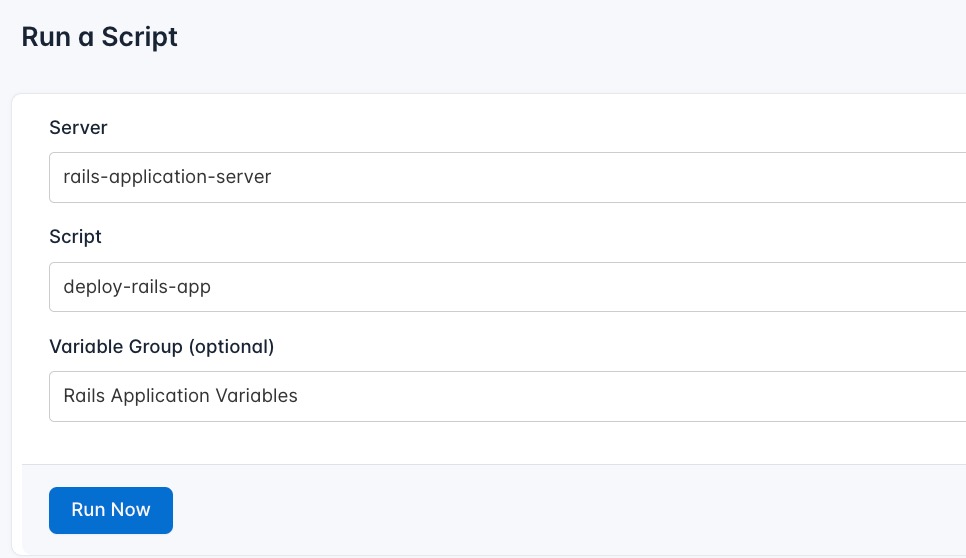
- Run the script: Click on “Run” to execute the script on your server.
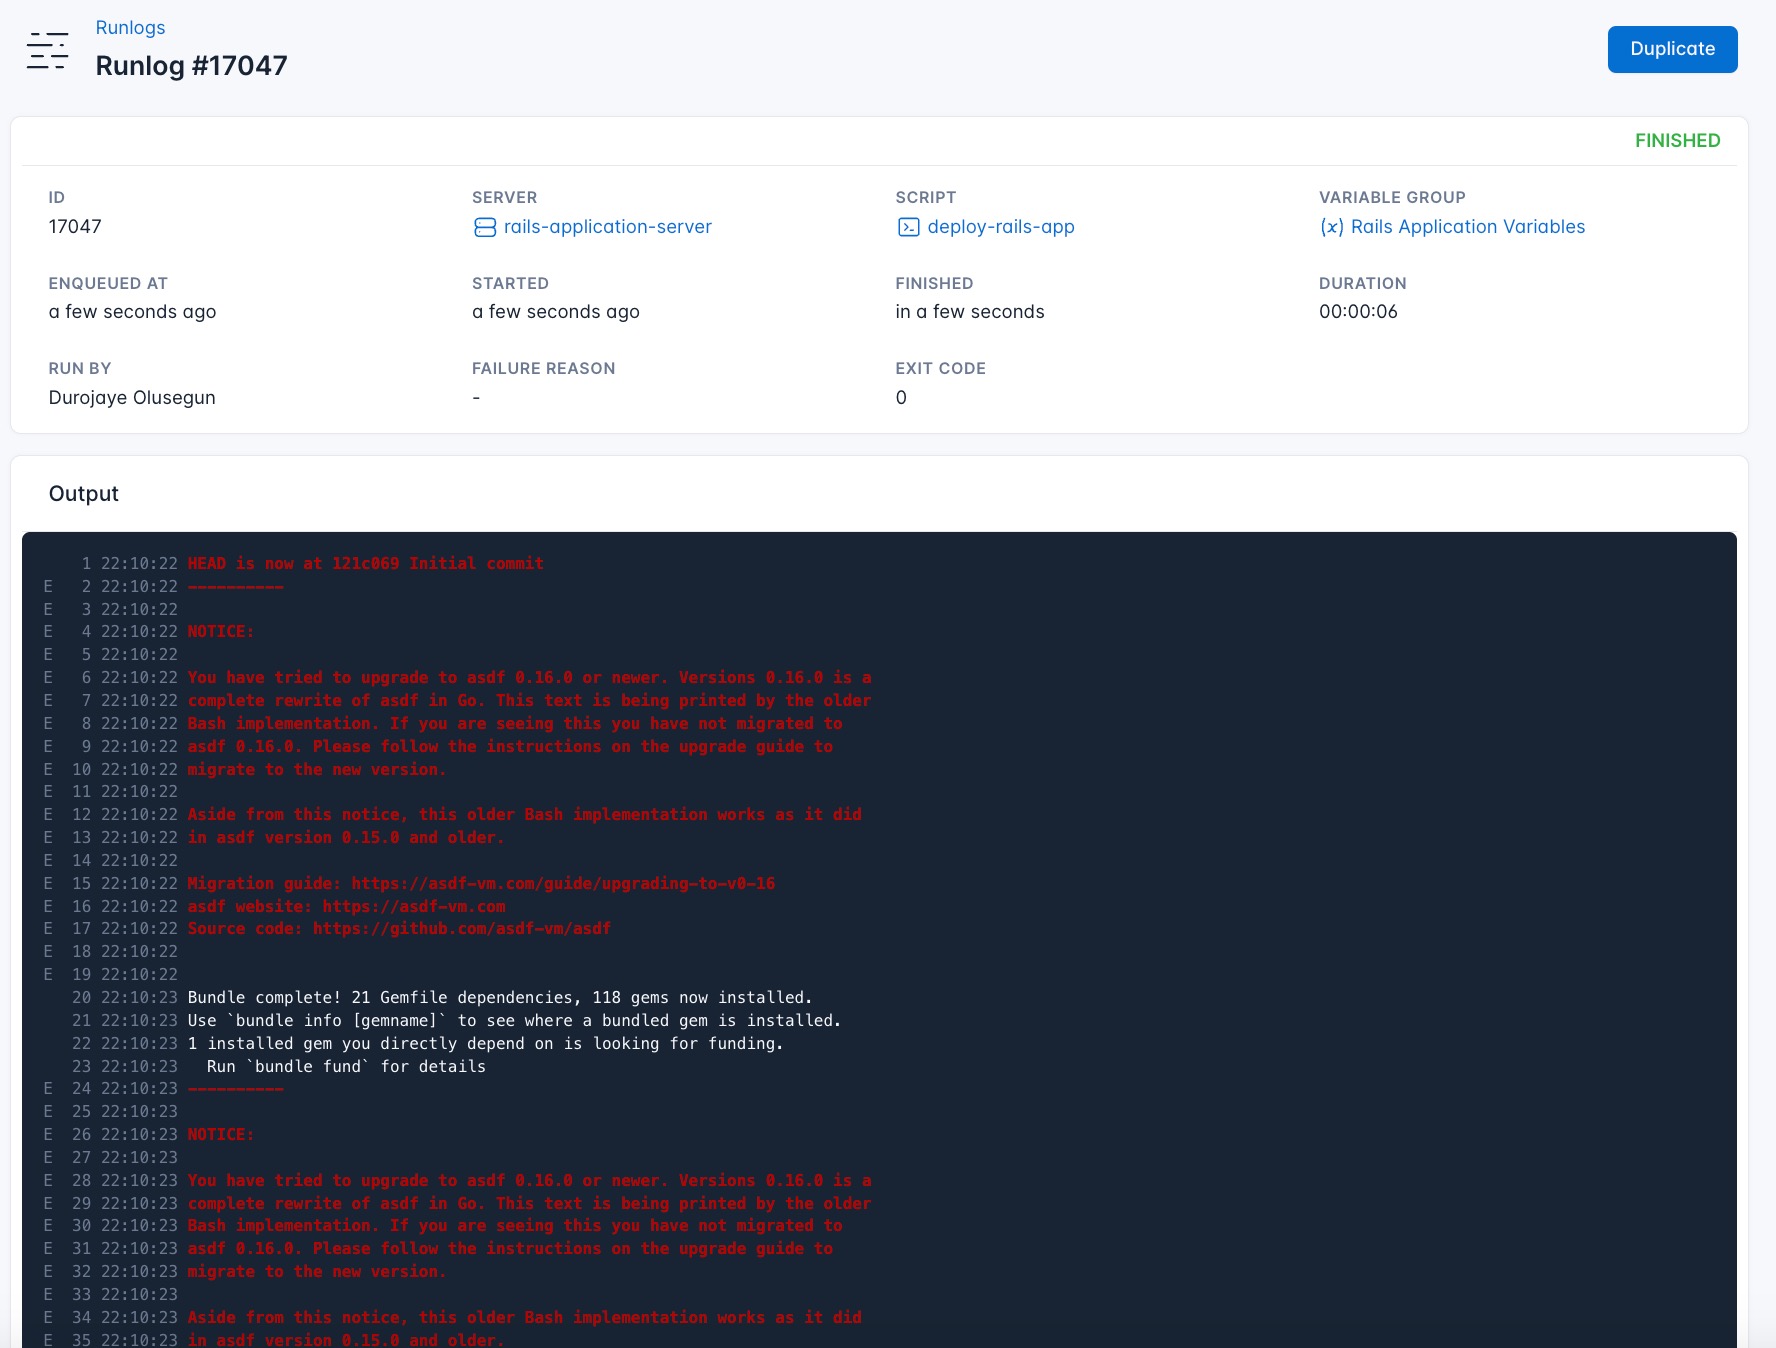
CloudRay will connect to your server, run the deploy-rails-app script, and show you the live output as the script executes.
Troubleshooting
Running out of memory when installing Ruby
If you encounter an “out of memory” error during the Ruby installation using asdf install ruby, it’s likely because the /tmp directory is mounted in RAM with limited space. The build process requires more space than is available in the RAM-mounted /tmp.
To resolve this issue, you can disable the RAM mount for /tmp so it uses disk storage instead.
Create a new script with following code and run it on your server:
set -e
echo "Disable mounting /tmp in RAM otherwise ruby-build will run out of memory"
systemctl mask tmp.mount
reboot
That’s it! Happy deploying!
Related Guides
- Deploy Delayed Jobs
- Deploy Express Application
- Deploy SonarQube
- Deploy Static Website from GitHub
- Deploy Next.js Application
- How to Deploy phpMyAdmin
- Deploy Laravel
Olusegun Durojaye
CloudRay Engineering Team
